Learn to install a suspended ceiling with this expert how-to article. It covers what to consider before you install, followed by step-by-step DIY instructions and a helpful video.

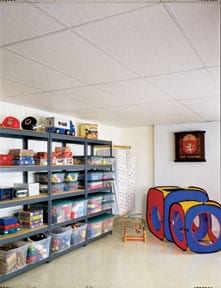
A suspended or “dropped” ceiling, first common in office buildings and commercial spaces, is also popular in homes for certain types of rooms-notably basements, garage conversions, and recreation rooms.

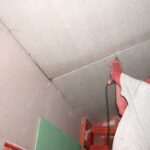
Made up of a gridwork of metal channels that hold lightweight panels, a suspended ceiling hangs beneath the home’s original ceiling or the underside of the floor above it, often concealing heating ductwork, pipes, other mechanical equipment, or a badly damaged ceiling.
In a residence, the panels that fit into the grid are typically made from lightweight, sound-absorbing mineral fibers and are sized 2-by-2 or 2-by-4 feet. Their sound-deadening qualities, especially when paired with sound-attenuation batts of insulation placed above them, can do a great job of controlling noise.
Because the panels simply drop into the upside-down T-shaped channels of the grid work, they are easily removed for replacement or to access mechanical equipment in the area above. Specialty panels and equipment such as fluorescent light fixtures and sound speakers are also designed to fit into the grid.
A disadvantage of a suspended ceiling is loss of headroom. This type of ceiling literally “drops” the ceiling. So that panels can be pushed up through the grid and then set into place, a minimum clearance beneath the lowest objects (such as floor joists) is required-typically from 3 to 8 inches.
In addition to the panels on display at most home improvement centers (and available by special order), look at some of the commercial offerings in manufacturers’ catalogs and on their websites. Leading manufacturers of suspended ceiling systems are Armstrong, Certainteed, and USG. Each make the panels in patterned, textured, and smooth designs. Some also produce metal tile-like panels and wood-like panels.
Panels are usually sold in packages containing a certain number of square feet of material. To estimate the quantity you need, measure the length and width of the room, eliminating areas that will not be covered with panels (a skylight or a ceiling fan, for example). Multiply these figures for the square footage and add 10 percent for waste.
For a professional-looking job, plan to create equal-size borders on opposite sides of the room. To determine the nonstandard width of panels needed for perimeter rows, measure the extra space from the last full row of pieces to one wall and divide by two. This final figure will be the width of border pieces against that wall and the opposite wall. To complete your calculations, repeat this procedure for the other room dimensions.
Step-by-Step Installation
Installing a suspended ceiling is a fairly easy do-it-yourself project. Here’s how:
1 Start by calculating the height the ceiling will be. The minimum should be 7 feet, 6 inches, and it should also be 3 inches below any plumbing and 5 inches below any lighting. Once you have figured out the ceiling level, snap a chalk line to mark it. Then install the track supports on the walls, around the perimeter of the room, so that they just cover the line.
2 Using tin snips or a hacksaw, cut the main tees to length. Place them on the track supports and hang them from the joists with #12 wire attached to eye screws inserted every 4 feet.
3 Insert the tabs of the 4-foot cross tees into the slots of the main tees and then snap them into place.
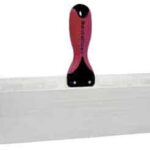
4 Gently lower into place the solid panels and any fluorescent lighting panels you are installing. Use a utility knife to cut border panels to fit. Before handling the panels, wash your hands well because smudges cannot be easily removed.
Here’s a helpful video that will walk you through all of the steps: