This article offers step-by-step directions for replacing or installing a conventional light switch.

When a light switch wears out because of their frequent use, it’s time to replace it. When a switch wears out, it may not work right or, worse, can give off sparks. A light switch that gives off sparks is a fire and shock hazard and should be replaced immediately. Because common light switches are relatively inexpensive (typically less than $10), it doesn’t pay to try to fix a broken one. Instead, you just replace it.
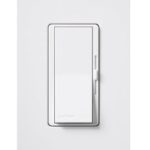
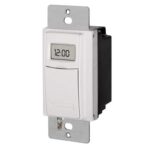
In fact, replacing a light switch can increase convenience and functionality, too, if you choose a switch that has features like a timer, motion sensing, or dimming. For more, see the HomeTips Light Switches Buying Guide.
In this article, we’ll show you how to safely DIY light switch replacement yourself, step by step.
Caution: Before working on a light switch, shut off the power to the circuit—never work on an energized circuit. For information on how to do this. See How to Turn Off an Electrical Circuit.
How to Replace a Single-Pole Light Switch
If a switch doesn’t work, first make sure the problem is with the switch and not the light or device it’s supposed to power. Put a new bulb into the light fixture or plug a working lamp or other appliance into the switch-controlled receptacle to make sure the switch is faulty.
When you replace a switch, make sure you check the amp and voltage ratings on the back of the old switch. The new light switch should have the same ratings. If you have aluminum wiring (the metal part of the wires looks silvery), be sure to get a replacement switch marked “CO/ALR.” Unmarked or CU/AL switches should be replaced with CO/ALR switches.
Here is how to replace or install an old single-pole light switch with new one:
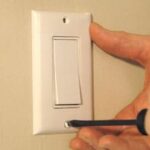
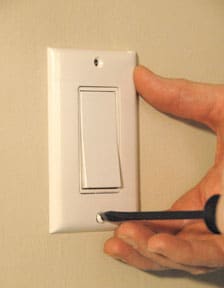
1 After shutting off the power to the switch, use a screwdriver to remove the plastic faceplate and to unscrew the existing switch from the electrical box.

Pull the switch outward without touching any bare wires. Use an electrical tester to check the wires that go to the existing switch (or the new wires that are intended for the switch) so you can be sure they are not active.
Place one probe on the bare ground wire inside the box and touch the other probe on each of the wired screw terminals of the switch or the bare end of the black wire that will carry electricity to the switch. No voltage should register.
2 Once you’re sure the power is off to the switch, use the screwdriver to remove the existing switch (if there is one) from its wires.
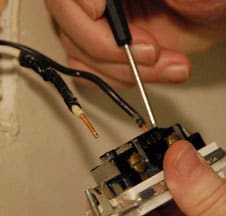
If the wires are connected to terminal screws, turn the screws counterclockwise to loosen them and unhook the wires. If the wires are pushed into terminal holes in the back of the switch, push a very small flat-bladed screwdriver into the slot next to the screw connection holes to release the wires.
3 Straighten or, if necessary, clip off the very ends of the circuit wires you will be connecting to the switch. Use wire strippers to remove 1/2-inch of insulation from the wire ends unless the ends are already stripped.
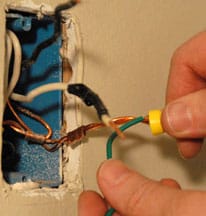
4 Loosen the green grounding terminal screw on the switch and, using needle-nose pliers, loop the bare or green grounding wire from the circuit clockwise around it, and tighten the screw to lock the wire in place.
Note: If the switch has its own grounding wire, twist the bare end together with the circuit’s grounding wire, using lineman pliers, and secure it with a copper compression sleeve or wire nut. Note: If you are using a metal box, include a grounding wire “jumper” from the ground wire connections to the box.
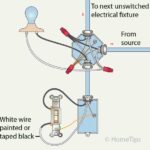
5 If the switch has terminal screws, loop the circuit wires clockwise around the terminal screws in the same fashion and tighten the screws.
It does not matter which wire goes to which terminal. If the switch only has push-in terminal holes in the back, make sure that 1/2 inch of insulation is stripped from the end of each circuit wire, straighten each tip with lineman’s pliers, and push the wires into the terminal holes (again, note the brass and silver sides of the switch). Wiggle all the wire connections to make sure they are secure.
Note: If the new switch has short wires coming out of its body, use lineman’s pliers to twist together the bare end of the green wire clockwise with the circuit’s green or bare ground wire, and then secure the connection with a wire nut.
Then join the bare ends of the switch’s wires to the circuit wires, twisting clockwise, and secure them with wire nuts. Wiggle the wires to make sure the connections are secure.
6 Mount the switch right side up. First, fold the wires behind the switch and carefully push the switch into the box. Next, align the switch vertically by adjusting the screws in the mounting slots.
Also make sure the switch is flush with the wall. If it isn’t, shim it out using the break-off portions of the switch’s plaster ears or use special washers sold for shimming purposes. Screw the switch to the box.
7 Screw the faceplate to the switch using the screws included with the faceplate.
Then turn the circuit back on. If the light still doesn’t work, the problem is in the wiring or the light fixture. See Light Fixtures Troubleshooting & Repairs.
Get a Pre-Screened Local Electrical Wiring Pro