Expert tips on completing a ceramic or stone tile floor layout. Covers measurements, checking squareness and straightness, estimating tile counts, and more.

When installing a new tile floor, don’t just start laying tiles at one end of the room and hope things will look good when you get to the other end. If you do that, you might get lucky, but there’s a greater chance that you will end up with a row of noticeably narrow tiles or that a grout line will be obviously out of parallel with a wall.
It’s nearly impossible to undo mistakes like this, so take the time to determine the orientation of all the tiles before you start laying them.
Measuring for Tiles & Grout
When you choose your tiles, you also need to decide on the width of your grout lines. The most common grout width is 3/16 inch. Varying the width by even 1/16 of an inch makes a surprising difference in a floor’s appearance: 1/4-inch lines make for a more rustic appearance, and 1/8-inch lines are primly narrow. When figuring your layout, always factor in the width of the grout lines; over the length of a room, they will add up to a significant amount.

Checking for Square & Straight
If a room is out of square, the tile lines will not be parallel to one or more walls. To quickly check, lay a sheet of plywood or drywall on the floor against each of the corners in turn.

Take note not only of any out-of-square conditions but also walls that wave or curve. As a general rule, you want to install tiles as wide as possible along these walls; the narrower the tiles, the more apparent the wall’s imperfections will be.
Laying out Tile with a Dry Run
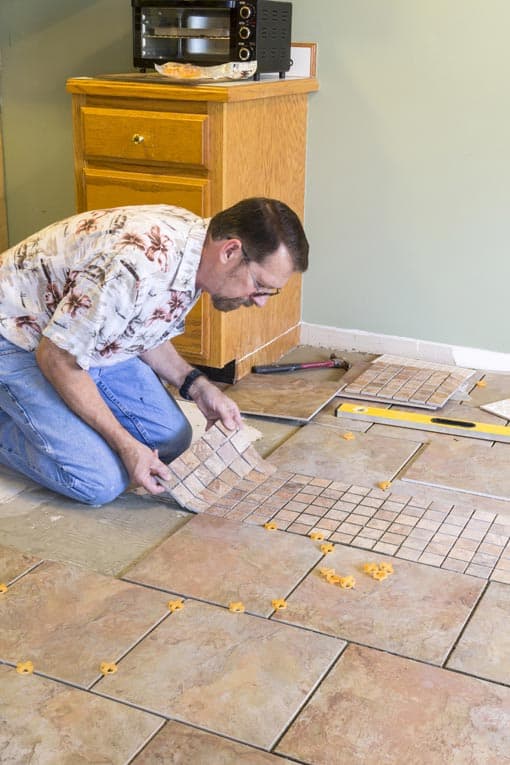
Many professional tile setters can measure and make calculations in their heads, but a do-it-yourselfer is much better off taking the time to make some dry runs. You don’t have to set all the tiles on the floor, but you should set out lines of tiles in two directions to see how the layout will end up and then adjust as needed.
If the tiles are regular in shape and size, you will likely use plastic spacers to maintain consistent grout lines. If you are using spacers, place rows of tiles on the floor, with the spacers between them, to see how wide the last rows of cut tiles will look.

If the tiles are irregular (as in the case of saltillo tiles and others), use the grid system. Mark the floor for a grid of squares or rectangles, each of which holds a certain number of tiles (often, nine).
To start, lay one grid’s worth of tiles on the floor, arranged with spaces for the grout. Measure the overall group to determine the size of each grid square. Measure and mark small lines on the floor indicating the squares. Adjust the layout as needed for a neat appearance. Then snap chalk lines between the pencil marks. Recheck to make sure all the squares are correctly sized; it’s easy to make a mistake.
Estimating Tiles Required
For quicker measurements, lay six (or more) tiles on the floor, with spacers, and measure the total length. Divide by 6 to get a per-tile-and-grout-line dimension, and use this figure to determine your layout.
You may choose to measure the room(s) and make a drawing on graph paper. This is helpful when the room has some angles or when tiling multiple rooms. However, it is easy to make mistakes when working on paper, so, for your peace of mind, do some dry runs to make sure you’ve got it right.
Adjusting Tiles for Borders
Ideally, the cut tiles on either side of a room will be the same width and there will be no narrow tiles. But the real world is not perfect, so you may need to come up with a compromise solution. Compromises often come into play when tiling multiple rooms.
If the room is out of square, you may choose to have lines that are slightly out of parallel with the walls on both sides rather than having one side obviously out of parallel. You may also need to have narrow cut tiles along one wall. If so, do this along a wall where there will be a piece of furniture that will hide them.
NEXT SEE:
- Installing Cement Backerboard for Tile Flooring
- Installing Tile Flooring Membrane
- Cutting Floor Tiles
- Applying Thinset Mortar for Tile Installation
- Laying a Ceramic Tile Floor
- Laying a Stone Tile Floor
![]()
![]()