Problems with hard water? Here’s expert advice on where and how to install a water softener.

A water softener removes minerals from water, making a home’s water kinder to bodies, hair, appliances, pipes, and more.
Hard water—that is, water with lots of minerals— is more than a nuisance. It can stain sinks, reduce the cleaning power of detergent, cause buildup in faucets and pipes, and shorten the life of a water heater.
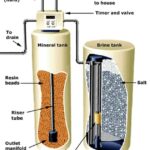
A water softener is the appliance that removes minerals from water. For more about water softeners and how they work, please see the Water Softeners Buying Guide. Here we’ll look at where and how to install one.
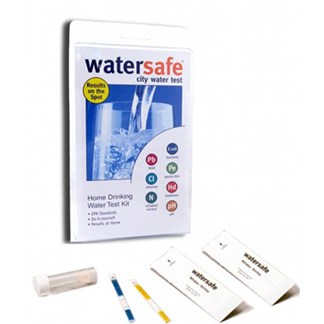
To find out whether your water is hard, you can buy a water test kit online. This will give you a clear idea of the amounts of minerals in your water.

Though several types of salt-free water softeners are available, a salt-based (ion exchange) softener is the most popular. (Please see the Water Softeners Buying Guide for more information on hard water and choosing a water softener.)
Installation must adhere to local plumbing codes.
Though most homeowners choose to buy and maintain their own water softener, a viable option is to rent one. Over the long run, renting will cost more than buying, but it costs much less up front and can save you the trouble of installing, maintaining, and repairing a system.
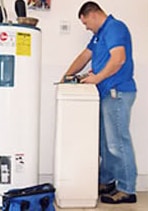
Where to Install a Water Softener
If your home has an older water softener that you wish to replace with a new one, plan to put the new unit in the same location. If there is no existing water softener in your home, consider the following advice for locating your new softener.
General location. For starters, a new water softener should be located out of the way but where it is easy to tie it into the plumbing system—in most cases, this is in a basement, garage, or utility room, often near the water heater. Allow enough space around the equipment for easy servicing.
Do not put the softener in an area where freezing might occur; this can cause permanent damage and void your warranty. If temperatures are expected to drop below 40 degrees F (4 degrees C), protect the equipment by relieving the pressure and draining the system. Also avoid direct sunlight—and don’t put the equipment outdoors.
Required hookups. A water softener will need a drain such as a floor drain or utility sink. In addition, the water softener will need a nearby electrical receptacle (not controlled by a switch) that can handle the needed amperage (check the manufacturer’s specifications).
Where to connect to pipes. For softening a home’s entire water supply, install the softener before the water heater—this helps reduce sediment buildup in the water heater, too. In households where sodium in the drinking water may cause a health risk, it may be necessary to bypass certain faucets used for drinking water (such as the kitchen sink) or, in some cases, soften only the hot water side of the water supply system. Be aware that your entire cold water system will lose all of the benefits of water softening if you do this.
Another option is to opt for a salt-free water softening system (see Salt Free Water Softeners). Don’t place the softener after (downstream from) the water heater—temperatures above 110 degrees F (43 degrees C) may damage the softener and void the warranty.
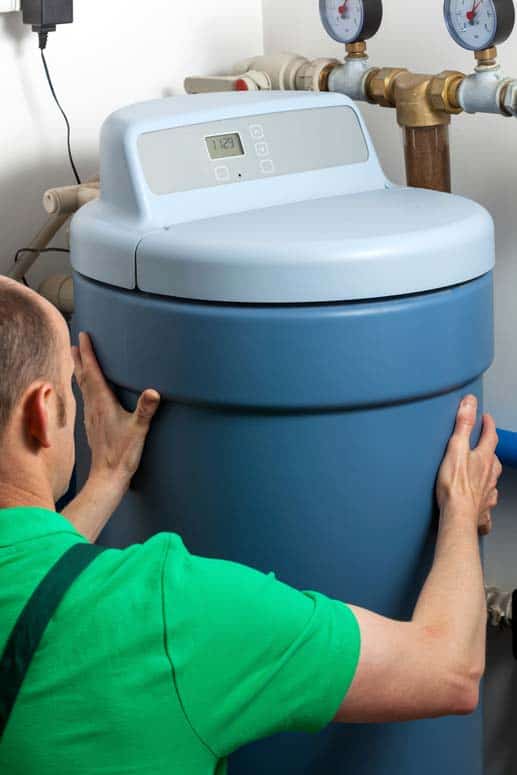
Plumbing a Water Softener
Most water softeners come with a bypass valve that you must assemble and attach to the unit. In addition, some local plumbing codes require that you install shutoff valves to the pipes that lead to and from this valve so the water to and from the softener can be turned off easily. If your softener has such a bypass valve, attach it to the softener, following manufacturer’s instructions.
1 Clear and sweep the area. Position the water softener where it belongs so you can easily measure for the connecting pipes. Pay attention to orientation of the unit—the INLET should be attached to the water supply pipe and the OUTLET should go toward the water heater.
2 Shut off the house water supply valves. (For more about shutting off the water supply, see How to Shut Off the Water Supply.) Turn off the water heater’s water supply and the power to the water heater (the circuit breaker for an electric water heater or the gas valve for a gas water heater). Then open a couple of bottom-floor faucets or hose bibbs to drain the water from the pipes.
3 Cut into the water supply line, using a pipe cutter, and install elbow fittings so you can run two lines to the inlet and the outlet ports of the bypass valve. Again, pay attention to orientation: Hard water from the water supply will run into the softener’s inlet, and soft water will run out to supply the house’s fixtures and faucets. If you want an outlet, such as a hose bibb, to carry hard water, install a T fitting prior to the softener and run it to the outlet.
4 Cut and install the pipes that lead to the bypass valve. Solder all the fittings and nipples before attaching them to the plastic bypass valve (the heat from soldering could damage the plastic). For more, see How to Cut & Solder Copper Pipes. If the pipes are too large, use a reducing fitting to install pipes of the correct size. Use the compression fittings supplied with the softener to attach the pipes to the unit. Note: If you home’s electrical system relies upon the plumbing for safe grounding, you must install a jumper across the water softener installation piping to ensure proper grounding.
5 Clamp the drain hose to the softener, and run it to a drain or utility sink. The end of the hose must be at least 2 inches above a drain hole to prevent back siphoning of waste water, and it should be securely clamped.
Note that the drain hose must be sized according to the distance of its run and its height in relation to the inlet. Typically, a 1/2-inch interior diameter (ID) line can run up to 15 feet if its discharge is lower than the inlet. You’ll need 5/8-inch ID for the same distance if the discharge is slightly higher than the inlet. For a distance of 15 to 25 feet and/or if the drain is above the inlet, opt for 3/4-inch ID. The drain line should not be positioned more than 10 feet above the floor.
Be sure to follow the manufacturer’s instructions.
6 Connect the brine tank’s overflow tube, following manufacturer instructions for any additional assembly. The overflow’s discharge must be positioned lower than the overflow fitting.
7 Set the bypass valve to the “bypass” position and turn on the water to run through the softener for a few minutes to flush out sediment and expel air in the pipes. Also open the valves to the water heater and restore its power and/or turn the gas valve back on and relight the pilot if necessary (see How to Relight a Gas Water Heater). Check for any leaks.
8 Set the valve to the “Backwash” position after plugging the unit into a nearby receptacle. Then press and hold the “Regenerate” button until the valve advances to Backwash. If necessary, unplug the power to keep the control from advancing further.
9 Partially open the inlet control on the bypass valve to slowly. The idea here is to bleed off any build up of air; once the water flows steadily to the drain and the unit stops sputtering, you can fully open the inlet and outlet bypass controls. Fill the tank with water and salt as directed by the manufacturer.
10 Plug in the power cord again. Press the “Regenerate” button again and allow the unit to cycle to its next stage and repeat until the “Service” setting is reached. Finally, program the controls.
The following video is quite thorough in showing you how to assemble and install a water softener. Though this focuses on a Fleck 2510 model, the techniques are reasonably generic—you can adapt them for most similar types of softeners.

Featured Resource: Find a Local Water Treatment Installation Pro