Expert advice on how to repair built-up and tar-and-gravel roofs, including DIY tips on patching torn roofing and repairing blisters on a flat roof.

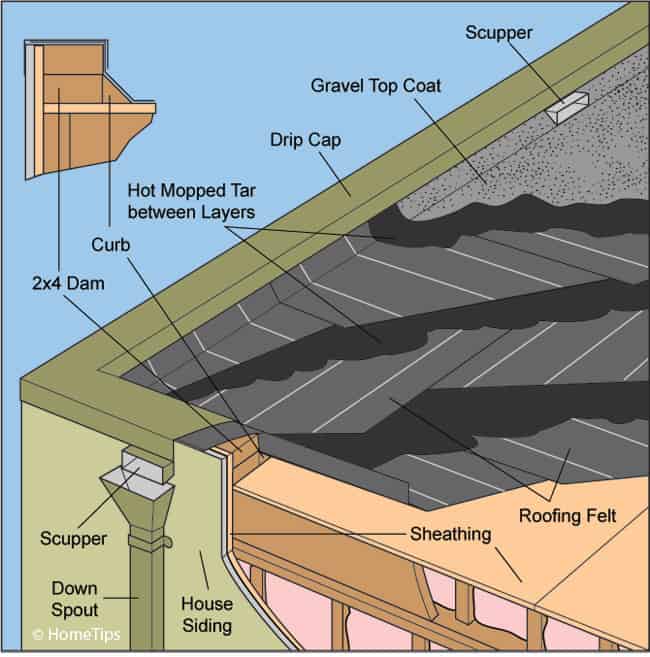
Although built-up roofs are durable, leaks can develop. These are most often found where flashing is located, such as at connections between the roof and the chimney, the eaves, or another roof plane. They may also develop where wind has blown the gravel away and exposed the surface to sun, heat, and cold. An older roof may also develop leaks where the asphalt has blistered or where the layers of roofing felt and bitumen have separated.

To keep built-up roofs in good shape, be sure that there are no bare patches in the gravel. Keeping the roof surface covered with gravel will also keep your house cooler in the summer and warmer in the winter.
If simple repairs do not remedy leaks, the roof surface may need to be replaced. This is a job for professionals; rolling out layers of roofing felt and hot mopping asphalt is more than most homeowners will want to take on.
Modified bitumen or “torch-down” roofing is a popular alternative to classic tar-and- gravel built-up roofs. Easier and faster to install, it consists of a single rubber membrane that is heated with a torch and then bonded to a fiberglass mat that is attached to the roof sheathing.
Repairing Blisters on a Flat Roof
Blisters on an almost flat roof may be caused by heat and sun, but they often signify moisture under the surface. The chances are good that water has penetrated the roof membrane through a nearby hole or flashing.
If there are several blisters or the blisters are quite large, consider calling a roofing contractor to handle the work. Otherwise, follow the steps below:
1 Sweep gravel and dirt away from the blister.
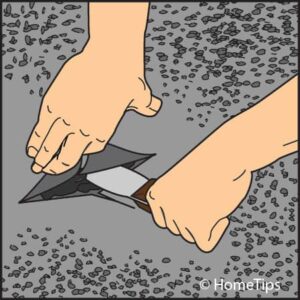
2 Using a utility knife, slice through the top layer, releasing the pressure from the bubble.
3 Feel inside the hole for moisture. If it feels wet, look for possible sources of leaks along the flashing or in the same general area as the blister, and fix those leaks.
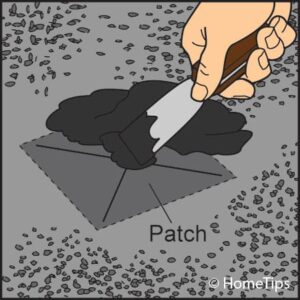
4 With a putty knife, work plastic roofing cement into the pocket and around the surface of the cut (see illustration at left). Apply cement beyond the damaged area at least 2 inches in all directions.
5 Cut a patch from an asphalt shingle or a piece of roll roofing that’s about 2 inches larger than the hole, and slide it into the slit. Press it into the roofing cement, making certain to cover as much of the area inside the cut as possible. Cover the blister or hole with roofing cement to seal the patch, and then apply cement about 2 inches beyond the edges. When the cement begins to set up, sweep the gravel back over the top of the patch.