How to pour concrete footings and piers, with step-by-step instructions for building a form and ready-made concrete pier options.

Waxed fiber tubes, readily available at home improvement centers and lumberyards, make forming and pouring footings and piers a relatively easy job.


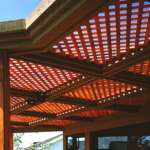
It’s also easy to build a simple form from lumber scraps, as shown in the photo. Be aware that, by some codes, you may be required to have the footings inspected before making the piers, or you may need to add several inches of gravel to the bottom of each footing before adding concrete.
Dig and pour all footings and piers at one time, if possible. Have rebar and anchor bolts or post bases on hand, as you must add them to the concrete while it is still wet. Lay out the footings. The spacing between footings for support posts is determined by post placements, which are a factor of beam spans.
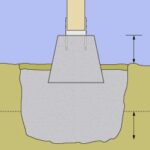
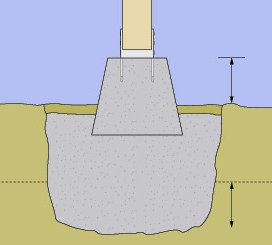
In areas with freezing winters, a concrete footing usually must extend at least 12 inches below the frost line (the depth at which soil freezes). A footing should also be at minimum 8 inches thick and twice as wide as the wall or posts it will support.

Fiber Tube Forms
To build a form from a fiber tube, begin by digging a flared hole, sized as required by code, using a clamshell digger or a power hole auger.
Cut a length of waxed fiber tube (in some cases, fiber tubes can be difficult to locate; instead, you can form rectangular footings from scrap plywood or wood) long enough to extend 2 inches above grade and 2 inches into the flared footing at the bottom of the hole. Level and suspend this tube in the center of the hole by screwing it to temporary braces.
Next, fill the flared section of the footing and the bottom 2 feet of the tube with concrete. Using a piece of wood, agitate the mix to remove any air pockets. Repeat the process every 2 feet, until the tube is slightly overfilled. Smooth the surface by moving a short 2 by 4 from side to side across the top.
Add rebar according to code requirements, typically two pieces of #4 rebar spaced about 2 inches from the fiber tube. Each should be long enough to reach from the bottom of the footing to about 2 inches below the pier’s surface. Insert an anchor bolt, post base, or short rebar “pin” for centering the post, and check it for alignment.
Ready-Made Piers
Depending on the type and size of project you are building, you may be able to set a ready-made concrete pier on a footing. Choose the type of piers with integral metal post anchors.
Soak the piers with a hose, and then place them on the footings five to 10 minutes after the footings have been poured, when the concrete is stiff enough to support them. Then, with the post anchors properly aligned with your string lines, level the piers in both directions.
Keep the concrete damp for two days, allowing it to cure slowly. Then remove the temporary braces, backfill the hole with dirt, and cut away the exposed fiber tubing.