The tidy coordination of a full-scale integrated garage storage system can be appealing, but it comes with a hefty price tag of several thousand dollars. To make sure your investment is worth it, consider the following:

Storage Capacity
Dimensions
Accessories
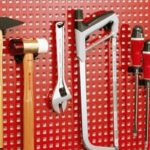
French Cleat Wall Storage
Storage Capacity
Don’t be fooled by promotional photos that showcase neatly organized (read: nearly empty) garages. Think about what you need to store immediately and in the future, especially if you’ve just cleaned out your garage. Adjustable shelves can add flexibility if your needs change. However, be aware that adding extra accessories like baskets and racks can quickly make a reasonably priced system expensive.
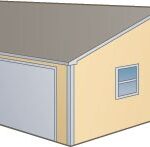
Dimensions
Height, width, and depth are critical factors when configuring workspaces and choosing storage options. Open shelving should be deep enough to easily accommodate bulky items. For cabinetry, 2 feet is a good depth for lower cabinets, especially if you plan on putting a workbench on top of them. A 12-inch-deep upper cabinet can keep items more accessible, but consider adding just a few inches, which can increase storage space considerably. If you’re planning on storing bins or boxes behind closed doors, keep their dimensions in mind when choosing cabinets.
Accessories
Try not to base your storage purchases on accessories, such as specialized racks for sporting gear or yard equipment. While these units are useful, the amount of storage and quality of a system is the most important consideration. Extras can always be added later.
French Cleat Wall Storage
A French-cleat system is a classically easy and inexpensive way to mount storage cabinetry in a garage. Just follow these simple do-it-yourself steps:
- Using a table saw, cut a pair of 2 by 4s or void-free plywood at least 3/4 by 3 inches thick to the width of the cabinet you are planning to mount. Then cut a 45-degree bevel along each cleat.
- Position one cleat at the height you want the cabinet to be. Point the beveled edge up and screw the cleat into wall studs.
- Position the other cleat on the top back of the cabinet with the beveled edge pointing down. Glue the cleat in place and then screw the ends to the cabinet’s top and side edges. Attach a spacer the same thickness as the cleat along the bottom of the cabinet so the cabinet will hang level against the wall.
- Position the cabinet so the cleats lock together. Add screws where the top cleat crosses wall studs to secure the cabinet.
French cleats can also be used to hang storage boxes-just attach a cleat as you would molding along a wall and screw another cleat onto the box. If the box will carry light items, the second cleat does not need to be screwed into the studs.
You can also add heavy-duty hooks to a cleat for items that have hanging straps such as many types of garden tools.