This guide will teach you how to install garden drip irrigation tubing, a way to water your plants efficiently and conserve water. Learn the expert techniques for installing garden drip irrigation tubing yourself.

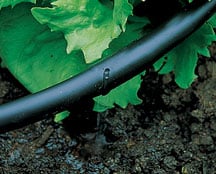
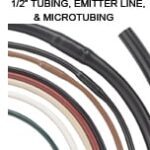
Installing drip tubing, also referred to as a micro-sprinkler watering system, is a simple project. Drip tubing is generally 1/2-inch flexible tubing that is black in color. It is easily cut using a utility knife.

Start with the control valve, which in the case of a drip system is often a simple battery-operated timer. You can install the timer onto or near the spigot and attach the 1/2-inch tubing directly to it. Or, you may choose to run PVC pipe near to the area to be served, attaching one side of a timer to the end of the pipe and attaching the tubing to the other side of the timer. This option is preferable if it helps keep the tubing, which is easily damaged, out of harm’s way.
Once you have all the parts, tubing is easy to attach using a threaded adapter. The trickier part is running the tubing without kinking it. Work on a warm day as cold tubing will not be flexible.
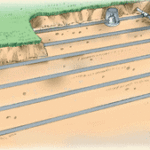
Unroll the tubing carefully—it’s easily kinked—and rout it from the water source to the area to be watered. In most cases, you want to run the tubing alongside the entire area, in an inconspicuous place or partly buried, so you can easily attach the emitter lines and run them to the various planters, pots, and/or flower beds.
If you do kink the tubing, don’t try to straighten out the kink; it will never allow full water flow. Instead, cut the tubing on either side of the kink and join the two ends with a coupling that is held tight with two hose clamps.
To run tubing under a sidewalk or driveway, see “Digging Under a Pathway for Underground Pipes.” Install PVC pipe under the sidewalk and attach tubing to both ends; running the tubing without kinking it will be difficult.
To make a sharp turn, use an elbow (El) fitting. To branch off for an additional line, use a Tee fitting. To install a fitting, slide a hose clamp over each of the hoses, insert the fitting into the inside of the tubing pieces, slide the clamps over the fittings, and tighten.
At the end of the tubing, use a closure fitting to seal the tubing end. Turn on the water to test for leaks. Now you’re ready to poke drip emitter lines into the tubing and run them to your plants, where you can install the emitters or micro-sprinklers of your choice.