Want a home surveillance system you can count on for clear, reliable video? Security experts recommend hardwired CCTV security systems for a variety of important reasons:

Security Gear You Need
Connect & Test
Mount the Cameras
Run the Cables
- Wired security cameras provide high-definition video—good enough to read license plates and recognize faces, while many wireless systems still deliver lower resolution images. If you want to use your cameras to find out whose dog is pooping on your lawn and who’s not cleaning it up, for example, go hardwired.
- Wireless camera systems can be hacked—meaning that some digital 16-year-old computer whiz neighbor, or maybe some more malicious hacker, could potentially steal your video signals to learn about your household routines and property; hard-wired systems can’t be hacked and are therefore more secure.
- Wired camera systems protect your property 24/7. Wireless systems are prone to intermittent performance issues related to poor signal strength and radio interference. Wireless signals have limited range and cannot penetrate masonry materials to feed the DVR that records the images.

But, wireless systems are fast improving, and for homeowners either on a budget or attracted to the smartphone surveillance opportunities they offer, wireless may indeed be the right answer. So, there’s another reason, I suspect, that professional security installers recommend wired over wireless systems: They think that most civilians can’t or are unwilling to take on the wiring themselves, and therein lies their paycheck.
It’s not that difficult, though, and the aforementioned benefits of a wired system are real (and, wired systems now include WiFi-enabled smartphone surveillance, as well, offering the best of both worlds). If you have the skills to hook up your cable box to your TV, and are willing to fish a little wire for cosmetic purposes, you can save some real money by wiring your own home security camera system.
Security Gear You Need
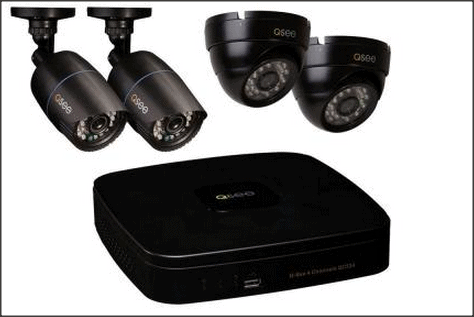
You can buy home surveillance system components à la carte, including cameras, a DVR for recording, and cables and connectors, but if you want to install two or more cameras, it’s advisable to start with a packaged system that’s more likely to have most of what you’ll need in compatible formats. For the best results, look for a system that includes the following:
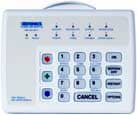
- A DVR with H960 compression, remote viewing via WiFi, motion detection, and a 1 TB hard drive. Most DVRs can be connected to a TV via a high-speed Internet connection for monitoring.
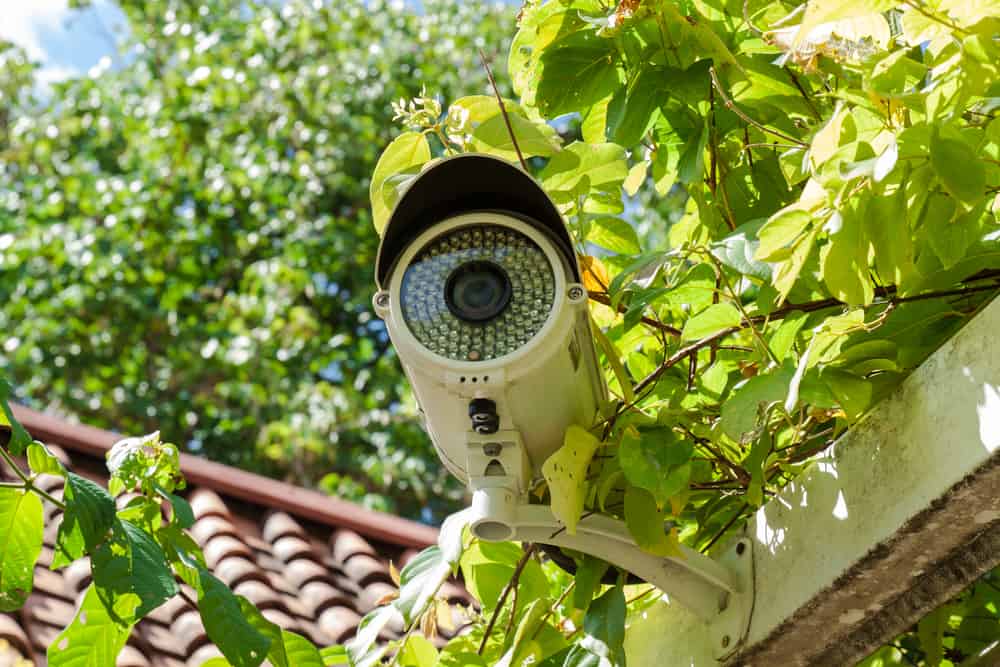
- H960 cameras with 700TVL resolution, night vision, weatherproof bodies and mounting hardware.
- Cables and connectors for each camera.
- PC and Mac compatibility.
- Applications for the types of phones and computers that you own, email alerts and incident snapshots.
Note that in some systems, the standalone DVR can be replaced with a PC-based DVR card, which plugs into the PCI slot of your computer and uses it to record and monitor images from the cameras. Generally speaking, one DVR card can monitor up to four cameras; most desktop PCs have PCI slots for two cards.
Cameras are available in a number of styles. Those most often used in home security applications include:
- Dome security cameras—used most often for indoor applications.
- Bullet security cameras—about the size of a finger; unobtrusive.
- Box security cameras—fairly large; good deterrent when mounted in the open.
Depending on the number of cameras and channels in the DVR, a complete package would range from about $200 (2 channels) to about $600 (8 channels).
If you work with a kit, all of the cables should be included and the connections should be compatible with the components to which they must be joined. If you choose to acquire components separately or don’t find everything you need in the kit, you may need to acquire cables and connectors to get the job done.
Here are the basics:
Siamese cable is available in rolls, and if you work with bulk cable, you’ll need to splice connectors at each end to mate with the camera and power source. Although it’s a simple connection, you should consult an electrician if you’re not already familiar with splicing cable.
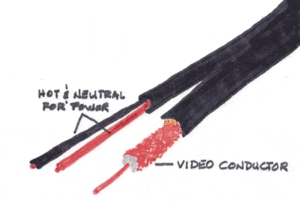
Connectors. At the camera connection, the electrician will splice one connector to the hot and neutral wires to plug into the power feed in the camera’s wiring harness, or “pigtail,” and another to plug the video conductor into a mating fitting on the harness’s video feed. At the other end of the cable, they’ll use a connector to plug into the power source.
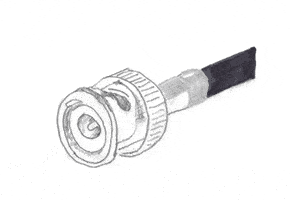
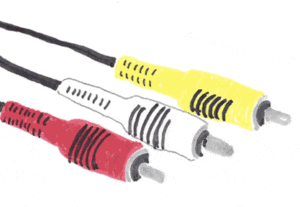
The connectors most often used are BNC connectors and RCA connectors, as shown here.
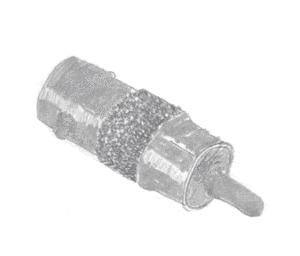
Adapters. If you find mismatched connectors as you work to wire the system components, you can always correct the issue with an adapter, such as the BNC to RCA adapter shown.
Connect & Test
Once you have items from your system kit unpacked, it’s a good idea to test the DVR, cameras and cables before mounting the cameras.
- Unpack the DVR and plug it into the power supply; if you’re using one or more DVR-cards in place of a standalone DVR, install the card(s) in the PCI slots in the CPU.
- Unpack a camera and find the pigtails with BNC or RCA connectors that match the ports on the camera.
- Connect the Siamese cable to the pigtail, and then plug the other end into the DVR.
- Power on the DVR and check the monitor to see that you have an image.
- Repeat the test with each camera, pigtail and cable set.
Mount the Cameras
Once you’ve verified that all the components can be connected and all are working properly, mount the cameras in locations that you want to keep an eye on. Typical locations are:
- At the front door so you can identify people approaching and/or calling on you.
- At a back door or other entry points around your home that can’t be seen from the street and are vulnerable to unauthorized entry.
- In children’s rooms so you can keep an eye on what they’re up to when they’re alone there.
- At outdoor pool areas so you can monitor children and guests playing near the water.
- Wherever you might store valuables or firearms.
Just bear in mind that cameras designed for indoor use will eventually fail if they’re deployed outdoors.
Compatible camera mounts that can be conveniently fastened to walls, ceilings and outdoor soffits are generally provided along with other necessary components in surveillance system kits. Simply screw them in place, mount the camera, plug in the pigtail and connect the cable.
Run the Cables
Cables can be stapled to walls and ceilings en route to where they plug into a power source. For a cleaner appearance, you may wish to drill holes near each camera mount and fish the cables through walls, floors and ceilings so they are concealed on their path to the power source.
Once you’ve got your video surveillance system setup, you can feel secure in the knowledge that not only will you be able to keep tabs on the covered areas via smart device, but also that the mere presence of surveillance cameras has proven a powerful deterrent to all kinds of misbehavior.
Find Reliable Local Home Security Pros
ABOUT THE AUTHOR
Michael Chotiner, a former general contractor, knows what it takes to do more advanced DIY projects and likes to share “tutorials” for The Home Depot. The wired cameras he talks about in this article are an important part of home security. To see a wide selection of home security kits and cameras, visit The Home Depot.