Expert advice on how to install hardwood floors from start to finish, including tools and materials, preparation, layout, cutting, and fastening

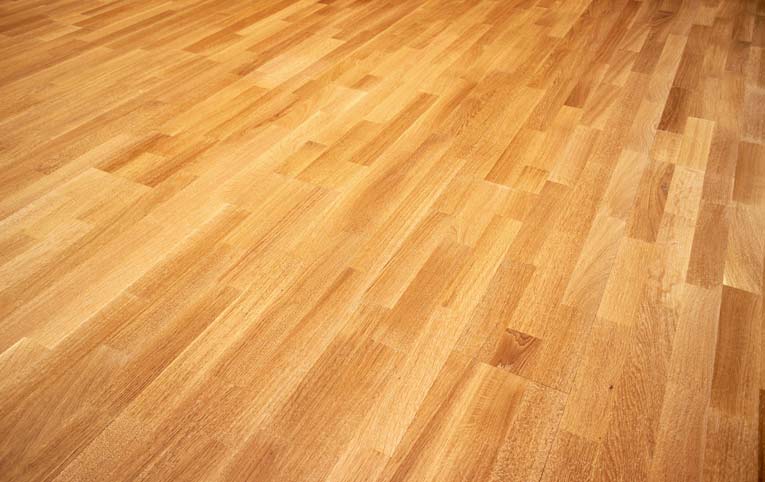
Few home improvements can transform a room with warmth, beauty, and style as effectively as new hardwood floors.
In this article, we’ll guide you through the steps of installing a new wood floor.
In short, to Install a Hardwood Floor:
- Estimate and order the materials you need.
- Prepare the subfloor and fasten asphalt-laminated kraft paper flooring underlayment to it.
- Deliver the materials to the site and allow them to acclimate to the room’s humidity.
- Layout and mark the placement of flooring.
- Attach the first flooring row to the subfloor.
- Cut and fasten successive flooring strips.
- Rip the final row of flooring and fasten it in place.
- Sand and finish the floor (unfinished solid flooring only).
For information about floor sanders, see 10 Time-Saving Rental Tools for Do-It-Yourselfers.
Now let’s take a closer look.
Engineered vs. Solid Wood Flooring
As discussed in the Wood Flooring Buying Guide, the two main types of hardwood flooring—solid and engineered—differ significantly.
A third type, laminate flooring, isn’t really wood—it’s a picture of wood glued onto a composite core; this is not the type we’re discussing here. For more about this, see Laminate Flooring Buying Guide.
Engineered wood flooring is often thinner than solid wood flooring. It is manufactured with a thin surface layer of hardwood and a core that’s more like plywood. If you intend to install the floor yourself, engineered-wood flooring is usually the best bet because it is pre-finished, eliminating the need for sanding and finishing the floor, which dramatically simplifies the job.

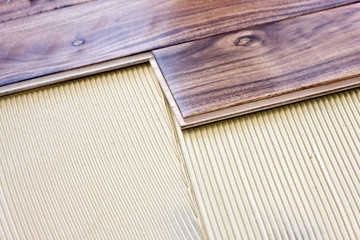
In addition, because engineered-wood flooring is made from layers of wood sandwiched and bonded together, it is more stable than solid wood and resistant to changes caused by extreme temperatures and humidity.
Engineered flooring, at best, can only be sanded and refinished once or twice because its finish layer is very thin (from 1/16″ to 3/16″). Engineered-wood flooring (or other flooring materials, such as tile or vinyl) may be installed above or below grade.
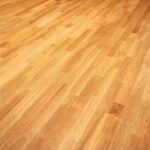
Solid wood flooring is a traditional favorite. It usually is thicker than engineered flooring and is clearly cut from a single board of hardwood. Solid-wood flooring has a tendency to warp, twist, expand, and contract with changes in moisture and temperature. On the flip side, solid flooring can be sanded and refinished multiple times.
You can install a solid-wood floor on a conventional raised plywood subfloor or on a properly prepared concrete slab (see Installing Hardwood Floors Over Concrete), but only if the surface is above grade. It must be no more than 3 inches lower than the ground level outside because moisture, which is typically present beneath below-grade floors, can be very damaging to solid wood.

HomeTips Pro Tip: Floor sanding is incredibly dusty work, and a drum sander can leave visible marks and ridges on the floor. If you are not experienced at this job, strongly consider installing a prefinished engineered-wood floor.
Bathrooms and kitchens are another story. Though moisture is present in both areas, you can protect the surface of a solid-wood floor with a sturdy, protective finish.
For more comparisons, see Solid or Engineered Wood Flooring.
Before you get too far into this project, check out this excellent video on installing a pre-finished 3/4-inch solid wood floor. This is a very thorough look at the process of replacing a carpeted floor with a nail-down wood floor, from start to finish. Hats off to April Wilkerson, who installed the floor and made the video!
Preparing for Hardwood Flooring
Because installing hardwood flooring is usually a major, expensive home improvement, it pays to ensure a quality, durable result. The key is proper preparation. This video is helpful for gathering the tools and materials you’ll need—including estimating the amount of flooring you will need. It also shows how to prepare a carpeted, suspended wood floor.
New wood flooring should be laid on a clean, smooth, level, structurally sound base. Depending on the particular flooring, this base may be a previous floor covering, an existing wood floor in good condition, a new plywood subfloor, or even a moisture-proofed concrete slab.
By installing wood over an existing floor, you bypass the messy job of removing the old flooring, and you gain instant soundproofing and insulation from the old floor. A disadvantage to leaving old flooring in place is that you must correct any irregularities in it. Also, the new floor will raise the flooring level, making the transition to a hallway or an adjoining room awkward.
Removing Doors and Base Molding
Whether or not you’re installing over old flooring, the first step in preparing floors for hardwood is to remove doors and base shoe molding (remove baseboards only if there is no shoe molding). Number the molding pieces so you can easily replace them when you’re finished.
Make sure that the use and conditions of the room won’t have a negative impact on the flooring during installation. Too much foot traffic on a new floor or excessive temperature or humidity swings can diminish the quality of—and sometimes even ruin—wood flooring.
Proper preparation techniques depend upon the type of flooring you’re installing and the conditions of the base that will be beneath it.
Preparing Subfloor for Hardwood Flooring
Most wood flooring goes on a typical raised, wood-framed subfloor that is surfaced with plywood or OSB (oriented-strand board) subflooring panels.
The subfloor must be clean, dry, flat, structurally sound, squeak-free, and clear of any surface bumps or fasteners.
Use a long, straight board and a carpenter’s level to check for any dips or rises. Sand down bumps and fill dips with leveling compound.
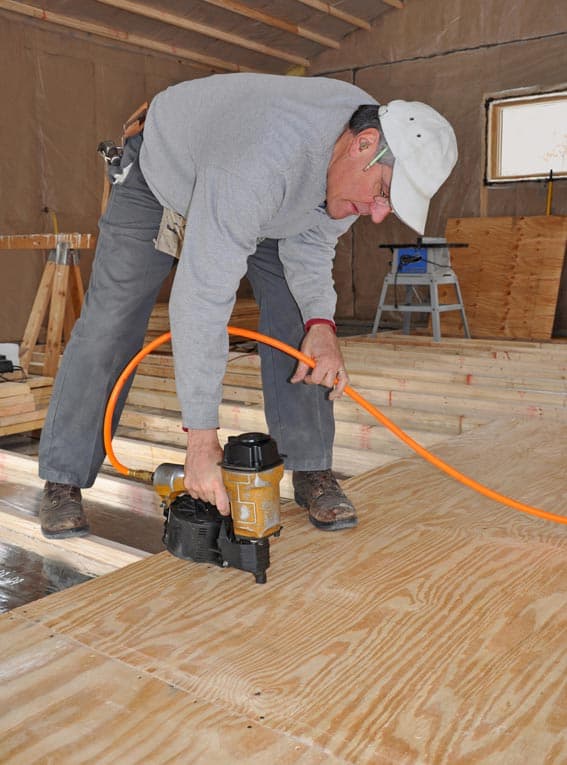
Reseat any raised fasteners and screw down any squeaky spots using 1 1/2-inch screws.
To prevent ground moisture humidity from rising up into the room and negatively affecting the flooring, the crawlspace beneath a raised floor should be at least 18 inches high and properly vented with 1.5 square feet of vent area for every 100 square feet of crawlspace.
Cover the entire ground area with 6-mil black polyethylene, overlapping the sheets and then taping them together. Extend the material 6 inches up the concrete foundation walls and tape it in place.
Hardwood Flooring On a Concrete Slab
Wood flooring can be installed on an above-grade concrete slab if the slab is at least 60 days old, dry, and has been professionally moisture tested (this is beyond the skills of most do-it-yourselfers).
The slab must be flat, without high or low spots. And it must have a trowel finish that is clean.
For complete information on preparation and installation, see Installing Hardwood Floors Over Concrete.
Before Hardwood Flooring Is Delivered
The conditions of your home must be ready for hardwood flooring before the material is delivered.
In fact, wood flooring is typically one of the last installations during a remodel.
To avoid physical damage to the surface, be sure it goes in after all construction and completed installation of any fixtures and appliances that will not sit on top of it.

How Heat & Humidity Affect Hardwood Flooring
Wood flooring—especially solid wood flooring—is very susceptible to moisture problems.
Unless the manufacturer specifies otherwise, wood flooring must be allowed to adjust to the house’s normal humidity level before installation to prevent expansion and contraction that can spoil the final job.
This means any packaging should be removed and the wood should be stacked for several days in the room where it will be installed. Do not store it in the garage or on an exterior patio.

Anything that might artificially alter the normal humidity level of the room where the flooring will be installed must be controlled, too. For example, the house must be fully enclosed and the heating and/or air-conditioning system should be operating at normal occupancy levels.
If this isn’t possible, you’ll need to set up temporary heating and dehumidification that matches the conditions of the final space. All plastering, concrete work, drywall, texturing, and painting of primer coats should be finished and dry to avoid introducing excessive moisture into the air.
Hardwood Floor Layout & Preparation
Determine the direction of the floor joists that support the subfloor and plan to install the flooring perpendicular to them; this isn’t imperative, but it is generally the best practice. Start installation at the longest, most visible straight wall (often an exterior wall).
If you know the positions of the floor joists, mark them on the wall where the base molding will hide your marks later.
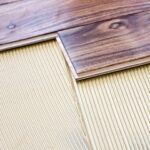
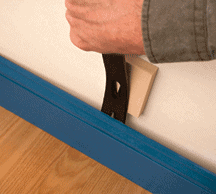
Roll out 15-pound asphalt-laminated kraft paper flooring underlayment to provide a vapor barrier and reduce floor noise.
Overlap edges of the kraft paper by 3 inches. Use a utility knife to trim the paper around objects such as a fireplace hearth. Fasten the underlayment to the subfloor using a staple gun.
At both ends of the long wall, measure 48 inches toward the room, mark these dimensions with a pencil, and then snap a chalk line between your marks to serve as a guideline. This line should be exactly parallel to the wall so you can make sure your floor boards are in alignment as you work your way across the floor installing them. From this mark, measure to the opposite wall to check for equal distance at both ends. If the measurements are the same, the opposite wall is parallel. If it isn’t parallel, the flooring won’t be either, so it may be necessary to slightly adjust your guideline.
Then snap chalklines across the kraft paper at each floor joist location so that you will be able to identify where the best backing is for nailing when you get to that step.

How to Cut & Fasten Hardwood Flooring
The instructions given here are generic for cutting and nailing solid-wood flooring to a plywood or OSB subfloor. Before beginning, read the manufacturer’s instructions for your particular flooring.
Cutting Hardwood Flooring
To rip flooring, use a power saw that has a fence, such as a job saw or table saw. For crosscuts, equip a power circular saw with a carbide-tipped 40-tooth blade or, even better, use a power miter (“chop”) saw with the same type of blade.
Cut the boards face down with a circular saw or face up with a job saw, table saw, or power miter saw. Be sure all end cuts are precisely square (at a 90-degree angle).

For making curved or irregular cuts, you can use a portable saber saw (jigsaw).
The blade on this type of tool cuts on the upstroke, often splintering the top surface. So, if the cut will not be covered by molding, be sure to turn the flooring face down during cutting. If the cut won’t be visible, it’s usually easier to work with the flooring face up.
Fastening Hardwood Flooring
When nailing boards to the subfloor, you will be using two methods: face nailing and blind nailing. Both can be done by hand with finishing nails and a hammer, but it is much faster, easier, and less likely to damage the flooring to use a power nailer for face nailing and a pneumatic flooring nailer for most of the blind nailing. You can rent these tools if you don’t want to buy them for just one job.

To face-nail by hand, first pre-drill a pilot hole in the surface of the wood flooring, and then drive a finishing nail until its head almost reaches the surface.
Set the head below the surface using a hammer and nailset and fill the hole with wood putty that matches the floor. To use a power nailer, just position the tool and pull the trigger—it should sink the nail below the surface; fill the hole with wood putty and wipe away the excess.
To blind-nail flooring, drive a nail at an angle through the tongue. When the groove of the next board is fitted over the tongue, the nails are hidden. For this job, you absolutely need a flooring nailer. This tool is designed for easily driving a special ring-shank flooring nail at an angle through the flooring’s tongue into the subfloor. You just strike the tool with a dead-blow hammer, one solid strike per nail.
Laying the First Rows of a Wood Floor
For the first three rows of flooring, choose very straight boards. Then cut one starter board for each row. The boards should vary in length by at least 6 inches so the end joints will be staggered by at least 6 inches from row to row.
Face the tongue of the first row of boards away from the wall and dry-fit the boards in place. Use 1/2-inch spacers along the base of the wall to provide an even expansion gap between the flooring and the wall (this gap will be hidden by the base molding after installation).
Use a measuring tape to measure from the guideline to the board’s edge to double-check that it is the same distance at both ends. Hold the board in place and top-nail it to the subfloor with 1 1/2-inch finishing nails placed about 3 inches from the boards’ ends and about 1/2 inch from the grooved edge at 6-inch intervals. Set the heads below the surface using a nailset. Install all of the boards in the first row.

Fit a board for the second row so that its groove interlocks tightly with the tongue of the first row. Use a tapping block or small piece of flooring to protect the tongue and tap the second row boards tightly against the first row.

Then blind-nail through the tongue, placing a nail 3 to 4 inches from the end of each board and every 8 to 10 inches along its length; where possible, nail through the subfloor into the floor joists. Until you reach the second or third row where you can fit the flooring nailer in place, you’ll have to do this blind-nailing by hand with a drill, hammer, and nailset.
Completing a Wood Floor Installation
Now it is time to dry fit five or six rows of flooring, sorting and positioning the boards for a pleasing pattern and appearance. Remember to stagger the end joints by at least 6 inches. At the end of each row, cut boards to fit. It’s smart to pull flooring from several different packages or boxes to mix up any variations in wood color and grain.
Next, nudge all but one of the loose rows away from the attached second row and, if possible, begin the process of blind-nailing with a pneumatic floor nailer.

 HomeTips Pro Tip: If the flooring nailer does not have a protective plastic boot to prevent it from scratching the floor, cover its metal base with masking tape.
At floor heating registers, always cut boards to fit the opening before installing them. When you come to an obstacle such as a fireplace hearth, miter boards to create a border that will frame it.
Glue this in place and then face-nail it. Also consider gluing the ends of the boards fitting snugly against it.
Continue across the floor. When you get to the last two or three rows, it will be difficult to use the floor nailer, so you may need to top-nail as you did the first row. To force the boards tightly together, use a small pry bar. Fill any face nail holes with wood putty and wipe off the excess.
When you reach the final row, you may need to rip-cut lengths of flooring to fit.
Measure from the wall to the top edge of the last flooring strip (not the tongue). Subtract 1/2 inch for clearance, and then mark the boards and cut them. If the plank is less than 1 inch wide, spread glue along the tongue of the last full-sized row and then fit the final piece in place.
You’ll need to use a short pry bar to force the final strip against its mate as you drill and nail it. Use a short piece of flooring to protect the wall from being damaged by the pry bar. Wipe away any excess glue.

Remove any spacers, cut off excess underlayment that may be sticking up around the edges, install baseboards and shoe moldings, nailing them to the wall, not to the floor, and finish with transition strips between your new floor and other flooring materials. Fill any remaining nail holes with matching putty.
ALSO SEE: Wood Flooring Buying Guide