This expert guide will teach you how to plant and grow melons, a delicious and rewarding garden crop. Learn about the different types of melons, how to choose the right melons for your yard, and how to plant, grow, and care for melons in your garden.

When you’re planning your edible garden, don’t overlook the addition of melons. Before you add them in, though, be sure you can give these somewhat demanding plants the conditions they like.

That includes rich soil, full sun, plenty of water, and space to spread their 10-foot-long vines. Most of all, though, you need to give melons a long period of warm weather in which to grow.
Conditions for Melons
Even the varieties that mature early need at least 70 days to ripen; other varieties may take up to 115 days to reach maturity. They are truly summer fruits.
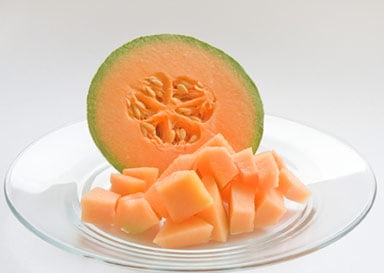
Though cantaloupes, also called muskmelons, are the most widely grown melons, you will find plenty of other choices. Smaller muskmelons, such as Ha-Ogen and Charentais, are a good choice for limited spaces.
Late melons include the very sweet honeydew, casaba, Galia types, and Crenshaw, a popular hybrid. These generally do better in relatively dry areas. If you have room, and enough heat, there’s the ultimate summer melon, the watermelon. You can find some early-ripening varieties, such as Icebox. If you want something different, try growing a seedless watermelon, or one that’s yellow instead of red.
Where summer heat is not always a given, look for varieties that ripen early, such as Alaska cantaloupe, Earlidew honeydew, Passport (a Galia type), Savor (a French Charentais), and Sugar Baby watermelon. You can also use growing techniques, like plastic mulch and row covers, to help them along (see Planting Melons). If it’s space that’s a problem, look for miniature melons. These can be grown in large containers or trained up a very sturdy trellis.
Melons may like heat, but humidity can be a problem. Look for varieties that are resistant to mildew and other diseases if you live in a humid or coastal region.
How to Prepare for Planting Melons
Prepare the soil well ahead of time, adding well-rotted manure and organic amendments. If you use fertilizer, mix it in thoroughly well ahead of time; melons are subject to fertilizer burn. You’ll have time in spring to get the bed ready; seeds shouldn’t be sown until the soil temperature has reached 75 degrees F. You may even need to start seeds indoors if your growing season is short.
If you’re growing in an area that has cool summers, look for a spot in the warmest part of your garden–next to a wall that reflects heat is a good choice. You can also cover the area with clear or black plastic or use row covers to keep the soil warm.
A third option is to grow melons in your compost pile–yes, compost pile–as many a gardener has discovered an inadvertent crop sprouting due to the heat and rich soil found there.
How to Plant Melons
In addition to being fussy about growing conditions, melons can be more fussy than most vegetables about how they’re planted: They should be grown in hills or raised rows. Hills are really flat-topped mounds, about 4 inches high and 2 to 3 feet in diameter, surrounded by a narrow watering basin.
You’ll need even larger mounds for watermelons, generally 8 feet in diameter. Space the hills about 4 feet apart for smaller varieties, 8 feet apart for watermelons. Plant seeds 1 inch deep, with four or five seeds per hill. Thin seedlings to two per hill. If setting out seedlings, plant two per hill.
For rows, mound the soil 3 to 5 inches above the garden surface and 12 to 15 inches wide. Add narrow watering troughs along each side of each row. Keep rows 3 to 4 feet apart, wider for watermelons. Plant seeds 1 inch deep, putting two to three seeds every foot, and then thin to one plant per foot. If setting out seedlings, plant every foot.
How to Care for Melon Plants
Once planted, keep the soil moist but not wet near the roots so the plants won’t dry out. As the plants grow, fill the watering basins or troughs to keep the soil moist while keeping water away from both the foliage and the fruit. Water deeply if the plants are wilting in the evening after a hot day. Add a water-soluble fertilizer every six weeks during the growing season.
As the fruit develops, place a brick or piece of wood under each one to keep it clean. If you’re growing on a trellis, support the fruits, once they reach 2 inches in diameter, in individual slings made of netting or old nylon stockings.
As they near full ripeness, protect Crenshaw melons from sunburn by using a shingle or piece of wood as a screen on the southwest side of the plant.
In addition to mildew, melons are subject to a number of pests, including aphids, cucumber beetles, and mites. In all cases, the best defense is keeping the garden debris cleaned up to encourage beneficial insects.
Aphids and mites can be hosed off with water or sprayed with an insecticidal soap. Cucumber beetles, which transmit bacterial wilt, can be controlled with parasitic nematodes or a product containing pyrethrins. For mildew, plant resistant varieties; for other varieties, spray with neem, sulfur, or copper soap fungicide.
How to Harvest Melons
Deciding when a melon is ripe can be one of the trickiest parts of having grown them.
A cantaloupe is ripe when it has a noticeable fragrance and the fruit comes off the stem with just a light tug.
To harvest, lift the cantaloupe until it separates easily from the vine. To make cantaloupes even sweeter, hold off watering a week or so before harvesting, but then resume watering if you have more fruit, and don’t let the vines wilt.
Honeydews are ripe when the place where they rest on the ground has turned white. Other late melons are ready when they have a strong, sweet smell and the blossom end is slightly soft. Their rinds should also have turned dull. Late melons should be cut from the vine with a knife or shears.
A watermelon is ripe when it makes a dull “thunk” when you rap on it.
The skin on the underside should have turned pale yellow, and the tendrils at the stem should be dark and withered. It, too, should be cut and not pulled from the vine.