If your heating and cooling bills have begun to spiral out of control, it may be time for a home energy audit. Assessing your home’s energy consumption is the first step toward figuring out what you can do to increase your home’s energy efficiency.

The point of an energy audit is to identify the areas of your home that are losing energy. These areas include your home’s heating and cooling system, hot water heater, and electrical. Correcting problems in these areas will not only reduce your carbon footprint but also reduce your energy bills significantly over time.

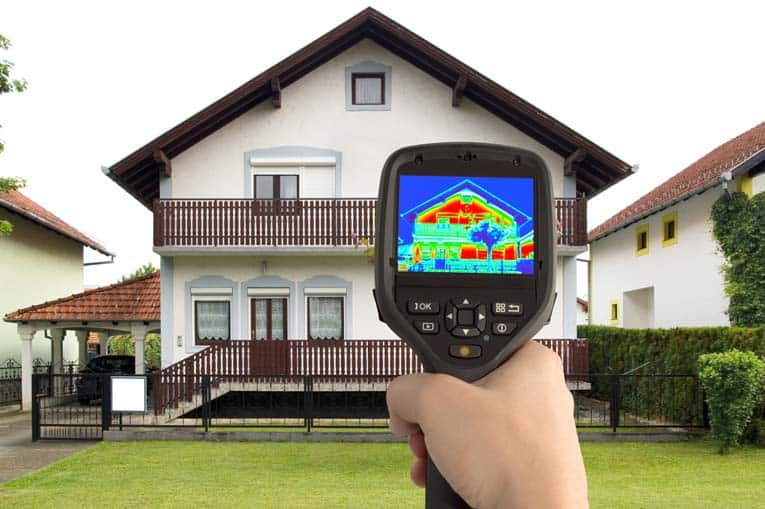
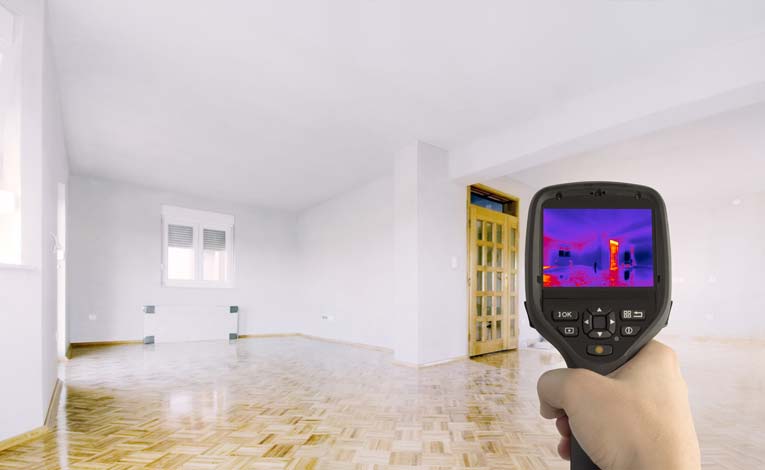
Any homeowner can conduct a simple energy audit, but for more detailed results you can call in a professional. A thorough energy audit utilizes blower door tests, thermography, and other techniques to detect areas of air infiltration and missing or insufficient insulation.
A professional audit includes a list of action steps for how you can reduce the energy expenditure in your home while improving its comfort level.
A full analysis should include:
• How much you currently spend on energy.
• Where your greatest energy losses are.
• How long it will take for new energy-efficient products and appliances to pay for themselves in energy-cost savings.
• What additional benefits you may garner from your energy-saving measures, such as increased comfort from better insulated walls.
Now ask yourself these important questions:
• How long do I plan on staying in my home?
• Which energy-saving measures will significantly increase the value of my home?
• How much of the work can I do myself and what jobs will I need to contract out?
• How much ready money and time do I have to accomplish the measures recommended?
Based on the results of the home energy audit and your answers to these questions, you will be able to set priorities for maximizing your home’s energy efficiency while spending the least amount of money to save you the most amount.
Do Your Own Home Energy Audit with Homeselfe
A home energy audit will assess the best ways for you to save energy in your home. Essentially a report card for your house, it will show you where your home excels and where it needs improvement to save gas, lower your electric bill, and generally save energy.
Though you can spend a few hundred dollars to have an energy audit done professionally, a free and easy option is to do your own, using an online DIY energy audit app such as Homeselfe (pronounced “Home Selfie”).
Here we take a closer look at this very helpful option.
How Homeselfe Works
To begin your own home energy audit, the first thing you do is go to Homeselfe.com and sign up.
Homeselfe then provides you with a digital “map” of your home, and a questionnaire guides you through your house, room by room. It takes about 5 minutes to fill-in the questionnaire.
You’re asked questions like “How old are your home appliances or “Is Your Home Well Insulated?” These questions focus on the key areas of your home’s energy consumption. As you answer each question, a clear picture of your home’s energy efficiency begins to emerge.
What You Receive
When you’re finished, you get a free instant report that tells you which parts of your home are energy efficient, and where it would be prudent to consider energy upgrades. These suggestions include projections of how much you can save over time by making the upgrades.
In addition to this report, you’re given helpful information about federal, state, local, and utility company rebates or offers that can help you reduce or offset the cost of your energy improvements. Homeselfe also will connect you with qualified local contractors who can give you free estimates for doing the work—a very helpful feature for finding reliable, trustworthy pros.
How to Make Your Home Energy Efficient
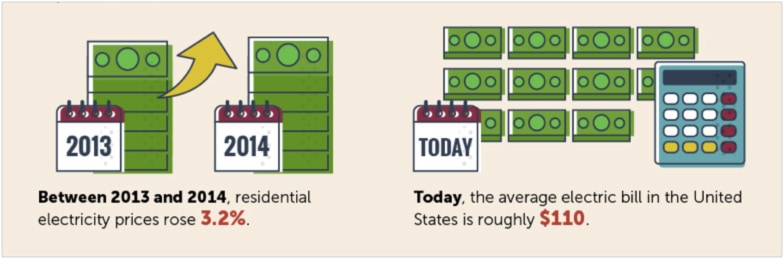
With video games, big-screen televisions, and high-tech smart appliances, today’s homes rely more heavily upon electricity than ever before. Accompanying this ever-climbing usage is over-consumption of precious resources and continually rising energy bills. In just one year, from 2013 to 2014, the average residential electricity price rose 3.2%, with the average monthly electric bill reaching roughly $110.
The good news is that we’re not powerless to turn things around. By making our homes more energy efficient, we can improve the comfort, conserve energy, and save money by lowering energy costs.
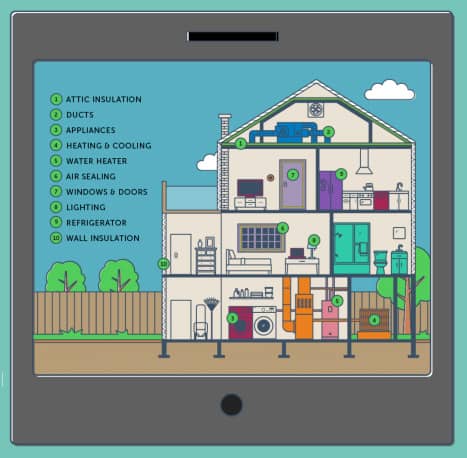
Energy Efficiency Measures
You can improve energy efficiency in many areas in your home, and it isn’t just about turning off the lights or unplugging unused appliances—although that does help!
Going energy efficient means looking at the whole picture, including…
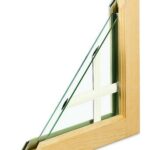
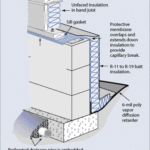
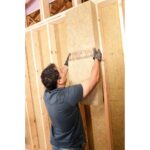
Insulation. Key to the efficiency of a house is its ability to retain expensively heated or cooled room air. If you spend a small fortune heating or air conditioning your home’s interior spaces, and that comfortably conditioned air just leaks out through poorly insulated walls, ceiling, and floors, you’re wasting a tremendous amount of energy and money.
Attic insulation is the most important, followed by walls and floors.
Ductwork. With central heating, a home’s furnace or air conditioner distributes conditioned air through a system of ductwork. But, because relatively short runs of ductwork are connected end-to-end to make-up that system, there is considerable opportunity for heat (or cooling) loss through leaks. In fact leaks and gaps in ductwork can waste up to 40% of the energy used in heating or cooling. Finding and fixing ductwork leaks is a great way to improve energy efficiency.
Appliances & devices. Old, outdated appliances waste electricity. New appliances, on the other hand, are designed to save energy. In fact, most new appliances with ENERGY STAR certification use about 50% less energy than their less-efficient counterparts—without any loss in functionality.
Efficient large appliances such as refrigerators or dryers can save up to $100 a year or more. And small savings add up. Energy-saving compact-fluorescent light bulbs, for example, can make a big impact on reducing your energy usage because you use them many hours every day. Here’s an interesting fact: If every U.S. household swapped just one light bulb for an energy-saving one, global warming pollution would decrease by over 90 billion pounds over the lifespan of the light bulbs.
Get Energy Incentives
Many programs are available to help homeowners make the transition to better energy efficiency. Most power companies provide special offers and rebates to help homeowners upgrade homes with energy conservation in mind. Many local and state governments also offer tax credits for similar upgrades.
But say you’ve made the decision to save energy and money by improving the energy efficiency of your home. How do you know which upgrades to make, and what incentives or rebates are available?
There’s An App For That!
When it comes to improving the energy usage of your home, not knowing exactly what your home needs to increase its energy efficiency can be confusing and stressful. You may not know how to get the biggest bang for your buck. Making more conscious purchasing decisions can definitely help, but you might be neglecting important strategies without a little guidance.
Luckily, there are apps available that allow you to learn more about your home, your energy consumption, and what you can do to make improvements. Homeselfe, for example, is a free do-it-yourself app that enables you to assess your home’s energy efficiency. For more about this, see Homeselfe.com.
In Conclusion
By making your home more energy efficient, you can increase its comfort, and make it more affordable to operate—and you can do your part in decreasing global energy usage. Furthermore, improving a home’s energy efficiency increases its value. Studies have shown that energy-smart homes garner higher prices when they’re sold. All of these benefits make energy efficiency a win-win.