Expert advice on how to rebuild an outdoor fire pit, with illustrated DIY instructions for laying it out, running gas and drain lines, and final construction.

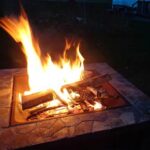
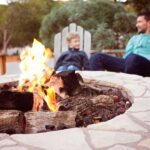
With its venerable stone facing and 16-inch-wide benches around it, this fire pit is a warm and inviting place to sit and chat. The pit is large enough so that people will not get too hot, and the stone surround absorbs and gently radiates warmth. A gas log lighter makes it easy to start a wood fire, or it could be used along with a set of faux ceramic logs. A drain allows the firebox to dry quickly after a rain. You can even cook over the open fire using a rotisserie kit.
The Design
The structure is supported by a reinforced concrete slab that is 10 inches thick around the perimeter and 6 inches thick in the middle. In an area with freezing winters, local codes may require a deeper footing that extends below the frost line, but most building departments will relax their requirements for a structure this small.
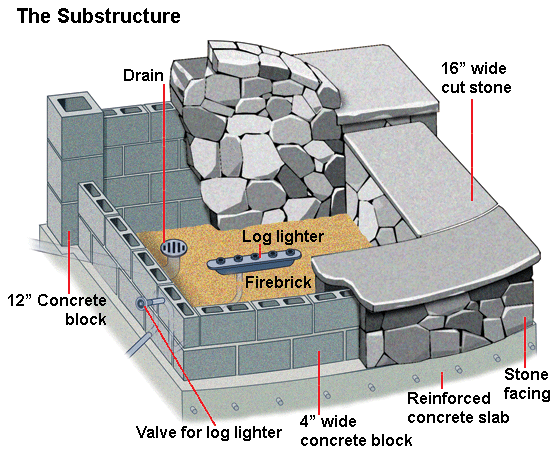
The fire pit is built of steel-reinforced concrete block, which is faced on both sides with natural stone. The walls are made of 4-inch-thick block, while the two pillars are made of 12-inch half block. This stone facing has un-mortared joints for a hand-stacked appearance. In an area with freezing winters, it is usually best to mortar joints to keep ice from forming in the joints and damaging the stones. You could also cover this structure with brick, tile, or stucco. If you want to use tile instead, build with 6-inch rather than 4-inch block. The benches and the two pillars are capped with stone slabs that were cut to fit.
Getting Ready
Build in a spot that is at least 5 feet from any combustible surface, such as a fence, an overhead structure, or tree branches. Choose a size and height that are comfortable. Most adults prefer to sit on a bench that is 16 to 17 inches high, but you may choose a different height. Buy the log lighter before starting construction and keep it nearby for reference as you work. Plan to place the lighter’s control at a spot that is convenient but which you can barricade if children are around.
How to Build It
Here are the steps to take:
- Lay Out for the Footing. When laying out for the footing, mark the ground taking into account the thickness of the stones on either side of the blocks; your concrete slab must support the stones. Use stakes and mason’s line to mark the square corners and use spray paint for the curved side.
- Excavate and Form the Footing. Dig a trench around the perimeter, following the layout lines carefully and creating sides that are as vertical as possible. Install wood forms around the excavation. The curve is gentle, so you can probably use 1-by-4 lumber rather than benderboard to form it. Check the forms for level and square. Remove the sod from the interior. Run a grid of string lines across the forms so you can check for depth as you dig the interior. When you reach the bottom of the excavation, scrape rather than bite into the soil.
- Run the Gas and Drain Lines. You could skip these amenities if you want to build fires from scratch and don’t mind mopping the pit after a rain. Otherwise, have a plumber run a gas line into the excavated area and up where it can run through a cell of a block. Install a valve, positioned so it will be on the outside of the stone wall. Continue running the gas pipe to the location of the log lighter. Also run 2-inch drainpipe into the area, poking up above the level of the firebricks (see step 6). You will cut this to height later.
- Pour the Footing. Pound 4-foot-long pieces of steel reinforcing bar perfectly vertically into the ground where they will run through the center of the 12-inch blocks. Also pound in rebar to run through a cell in each of the 4-inch blocks. Local codes may require that you also install steel reinforcing for the footing. Pour the footing and finish it with a magnesium or wood float. Allow the footing to cure for at least three days and keep it damp during that time.
- Build the Walls. Lay the concrete blocks following the instructions (to come). Where the blocks are laid in a curve, butt their inside corners together and pack mortar into the gaps around the outer face. Check the blocks for level as you work. Cut a hole for the gas pipe using a cold chisel or a drill with a carbide hole saw.
- Set the Firebricks, Caps, and Stone Facing. Lay the firebrick on the concrete inside the walls, using refractory mortar. Order slabs of stone cut to fit and set them in mortar on the walls and the pillar. Make sure the slabs are level in both directions. Apply stone facing as shown (to come).
- Finish. Use a hand saw to cut the drainpipe flush with the top of the firebricks. Install a grate onto the pipe. Though most of the walls are not mortared, you may want to apply a small amount around the gas valve to hold it firmly in place.
![]()
![]()