Learn to install an electronic thermostat with this expert DIY guide with step-by-step instructions and helpful diagrams.

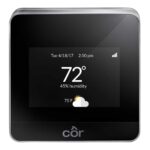
Programmable electronic thermostats help you save money and energy by allowing you to pre-program temperature settings for maximum efficiency during the day and night.


These can easily replace single-setting thermostat models, as they also work with standard central air and heating systems.
Following is how to replace your older thermostat with a programmable model. For information on buying the right thermostat, please see Home Thermostats Buying Guide.
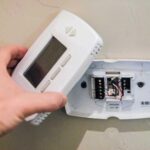
1. Remove the old thermostat. After making sure the power to the furnace is disconnected, remove the old thermostat’s cover, unscrewing any screws that fasten it in place.
2. Carefully disconnect each wire from the thermostat, and bend them slightly so they do not sink behind the base. Place a small label at the end of each wire, writing down the letter that is next to each wire’s terminal. Take a photo of the wires when they’re still in place for reference later.
3. Unscrew and remove the base of the thermostat from the wall, and hold onto the wires as you do so. Secure the wires around a paper clip, pen, or other similar object that will weigh them down enough so that they do not slip backwards into the hole in the wall.
4. Strip about half an inch of casing from the end of each wire if the wires are not already stripped. Rub the exposed copper with something made for cleaning metal, such as an emery cloth or a steel-wool sponge.
5. Detach the base from the cover of the new thermostat. Unfurl the pen or other object you have used as a weight from the wires, and loop them through the new base so that they appear under the terminal block. Reattach the weighted object to hold the wires in place.
6. Mount the new thermostat’s base. Stuff a few paper towels into the hole in the wall behind the thermostat. (This will protect your device from drafts.) Place the base against the wall, and put a level on top to ensure it is evenly in place. Using a pencil, mark the areas where you will set your screws. Proceed to screw the base to the wall, using regular screws for wood and anchor screws for drywall.

7. Connect the wires, following the instructions in your new thermostat’s manual and keeping wires separate from one another. If called for, install batteries into the device to provide a backup power supply. Attach the cover.
8. Turn the power back on, and program your thermostat according to the manufacturer’s instructions.
Here’s a helpful video that will walk you through the process of installing a new electronic thermostat: