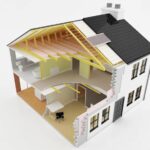
Expert advice on how to install fiberglass insulation, including methods for insulating walls, floors, ceilings, attics, and more. Includes cutting and fastening insulation, and insulating around obstacles.

Fiberglass insulation is energy efficient, affordable, easy to install, and readily available in a wide variety of sizes, types, and R-values. It can keep your home warm in winter and comfortably cool in summer.
And, fiberglass insulation can reduce your energy consumption, resulting in lower utility bills and contributing to a healthier planet.
However, it’s critically important that you install the insulation correctly and are compliant with all applicable building codes.
Here, we’ll look at several proven methods of installing fiberglass insulation, all of which are well within the capabilities of DIY homeowners.
Fiberglass Insulation Types
Following is a brief description of fiberglass insulation. For more, please see Home Insulation Buying Guide.
Fiberglass insulation, composed of finely spun glass fibers, is today’s most popular type of residential insulation. It is available in three forms: rolls, batts, and loose fill.
- Roll insulation comes in long, rolled-up strips. It can be custom-cut to fit existing spaces.
- Batt insulation is similar to roll insulation, except that it comes precut in ready-to-install strips. Batts are often easier and quicker to install because they greatly reduce the amount of cutting required.
- Loose-fill insulation, sometimes called blown-in insulation, consists of fluffy bits of fiberglass that are easily spread by hand or blown into place by a mechanical blower. Most home improvement stores rent insulation blowers.
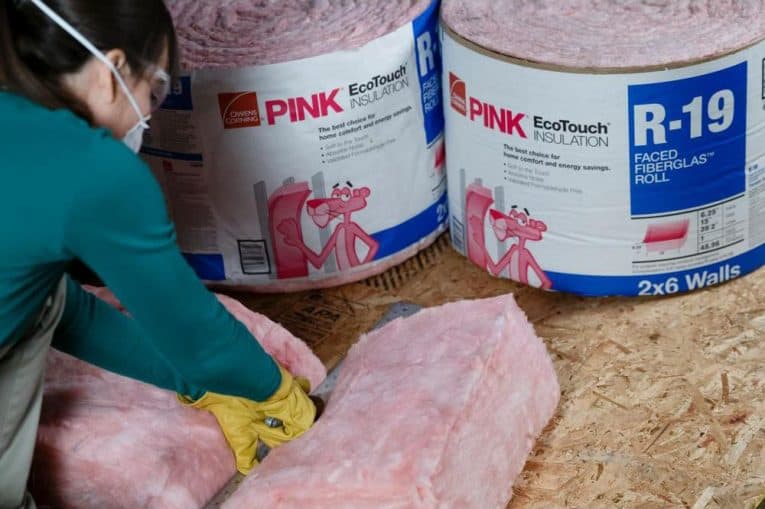
Roll and batt insulation are sold in two standard widths: 15 inches wide for fitting between wood framing placed 16 inches on center, and 23 inches wide for framing that’s 24 inches on center.

Both types are available faced with kraft paper or aluminum foil, which serve as a moisture barrier. They’re also available unfaced, meaning they have no moisture barrier. Unfaced insulation is often laid over existing insulation to increase home energy efficiency.
When you install faced insulation, the moisture barrier (paper or foil) must face toward the heated and cooled side of the room, so when insulating between wall studs, be sure the paper or foil moisture barrier faces toward the room.
Understanding R-Values
The R-value of insulation tells you its insulating value. It is a measure of thermal resistance that prevents the transfer of heat. The higher the R-value number, the thicker the insulation is and the better it insulates.
The exact R-value you need depends on several factors, including the size and construction of your home and the geographic area in which you live.
As a general rule, homes with 2-by-4 framed walls require R-13 insulation, and 2-by-6 framed walls require R-19 insulation. The standard R-value for insulating attics is between R-30 and R-40.
For more, see What You Should Know About Insulation.
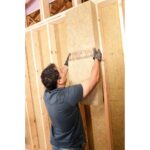
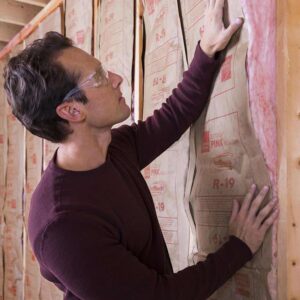
How to Insulate Walls
Walls are typically insulated with faced batt insulation because it comes precut into strips that fit standard 8-foot-tall walls. However, faced roll insulation is also perfectly acceptable. You’ll just have to cut the strips to length to fit between each stud.
Caution: Installing fiberglass insulation exposes you to fine glass fibers, which are irritating to the skin, eyes, and lungs. Whenever you handle the insulation, wear long pants, a long-sleeved shirt, tight-fitting eye goggles, gloves, and a dust mask, or better yet, a dual-cartridge respirator. To keep the itchy glass fibers from sticking to your neck, sprinkle baby powder onto the exposed skin around your shirt collar.
There are a few different ways to slice through insulation, but the simplest method for do-it-yourselfers is to use a straightedge and utility knife as shown in the photo below.
How to Cut Insulation
- Make a straightedge from a 1-by-6 or 1-by-8 board, cutting it 12 to 18 inches longer than the width of the insulation.
- Lay the insulation onto a scrap piece of plywood to protect the surface on which you’re working. Be sure the faced side—the side with the kraft paper or foil moisture barrier—is facing down.
- Measure the piece and add an extra inch for a tight fit, and then mark the insulation with a felt-tip marker.
- Set the straightedge across the insulation, aligning it with the cut mark.
- Kneel on one end of the straightedge and press down on the opposite end with your hand. Guide the utility knife along the straightedge to slice through the insulation. You may need to make two or three passes to cut all the way through.

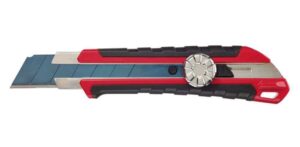

Utility Knife with Snap-Off Blade
PRO TIP: To cut through thick batts, use a utility knife that has a snap-off blade (shown here). Extend the blade out about 3 inches, then tighten the locking knob. The extra-long blade makes it much easier to slice through thick insulation. Just be careful with this super-sharp, long blade!
How to Fasten Insulation
- Gently press the insulation between two studs with its moisture barrier facing out toward the room. The energy efficiency of fiberglass insulation is based on its ability to trap air. Therefore, be careful not to compress the insulation too much—compression will reduce its insulating value.
- Unfold the mounting tab along each vertical edge of the batt.
- Flatten the tabs against the front edge of the stud on each side of the batt. Use a staple gun and ¼-inch staples to fasten the tabs to the edges of the studs, spacing the staples about 12 inches apart.
- Check to confirm that all staples are driven flat to the surface. If you find any protruding staples, tap them down with a Otherwise, they’ll interfere with the drywall installation. Some building codes require stapling the tabs to the inside flat sides of the studs, not to the narrow front edge. It’s wise to check with the building department in your town for the code-approved stapling method.
Insulating Around Obstacles
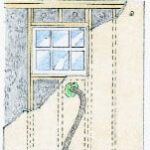
When you come across a wire or pipe, don’t simply lay the insulation over it. That creates an energy-wasting void behind the obstacle and compresses the insulation.
Instead, split the insulation, starting from whichever end of the insulation is closest to the obstacle. Then, slip the rear half of the insulation behind the wire or pipe and lay the other half in front of it, sandwiching the object.
There are two ways to deal with outlets, wall switches, and other electrical boxes.
The first method is cutting the insulation to fit snugly around the box.
However, most professional contractors use a better technique: Start by filling the void behind the box with either expanding foam sealant or a thick block of rigid polystyrene foam.
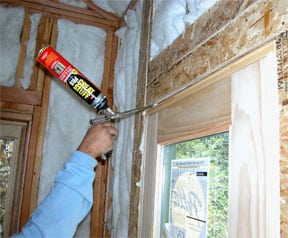
Notch the insulation to fit tightly around the box so that the insulation completely encases the box. Be careful not to get any insulation inside the electrical box.
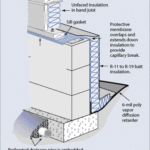
How to Insulate Under Floors
It’s important to insulate floors above basements, crawl spaces, and other unconditioned areas.
You can insulate between the floor joists using faced or unfaced fiberglass.
Rolls are preferred over batts because they come in longer lengths, which often allow you to run continuous strips across the entire length of the floor. Most floors are framed with 2-by-10s and require R-38 insulation.
- Cut the insulation to fit and gently press it up between the floor joists. If you’re using faced insulation, be sure the moisture barrier goes against the underside of the subfloor.
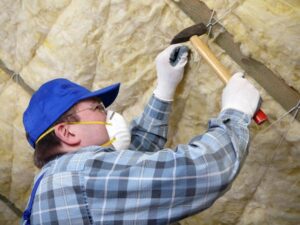
- Secure the insulation using stay wires. These are precut lengths of 14-gauge spring steel wire that are slightly longer than the space between the joists. Press the wires up against the insulation and the pointed ends of the wires will dig into the joists, holding the insulation in place. Space stay wires about two feet apart.
PRO TIP: As an alternative to stay wires, you can staple chicken wire or secure webbing to the underside of the floor joists to hold the insulation in place.
How to Insulate Attic Floors
A well-insulated attic floor blocks the upward movement of heated air in winter and cooled air in summer. As a result, your house feels more comfortable, and you’ll reduce your energy consumption.
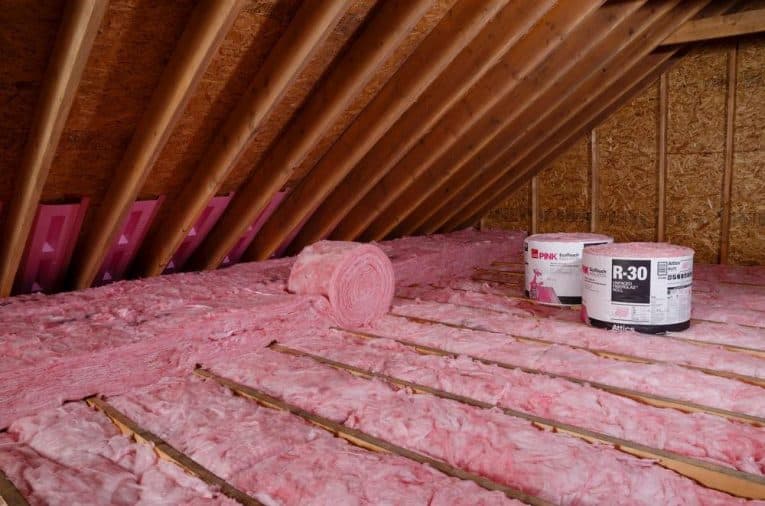
Insulating the attic consists of setting insulation between the floor joists, which are the ceiling joists of the room below.
However, you must complete an important step before installing any insulation: Use fireproof caulk to seal up cracks, holes, and openings around all penetrations, such as pipes, ducts, and cables. This prevents air from leaking through the ceiling and into the attic, and dramatically enhances the energy efficiency of the insulation.
If your attic floor has no insulation, install faced batts or faced rolls between each joist, with the moisture barrier facing down against the drywall or plaster ceiling below.
If there is already insulation between the joists, increase the R-value by installing unfaced roll insulation right on top. Run the unfaced strips perpendicular to the joists and butt each strip tightly together to form an airtight blanket of insulation. Or, top the existing insulation with a thick layer of loose-fill fiberglass, which you can spread by hand or with a mechanical blower.
Attic Insulation Details
Insulating attics is rather straightforward, but keep in mind these two important factors:
First, be careful when insulating around recessed light fixtures. If it’s a standard fixture, which typically has a cylindrical metal “can” projecting up into the attic, do not allow any insulation to contact the fixture. When the light is on, the recessed fixture gets very hot, and it could ignite the insulation. Maintain a clearance space of at least three inches around all sides of the fixture.
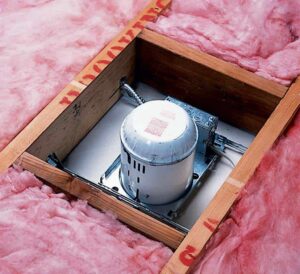
There is an exception to this rule. If the recessed light is an IC-rated fixture, then you can lay the insulation right over the top. (IC stands for insulation contact.) An IC-rated fixture has a large, square, superinsulated metal housing that protrudes into the attic.
If you’re not sure if your recessed fixtures are standard or IC-rated, contact an electrician or house inspector.
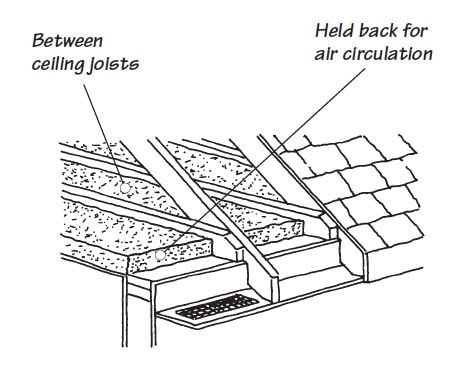
Finally, be careful not to stuff the insulation too deeply into the area along the eaves of the house. Doing so will block the soffit vents and prevent outside air from flowing into the attic and out a ridge or gable-end vent. If necessary, staple polystyrene attic-vent baffles between the roof rafters to prevent the insulation from covering the soffit vents.
Properly installed fiberglass insulation can keep your home well insulated and reduce your energy consumption for years to come.
Joe Truini is a home improvement expert who writes about a variety of topics related to carpentry and plumbing. Joe is also the author of numerous DIY books, including the best-selling Building a Shed. To learn more about choosing the right insulation and to see a wide variety of options, please visit The Home Depot website.
This article is editorial content that has been contributed to HomeTips at our request and is published for the benefit of our readers. We have not been compensated for its placement.