Step-by-step DIY instructions for mixing and spreading thinset mortar for a tile installation

Whether you’re tiling a floor or a countertop, first and foremost be sure to use thinset mortar that is latex- or polymer-fortified. Otherwise, it is likely to crack, resulting in loose tiles. You can buy “polymer-fortified” thinset mortar that you mix with water, or you can buy less expensive, unfortified thinset and add liquid latex as directed.
Use gray thinset for ceramic and stone tiles that are dark in color. However, many types of marble, glass, and other kinds of tiles are slightly translucent, so a gray mortar would slightly muddy them. For these tiles, use white thinset, which costs only a bit more.

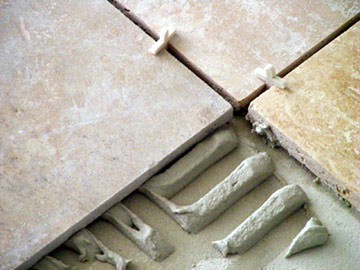
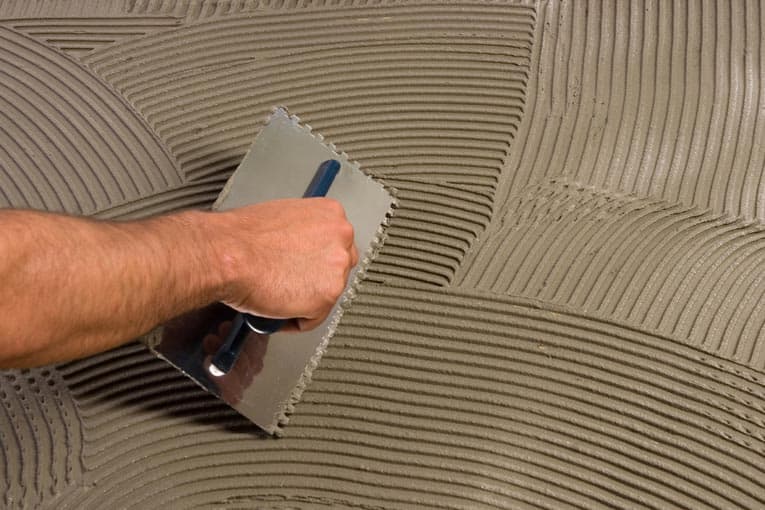
For most tile installations, a square-notched trowel with 1/4 inch notches produces grooves of the right thickness. For thicker tiles, larger notches are recommended.
If the mortar starts to harden while you work-either on the surface or in the bucket-discard it and mix a new batch.
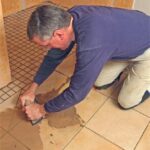
1. Mix the thinset mortar. If you are tiling a countertop or the floor of a small to medium-sized room, you can mix the mortar by hand.
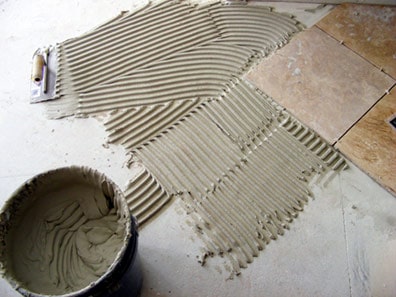
A square-notch trowel is the best tool for the job. Add a couple of inches of liquid to the bottom of a 5-gallon bucket and then pour in some powder.
Stir with the trowel, scraping the bottom and sides as you mix.
Add the liquid slowly-it’s easy to add too much. Keep mixing until you attain a consistency that holds its shape and is barely pourable.
Mixing by hand is somewhat strenuous work. You must stir a heavy concoction briskly for a few minutes.
If that is daunting, or if you have a large job, consider buying or renting a half-inch drill with a mixing paddle, which quickly and thoroughly mixes the mortar to a smooth consistency.
Hold the bucket between your feet as you spin the paddle. Work slowly at first to avoid slopping mortar out of the bucket. Then run the paddle faster until the mortar is smooth. When you pick the paddle up, the mortar should remain stuck for a few seconds before sliding off.
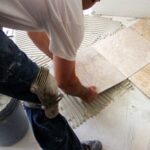
2. Spread the mortar. Dump or scoop the mortar onto the surface. Use the flat slide of the trowel to spread the mortar over an area about 3 feet square.
3. Comb the mortar. Using the notched side of the trowel, comb the mortar to produce an even surface. Use long strokes and hold the trowel at a consistent angle.
NEXT SEE: