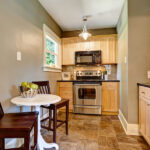
If you’d like to update and improve the look of your kitchen without the high costs associated with buying and installing new cabinets, then cabinet refacing or refinishing are decidedly simpler, less expensive approaches.

Cabinet refinishing involves removing the existing cabinet doors and drawer faces, sanding or stripping off the old finish, and applying a new paint or stain to the doors, drawer faces, and cabinets.
Cabinet refacing (or resurfacing) involves replacing the old doors and drawer faces with brand-new doors and drawer faces. The cabinets are then veneered and stained, or painted, to match the new components.
In both cases, the existing cabinets remain intact. As a result, cabinet refinishing or refacing are more affordable, quicker, and less disruptive than replacing cabinets.

Kitchen Evaluation
Before deciding to either refinish or reface the cabinets, make sure your cabinets are suitable for either of these upgrade options. Here’s a quick checklist to determine whether your cabinets are a good candidate for refinishing or refacing.
For refinishing, all components must be in good condition, including the doors, drawer faces, and cabinets. For refacing, it’s okay if the doors and drawer faces are damaged or outdated because they’ll be replaced.
No matter which option you choose, the cabinets and drawer boxes will remain when refinishing or refacing, so they must be in sound condition and good working order. Use this checklist to determine if your cabinets are a good candidate for refinishing or refacing.
- Inspect the inside of each cabinet for signs of structural damage, such as cracked side panels or loose joints. Poke around inside the cabinet with an awl or pocketknife. If you discover any soft, spongy areas, that could be an indication of wood rot or water damage.
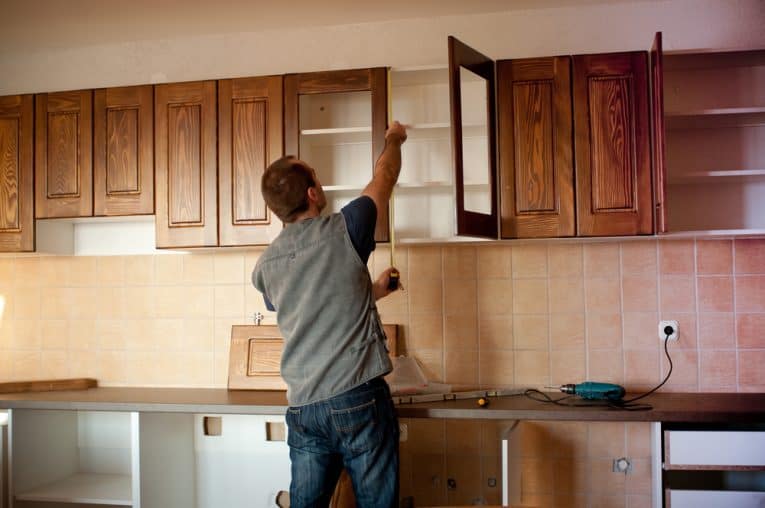
- Be sure the upper cabinets are securely fastened to the walls and to each other.
- Check base cabinets for water damage, too, especially under the sink. The bottom of the cabinets should be firm and flat, not sagging or dislodged.
- The face frames, if any, must be firmly attached to the cabinets, and their edges and corners should be smooth and flat. Small cracks and holes can be filled with wood putty, but face frames that are split in two must be replaced.
- Be sure that all fixed shelves are securely attached and not cracked, loose, or warped.
- Check each drawer to ensure it rolls smoothly, opens fully and closes completely. Remove the drawers from the cabinets and inspect the structural integrity of each one. The corner joints should be tight and strong. The drawer bottoms must be secured within the drawer box and not cracked or sagging badly.
- The drawer slides—whether made of metal or wood—must be firmly attached and in sound condition. Check the slides for loose or missing fasteners, and damaged or worn-out parts.
Once you’ve assessed your cabinets and determined they’re in good shape, you can consider these two cabinet updating options.
Cabinet Refinishing
The amount of time and effort it takes to refinish kitchen cabinets is often determined by two key factors: Whether the new finish will be stain or paint and the complexity of the design on the doors
Staining requires more prep work than painting, especially if you’re changing the stain color. Door style matters because raised-panel Colonial-style doors with arched upper rails take longer to refinish than simple, flat-panel Shaker-style doors.
To Stain Cabinets:
- Remove the cabinet doors and unscrew the drawer faces from the drawer boxes. If the drawer faces are an integral part of the drawer box, then pull the entire drawer from the cabinet.
- Remove all the hardware, including knobs, pulls, and hinges.
- Clean the doors, drawer faces, and cabinets with a solution of one part trisodium phosphate (TSP) and four parts water. Pour the solution into a planter mister and spray it onto the surfaces. Scrub with a scouring sponge, then wipe the surfaces dry.
- Determine how much of the old finish you need to remove. If you’re re-staining the cabinets, then you must sand the doors, drawer faces, and cabinets down to bare wood. (For the cabinets, you only need to sand the face frames and any exposed end panels.)
- Start with 100-grit sandpaper then sand again with progressively finer 120- and 150-grit sandpaper. The best tools for sanding are an orbital finishing sander, a random-orbit sander, a hand-sanding block, and a sanding sponge, which conforms to rounded edges and other irregular shapes. An electric contour or detail sander, which has interchangeable pads, can also prove useful, but isn’t necessary. You can also use a chemical stripper to remove the old finish, but sanding is less toxic. If you’re using a chemical stripper, be sure to wear gloves, work boots, long sleeves, and protective eyewear.
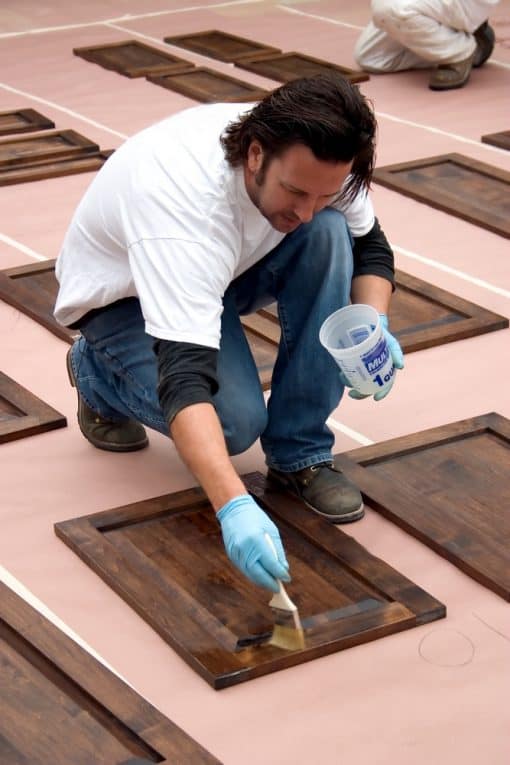
- Once the wood is sanded smooth, rub or brush on the stain. Allow it to soak into the wood for 10 minutes or so, then—and this is important—wipe off the excess stain with a clean cotton cloth.
- If the color is too light, immediately apply a second coat, but remember to wipe off any excess. Repeat until you achieve the desired darkness. Allow the stain to dry overnight.
- Once the stain is dry, use a foam brush to apply a coat of satin polyurethane varnish. Let the first coat dry, then sand lightly with 220-grit sandpaper, wipe off the sanding dust, and apply a second coat of varnish.
- Reinstall the hinges and hang the doors back onto the cabinets. You can also reinstall the old knobs and pulls, but for a fresh, updated look, consider replacing them with new hardware.
To Paint Cabinets:
- Remove all hardware and unscrew the doors and drawer faces.
- Scrub all the surfaces with the diluted TSP solution, as mentioned above.
- Sand the doors, drawer faces, and cabinet face frames and end panels. However, for painting, you don’t have to sand down to bare wood. In most cases, you only need to sand away loose, dirty paint. If you do sand down to bare wood in some areas, that’s fine—just be sure to “feather” the paint around the bare spot to create a smooth transition with the surrounding painted surface.
- Wipe away the sanding dust with a tack rag or damp cloth, then apply a high-quality primer/sealer.
- Allow the primer to dry.
- Brush or spray on a coat of 100 percent acrylic latex semi-gloss paint.
- Wait for the paint to thoroughly dry, then sand lightly with 220-grit sandpaper, wipe off the sanding dust, and apply a second coat of paint.
For more, see How to Paint Cabinets.
While experienced DIYers may relish tackling their own cabinet refinishing project, others may want help. Most home improvement stores offer professional cabinet refinishing services, which include a free in-home consultation and written price quote.
Cabinet Refacing
As mentioned earlier, cabinet refacing consists of installing all new doors and drawer faces. Here’s how to get started:
- Go shopping. If you’re planning to install the new components yourself, you can buy them from a local cabinetmaker or an online retailer. For professional design help and installation, visit the kitchen showroom of your local home improvement store. New cabinet doors and drawer faces are available in dozens of sizes, styles, colors, and woods in both stain and paint finishes.
- Write down the size and number of each door and drawer face and select the style, color, and finish you’d like. The items usually ship in 2 to 3 weeks.
- If you choose a stained finish, the existing cabinet face frames and exposed end panels will be refaced with wood veneer then stained to match the new doors and drawer faces. If you install painted doors and drawers, the face frames and end panels will be painted to match. Be sure to clean and sand the surfaces prior to veneering or painting.
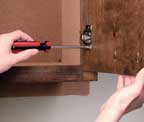
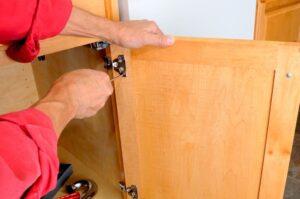
- To hang the new doors, start by screwing each hinge mounting plate to the inside of the cabinet.
- Screw the hinges into the pre-bored holes in the back of the door.
- Hold the door up to the cabinet and align the door hinges with the mounting plates. Secure each hinge with the provided screws. Adjust the hinges so that the door hangs plumb and level with an even gap all around. Note that cabinet refacing packages typically include new door hinges, but not doorknobs and drawer pulls, which you’ll have to purchase separately.
- Fasten the drawer faces by driving screws through from the inside of the drawer box. Be sure the screws aren’t too long or they’ll poke through the new drawer face.

For an average-size kitchen, professional cabinet refinishing will cost between $2,000 and $4,000. If you decide to refinish the cabinets yourself, you’ll spend about $200 on materials, plus the cost of any necessary tools and time spent working on the project.
Professional cabinet refacing for an average-size kitchen typically costs $8,000 to $12,000, although prices fluctuate depending on the door style and wood species. While refinishing or refacing cabinets isn’t cheap, it’s important to remember that a total kitchen remodel with all-new cabinets can cost $20,000 to $40,000.
Cabinet refinishing is a good—and affordable—option if you want to freshen up and modernize your kitchen. If you want to completely transform the look of your kitchen, then cabinet refacing is the better choice.
About the Author
Joseph Truini is a home-improvement expert and the author of the best-selling book “Building a Shed” who writes online for The Home Depot. He provides great how-to advice on upgrading the different spaces in your house. For more kitchen remodel products and information, click here.
This article is editorial content that has been contributed to HomeTips at our request and is published for the benefit of our readers. We have not been compensated for its placement.