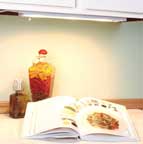
In older kitchens, most of the light comes from a single overhead fixture, supplemented by daylight from one or more windows. However, the strength of natural light is subject to the vagaries of time of day, sun exposure, season, and weather.

As a result, lighting is often scant when and where you really need it, particularly on countertops. The way to solve this problem is to mount lighting to the underside of overhead cabinets.
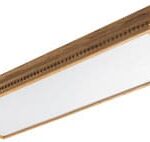
Under-cabinet lighting is available in a couple of varieties: fluorescent or halogen strips and individual “puck”-style halogen fixtures.
- How to Dim LED Lights
- Understanding Color Temperature in Home Lighting
- Light Up Your Look—Stylish Vanity Mirrors with Lighting
- Smart Home Upgrade: The Best Motion Sensor Lights for Security and Convenience
- Dining Room Lighting Delights—Illuminate Your Space with Style
- Stylish Floor Lamps—Light Up Your Living Room
Fluorescent fixtures are less expensive than halogen, but halogen provides a light that more closely approximates sunlight. Both types of strips are extremely easy to install and can either plug into a receptacle or be wired to a wall switch.
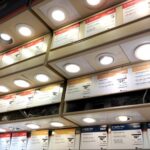
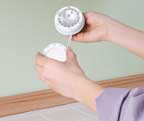
Where some under-cabinet areas do not need an entire strip of lights, small, individual puck-shaped halogen lights are ideal. Puck lights are available in packs of two or more and can be mounted exactly where you need them, then easily wired together with the snap-together fittings provided in the kit. The last puck in the string is connected to a low-voltage transformer, which is plugged into a nearby receptacle.
Here’s how to install a strip of under-cabinet lights:
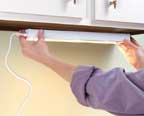
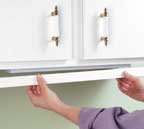
1. If your upper cabinets are wide or your base cabinets are narrow, plug in and turn on the light strip, and then move it around under the cabinet to determine its best location.
Most under-cabinet light manufacturers recommend installing a strip as close to the front of the cabinet as possible for optimal coverage of the area below. Keep in mind that the light’s cord will need to be attached to the underside of the cabinets and routed to an electrical outlet.
You may also need to make a valance if the light is very visible at eye level.
2. Once you’ve identified the ideal place for the strip, follow the manufacturer’s directions for marking the holes for the mounting hardware. Some manufacturers provide a paper template for this; others simply direct you to hold the strip in place and mark through the mounting holes onto the underside of the cabinet.
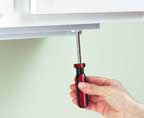
3. After you’ve marked the locations for the mounting screws (provided with the light strip), drill pilot holes, and then drive the screws into the bottom of the cabinet. (Depending on the thickness of the cabinet bottom, you may need to add a washer or two to the mounting screws to prevent them from poking up through the cabinet. Alternatively, you can use shorter screws.) Install the strip and plug it in. Fluorescent fixtures can plug right into a receptacle; halogen fixtures usually come with a low-voltage transformer that plugs into a receptacle.
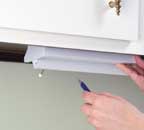
4. Finally, check to see if the light strip is visible at eye level. If it is, make a valance from a 1/2-inch wood strip 1 to 2 inches wide and the length of the fixture. Finish it to match your cabinetry, and then glue and nail or screw the valance to the bottom front edge of the cabinet. Not only will a valance hide the fixture, but it will also prevent glare.
Get a Pre-Screened Local Lighting Installation Pro
![]()
![]()