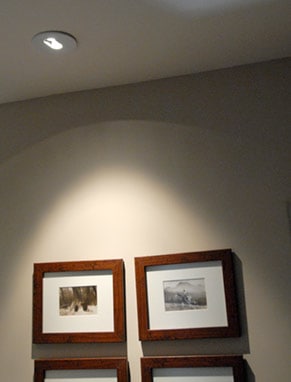
Recessed lighting can be a subtle yet effective way to add ambient lighting to a room or to highlight specific portions of it. Relatively inexpensive and easy to install, recessed lighting is an option that should always be considered when choosing to add light to a living space.
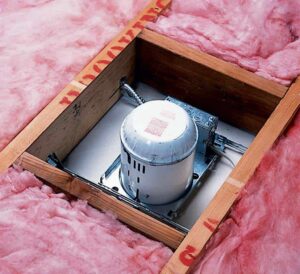
Recessed downlights are usually pre-wired and grounded to their housing boxes. Older-style downlights, however, may require wiring into a junction box attached to a ceiling joist. Keep in mind that downlights produce a lot of heat. To compensate for this, you must:
• Buy an IC-rated fixture for a direct-contact installation.
• Remove insulation within 3 inches of the fixture.
• Use special low-clearance downlights if the clearance above the fixture is tight.
• Keep combustible materials 1/2 inch or more from the fixture (with the exception of joists or other blocking used for support).
- How to Dim LED Lights
- Understanding Color Temperature in Home Lighting
- Light Up Your Look—Stylish Vanity Mirrors with Lighting
- Smart Home Upgrade: The Best Motion Sensor Lights for Security and Convenience
- Dining Room Lighting Delights—Illuminate Your Space with Style
- Stylish Floor Lamps—Light Up Your Living Room
As always whenever performing electrical work, make sure the power supply is turned off to the area. Use a circuit tester (also called a neon tester) to confirm that the circuit is dead.
Installing a New-Work Downlight with a Box
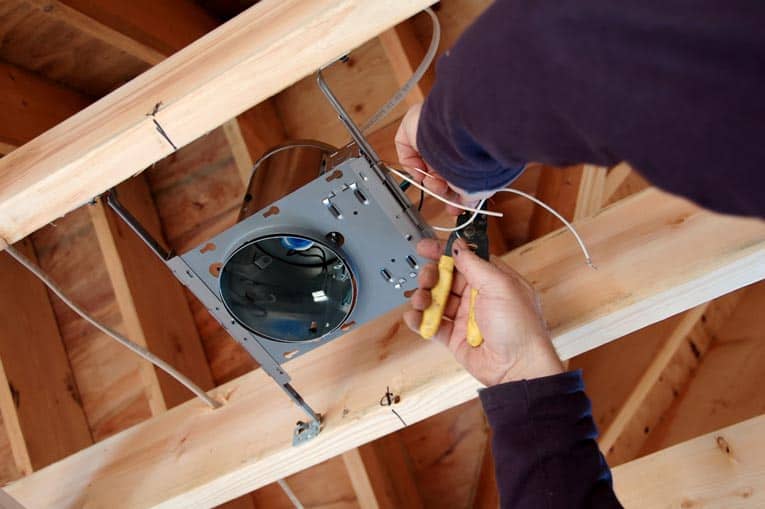
Installing a standard new-work recessed downlight fixture is a simple process in new construction. This kind of fixture easily fastens to ceiling joists with an adjustable hanger bar. Once the ceiling is in place, fixture trim is added as the finishing touch.
Note: Do not allow insulation to crowd the housing of the recessed light. To prevent heat build-up—and possible fire—insulation must be held back as shown in the photograph.
Please check out this video, put out by Halo, a leading manufacturer of recessed lights:
Wiring an Old-Work (Retrofit) Downlight
If you don’t have access from above the ceiling, you will have to use an old-work retrofit downlight housing installed from below. Before beginning installation, you will need to locate a space between two ceiling joists. Once you have, here is how to install the downlight:
- Make the connections. Turn off the power to the circuit that will serve the new fixture. Then, cut an access hole in the ceiling (use the paper template included with the fixture), and remove the cover plate on the mounting box. Use a voltage tester to be sure the power is off. Next, splice the fixture wires to the incoming circuit wires—black to black, white to white, green or bare fixture wire to the grounding wire for the circuit. Replace the cover plate on the mounting box.
- Slip the fixture into position. Gently maneuver the fixture, junction box first, into the access hole in the ceiling. Different fixtures employ different attachment methods; consult the directions included with the particular fixture you have chosen.
- Add the trim. Insert a lightbulb into the fixture socket and add the light fixture’s trim; this trim not only hides the rough edges around the hole in the ceiling but also helps diffuse the light coming out of the fixture.
Recessed Lights Go Off & On
To minimize the risk of fire, recessed lights have a thermal protector that shuts them off when they get too hot. Be sure the bulb doesn’t exceed the maximum wattage indicated inside the metal housing.
And check whether a reflector-type bulb is required. If the bulb is the proper size and type, loosen the wing nuts or screws that adjust the bulb-holder’s position inside the metal housing, slide the bulb unit down a little, and then re-tighten.
If possible, be sure insulation inside the ceiling is held back away from the fixture at least 3 inches. A flicker or spark indicates faulty wiring or a defective switch.
If you’re competent at handling electrical problems, shut off the power to the circuit and check the wire connections at the switch and fixture. Otherwise, call an electrician.





 Don Vandervort writes or edits every article at HomeTips. Don has:
