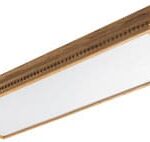
Inside a fluorescent light, electricity is delivered to a ballast, which sends a spark through the mercury-vapor-filled tube (or bulb), creating light by activating phosphors that coat the inside of the tube. If any of the components are faulty, the light won’t work right. Once you pinpoint the problem, most fixes are very easy. Remember to turn off the power first!

Replacing a Fluorescent Ballast
Replacing a Fluorescent Light Starter
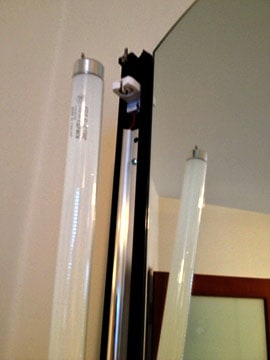
An old tube blinks off and on just before it dies; repairs are often simply a matter of replacing it. This problem may also occur because of poor contact between the pins at the ends of a tube and the tube holders. If the pins are bent, use needle-nose pliers to straighten them. Clean the pins and socket contacts with fine sandpaper.
Though gray bands at the ends of tubes are normal, black bands indicate that the tube needs to be replaced. If only one end is dark, turn the bulb end-for-end. If the tube is new and these fixes don’t work, you may have to replace the starter or ballast.

Some fixtures (“A-rated”) are quieter than others, but most fluorescent lights have a slight hum. If the sound seems too loud–or if you can smell electrical burning–shut off the power. The ballast is probably either the wrong type, improperly installed, or defective. Replace it or call an electrician.
Brand new tubes tend to flicker, as do bulbs that are cold. If an old tube still flickers after it has had a chance to warm up (or after you’ve warmed up the room), rotate it a couple of times in the tube holders. Try cleaning the tube”s end pins. If it still doesn’t work, replace it.
If only the ends of the tube glow, either the starter or the ballast is defective. Replace the starter, then the ballast.
Replacing a Fluorescent Ballast
You can replace a ballast or tube holder if you’re fairly familiar with wiring.
1 Turn off the power to the circuit.
2 Remove the tube and the cover plate that conceals the workings.
3 Disconnect or cut the wires to the tube holder or ballast and remove.
4 Strip 1/2 inch of insulation from the ends of the wires.
5 Mount the component and connect the wires with wire nuts.
6 Re-place the cover and tube.
7 Turn the circuit back on.
8 Turn the switch on.
Replacing a Fluorescent Light Starter
Although newer fluorescent fixtures have built-in starters or no starters at all, most older lights have an easy-to-change, visible starter. It is a small, silvery cylinder that plugs into one of the tube holders.
1 Shut off the switch.
2 Remove the tube.
3 Give the starter a quarter turn in a clockwise direction, and pull it out.
4 Plug in a new starter, giving it a quarter turn counterclockwise.
5 Re-place the tube.
6 Turn the switch on.