Once the trenches are dug and the control valves wired, installation involves measuring, cutting, and gluing–tedious but not difficult work. The pipe should be laid as flat as possible at the bottom of the trench, though a little unevenness won’t be a problem. As you work, keep the insides of the pipes as dirt-free as possible.
When carrying lengths of PVC pipe, don’t knock them together or drop them. The pipe can break–or worse, develop a hairline crack that you won’t notice until it bursts under normal water pressure when the system is running.
From the control valves, run the pipes for each circuit. For long, straight runs, you can use pipes with straight and flared ends rather than connecting the lengths with couplers.
If you live in a cold-winter climate, install drain valves along the pipe at the lowest points in the run. Install the valves pointing downward and line the area below and around them with gravel. The valves will open when the line pressure drops below about 3 psi.
Carefully measure and cut the pipes to run between the fittings at the riser locations, at the bends, and at all other locations as needed. Allow enough length so that the pipe ends fit well inside the fittings.
You can lay out all the pipe lengths and fittings first and then go back to make the connections, or you can connect as you go along. Either way, check the location of each fitting against the irrigation layout as you work. Install PVC pipe according to the steps shown here.
1Cut, position, and apply primer to the pipes
Use PVC ratcheting cutters for clean cuts. A hacksaw can leave plastic shards inside the pipe that can clog the system. Take care to make sure the cuts are straight.
Prop the ends of pipe on spare lengths of PVC set across the trench. Propping up the pipes not only makes them easier to work with but keeps dirt out of them. Be sure both pipe ends are clean.
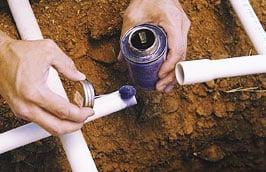
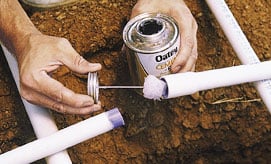
Before gluing PVC, spread a layer of PVC primer (often called purple primer) around the end of the pipe, as shown at right, and also inside the flared end down to the shoulder. The primer should dry in a minute or so.
2Apply solvent cement
Once the primer is dry, it’s time for PVC solvent cement.Work quickly, as the cement sets within seconds. With a soft applicator (one is normally supplied with the container), apply the cement liberally to the pipe, as shown at left, and then more lightly to the flared end.
3Secure the connection
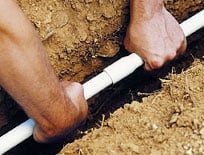
Quickly slip the pieces together and then immediately twist them partway around to make the connection secure. Hold the pipes for a few seconds while the cement sets, as shown at right.
Wipe of excess cement with a damp rag. Wait at least 6 hours before running water through the pipes, and even longer under cold, dam conditions.



 Don Vandervort writes or edits every article at HomeTips. Don has:

