Storm doors come with full instructions and a template for mounting the hardware. Major manufacturers offer installation information and troubleshooting by phone as well as online.

There are two mistakes you can make that will be difficult to fix. The first can occur when you are cutting vertical mounting frames. These must fit your openings so do not cut them too short. Also, when you are drilling holes to fit hardware on a wood-core storm door, be precise. Most manufacturers supply a template to make this job easier. Take your time, and follow the instructions.
Step-by-Step Storm Door Installation
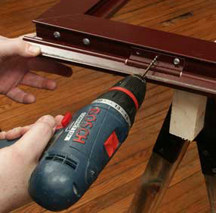
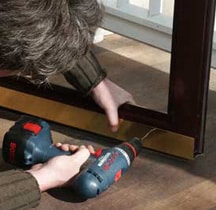
1 Place the door interior side up, and position the vertical hinge mounting frame on the hinge side so that the top of the track extends beyond the door by 3/32 inch. Then drive one mounting screw through the hinge into the pre-drilled hole in the door. Line up the hinge holes along the edge of the door. Next, center-punch and drill a pilot hole for each remaining screw, and drive in the screws.

2 Measure the height of the opening where the door will hang, both at the face of the jamb and at the stop. Turn over the door, and transfer these dimensions onto the hinge mounting frame. Using a hacksaw, cut the bottom of the hinge mounting frame at the angle that will fit your door’s sill. If the bottom of your door includes a sweep, temporarily install it on the door. (Adjust and screw it tight after the door is hung.)

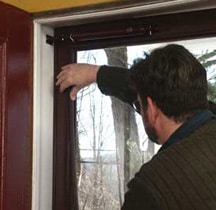
3 With a helper, stand the door in the opening, position it, and screw it in place. With the door open, place the top mounting frame on the hinge mounting frame. Then close the door, adjust the top mounting frame’s position, and screw it in place. Then mount the latch-side frame using the same methods.
4 Close the door, adjust the sweep so that it presses lightly against the sill, and screw it in place. Install the handle hardware according to the directions provided by the manufacturer.
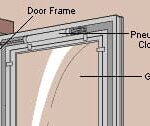
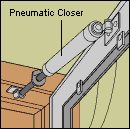
5 Screw the door closer’s bracket to the top of the jamb. The type shown is spaced 1 inch down from the top of the jamb and 1/4 inch back from the hinge side. Assemble the closer, attach it to the jamb bracket, and close the door. Holding the closer level, place the bracket on the door and mark for the screws. Pre-drill the screw holes, and attach the closer. If the door has a closer at the bottom, attach it the same way.

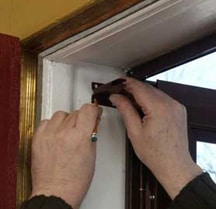
6 Close and latch the door, and then install the screen or glass panels. The system shown utilizes retainer strips. Hold the glass or screen in place, and then install the top retainer, horizontal retainers, and vertical retainer.
![]()
![]()