When measuring trim boards for cutting, even the pros make occasional mistakes of the “d’oh!” variety. So take the time to measure carefully and recheck your measurement to be sure you will not waste a good piece of molding. Following are some measuring tips. (For installing crown molding, which calls for specific techniques, see How to Install Crown Molding.)

Expert advice on how to accurately measure interior trim during installation, from choosing and using the right measuring tools to using a story pole.

Checking Your Trim Tools
First, test to make sure your measuring tools are accurate. If you are working with a helper, take a measurement with one tool while your helper measures with another and compare your results.
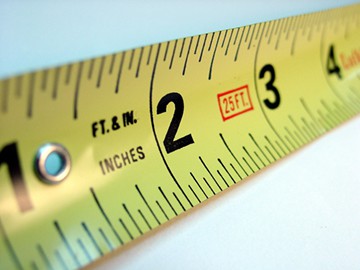
A tape measure’s hook slides back and forth about 1/8 inch-the exact thickness of the hook-so that you get the same measurement whether hooking it or butting it. Test it on a scrap piece to make sure the measurement is the same both ways.
A level often goes out of alignment. Place your level on a flat horizontal surface, note the position of the bubble, and then flip the level over. If the bubble is not in precisely the same position, it may be time for a new level.
Otherwise, you will need to flip the level every time you measure and make a line or hold the board in a midway position. Perform the same test while holding the level against a vertical surface to make sure you are getting accurate plumb lines.
Framing squares rarely go out of square, but they do get bent, which can throw off your measurements. Test yours against two factory edges of a piece of plywood. A solid angle square (also called a speed square) is almost always reliable.
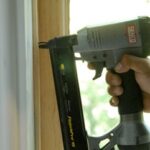
Keep in mind that a power miter saw or circular saw will typically cut a line (or kerf) about 1/8 inch wide. A hand backsaw will probably have a narrower kerf.
Good Trim Installation Habits
Work methodically to ensure that you measure and mark each board in the same way. When using a tape measure, call out to your helper (or softly to yourself) the measurements.
If you use a carpenter’s pencil, take the time to sharpen it cleanly so you can draw thin lines. Many trim carpenters prefer to use a standard pencil; others mark with a knife instead of a pencil.
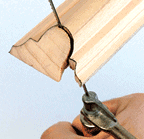
Draw a V rather than a single line, with the point of the V indicating the precise location for the cut. Then use a square to draw a line through the V, and mark the waste side with an X to make sure you cut the correct side of the line (you want to cut so the line remains on the trim piece).
Dealing with Sixteenths
Counting up sixteenths of an inch is tedious and often results in mistakes, so, for instance, if the measurement is 14 3/16 inches, some carpenters say “14 and a quarter minus,” meaning 1/16 short of 14 1/4. Others say “14 and a quarter short.”
Still others say “14 and a quarter; cut the line,” meaning you should cut off the entire width of the line (which tends to be about 1/8 inch wide). To indicate 14 5/16, use “14 and a quarter plus,” or “strong,” or “leave the line.”
When marking for a cut, use the simplest method with the fewest possibilities for error. Often the best option is to hold a piece in place against the wall and mark it rather than use a tape measure. This method often works when one end of the piece ends at an outside corner, but this will not work when you are measuring from inside corner to inside corner.
Before holding the piece in place, check to make sure the end you will not be cutting is square as you cannot always trust boards to come square-cut from the factory.
When measuring for a door casing, scribe a line along the edge of the jamb indicating the amount of the jamb edge you want to reveal-typically, 1/4 or 3/8 inch. Hold the vertical casing pieces in place and use the scribed line to mark them. Once the two verticals are in place, hold the horizontal in place against the verticals to mark it.
Using a Story Pole
When installing a chair rail or other molding around the middle of a room’s walls, you want all the pieces at exactly the same height. You can do this by drawing level lines, but that’s time consuming. As long as your floors are reasonably level, using a story pole is easier.

You can make a story pole out of a piece of lumber or trim. Mark it with the height of the moldings you want to install. Hold the pole in position and mark the wall at various points or mark either end of a wall and snap a chalk line between the marks.
Hooking a Measuring Tape
If a piece is cut at an angle on the end you are not cutting, it will be difficult to hook the tape measure to it. Instead, lay the trim piece along a 1-by board, with its end even with the end of the 1-by, and hook the tape to the 1-by instead.

![]()
![]()