This step-by-step DIY guide will teach you how to install an under-sink water filter to improve the taste and quality of your drinking water. Includes installing the sink-top dispenser.

Installing the type of water-treatment device that utilizes filter cartridges under the sink and delivers clean water through a sink-top spout is a relatively easy do-it-yourself project. Doing this job involves simply mounting the filter unit in the cabinet and connecting plastic tubing to your existing cold water pipes using special saddle valves.
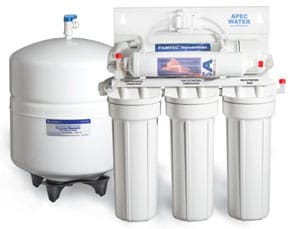
Several different types of water filters are sold, including dual-cartridge devices like the one shown below and reverse-osmosis systems that work basically the same way but also utilize an under-sink storage tank that holds clean water and is connected to the sink’s trap because it discharges wastewater.
Neither type requires electrical power.

Filters inside cartridge-based water filters must be changed periodically—typically twice a year. Changes in the odor, taste, and/or flow of the water are sure signs that the filter cartridges need to be replaced.
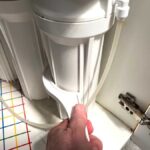
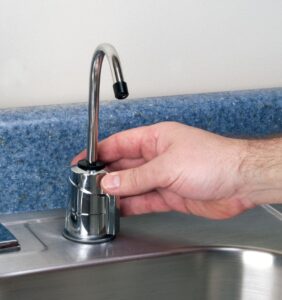
1. Mount the dispenser. Most dispensers are designed to fit in the extra hole in a sink top, as shown, but if this hole is already occupied, you’ll have to drill another in the sink or countertop. Follow the manufacturer’s directions for the location and size of the hole. Drill only into stainless-steel sinks; if you have an all-porcelain sink, drill for the dispenser through the countertop.
To drill a hole in stainless steel sink, buy a titanium graduated step bit and a small bottle of milling oil, and follow the instructions in the following video.
To drill granite, marble, porcelain, ceramic or terracotta tiles using a diamond-ground tip geometry drill bit, please refer to the following video.
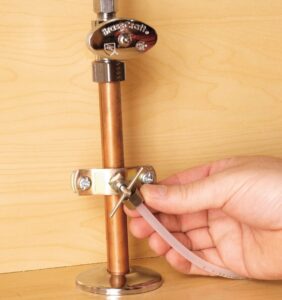
2. Install a saddle valve. Tap into the existing cold water supply line via a saddle valve. To install a saddle valve, first turn off the water supply and then open the faucet to drain the line.
Following the manufacturer’s directions, drill a small hole in the supply line. Turn the handle on the valve to expose the lance that’s designed to puncture the pipe, and position the valve over the pipe so that the lance fits in the hole. Attach the back plate of the valve and tighten the nuts to lock it in place, and then screw in the lance.
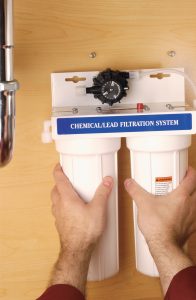
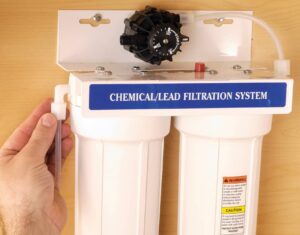
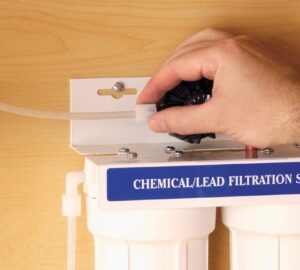
3. Secure the cartridge filtration unit. Position the cartridge filtration unit roughly between the cold water line and the dispenser. Be sure to leave the specified clearance between the system and the cabinet bottom to allow for cartridge replacement. Secure the device to the cabinet back or wall with the screws provided.
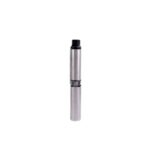
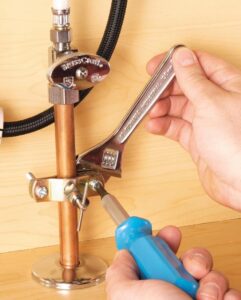
4. Hook up the device. Start by cutting a length of plastic tubing to reach between the saddle valve and the system. Make it short enough not to kink, but long enough to allow for installing a new compression fitting (the connector shown at the end of the tubing) later, if needed. Press the tubing into the compression fitting and thread it onto the saddle valve; tighten with an adjustable wrench.
5. Connect the filtration unit to the water supply line. Insert the opposite end of the tubing into another compression fitting and thread it onto the inlet port of the filtration unit. Tighten the nut with your hand, and then make another turn or turn and a half with an adjustable wrench.
6. Connect the water dispenser. Finally, cut a piece of tubing to run from the outlet port of the system to the water dispenser. Insert compression fittings on both ends and thread the nuts onto the dispenser and the system. Turn on the water supply and open the water dispenser. Let the water run for about five minutes to flush out any carbon particles or air pockets. Most manufacturers recommend allowing the water to run for about 20 seconds before using.
NEXT SEE:
• Water Filters Buying Guide
• Is Your Drinking Water Safe?
• Kitchen Instant Hot Cold Water Dispenser Buying Guide
• How to Solve Water Pressure Problems