Step-by-step directions for replacing the pre-filter cartridges inside of a multi-stage RO water filter.

Do you have a reverse-osmosis (RO) water filter that provides sparkling clean, filtered water at your kitchen sink? If so, you know the benefits of this type of filter—almost free, super-clean water at the flip of a lever. But when was the last time you maintained your filter? If it’s been more than a few months, your water may not be as clean as you think. It’s time to replace your reverse osmosis pre-filters.
How Multi-Stage Filters Work
The type of water filter that utilizes an under-sink set of tall canisters containing filter cartridges is known as a multi-stage reverse osmosis RO system filter. With one of these, water travels through the water supply line to pre-filters—a sediment filter and carbon filters—that remove sediment and chlorine. Then the water is forced through an RO membrane to remove minute solids. And finally, the water passes through a “total contaminant removal” (TCR) carbon post-filter that absorbs any contaminants remaining in your water and polishes the taste.

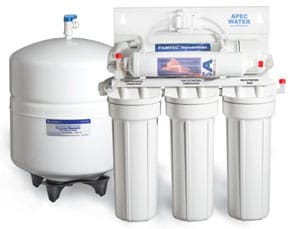
Some water filter systems have two pre-filters, while others have three or more. The pre-filter cartridges are the parts of this system that should be replaced most frequently—every 6 to 12 months, depending on how regularly you use your water filter and the quality of your water supply. The filter cartridges inside those pre-filter canisters fill up with minerals and debris and lose their filtering effectiveness.
How to Replace Your Water Filter Cartridge
In this guide, we will focus on replacing the pre-filter cartridges. The system we’re showing consists of three stages of pre-filters.
Before diving into the replacement process, you’ll need to identify your water filter system’s make and model so you can buy the appropriate replacement cartridges. You can find the manufacturer’s details on the filter housing and look up the filter replacement specs by searching online or by consulting the user manual that came with your system.

The good news is that replacing water filter cartridges is a relatively simple DIY job for most homeowners. Here are the step-by-step instructions that will guide you:
1: Prepare the system for cartridge replacement
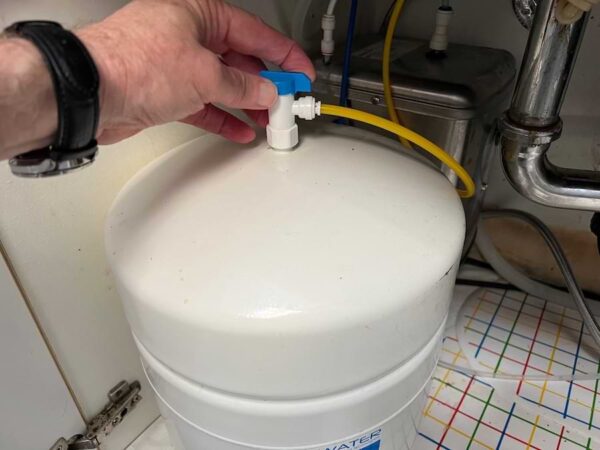
Under the sink, locate the cold water supply shut-off the water supply valve connected to your reverse osmosis filter—just turn off the water supply by turning it clockwise. Then locate the ball valve on top of the storage tank and turn it off. This will prevent water from entering the tank while you replace the cartridges, minimizing any potential spills or leaks. To make it easier to open the filter housings by releasing any built-up pressure, briefly turn on the RO faucet lever and let a little water pour out.
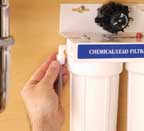
2: Open the housing
Put a baking sheet or towel under the filter housings to catch any water that spills out of the hoses or canisters. Locate the plastic wrench that came with your RO system. With the RO system standing upright, slide the wrench onto the first housing, make sure it grips onto the housing, and, looking down from the top, turn the housing clockwise to open it.
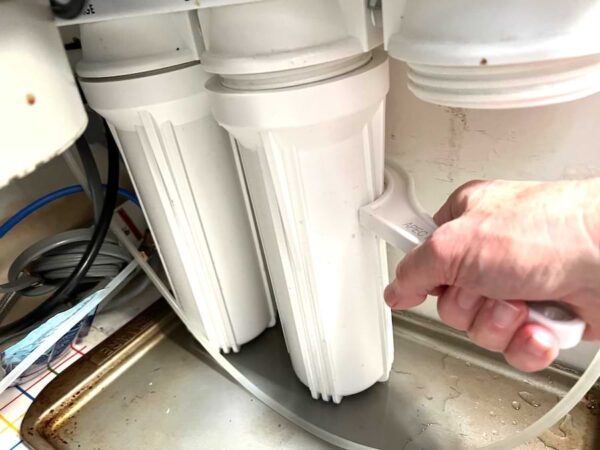
Note: This can be difficult if the housing is tightly sealed. You may need to lay the RO system on the floor for better leverage, or gently tap the wrench handle with a hammer to loosen the housing.
3: Replace the filter cartridges
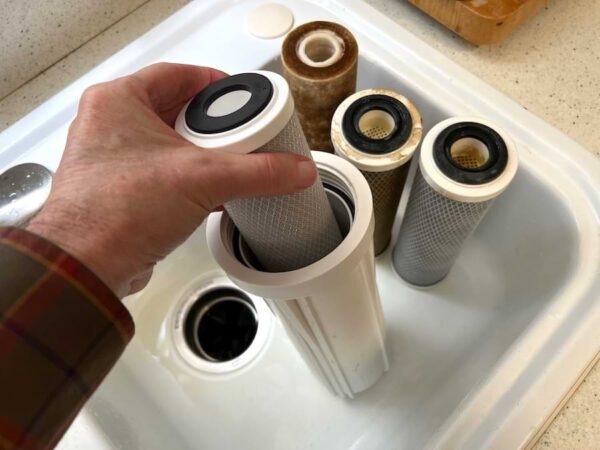
One-by-one, lift the filter housings up to the sink (careful—they’re full of water!) and remove the used filters from them. Let the cartridges drain, and then properly dispose of them, following local garbage disposal regulations. Using a mild dishwashing soap and a rag, clean the interior of each housing. Thoroughly rinse away any soap.
Place each new filter into its respective housing. For the unit shown here, the Stage 1 filter is a sediment filter and Stages 2 and 3 are identical carbon block filters.
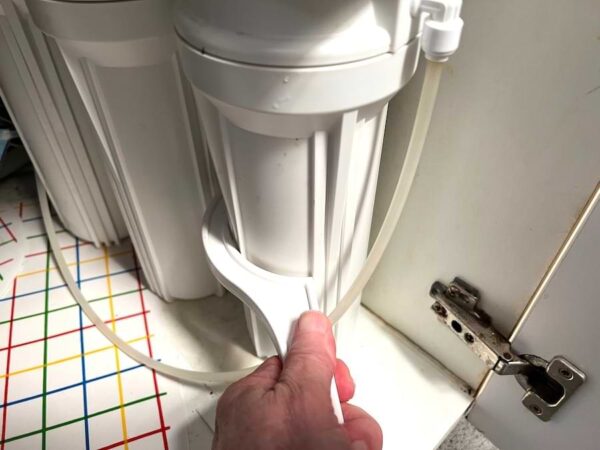
4: Secure the housings
Before closing the canisters, verify that each one has a black O-ring in the threaded grooves—this helps create a tight seal and prevents water from leaking. Then spread a little petroleum jelly on the threads so the canister will disassemble more easily next time.
Hand tighten each housing, rotating it clockwise (looking down from the top) until it’s snug and secure. To ensure a proper seal, use a filter wrench to give each housing an additional tightening. Be careful not to over-tighten—this can damage the housing or O-ring.
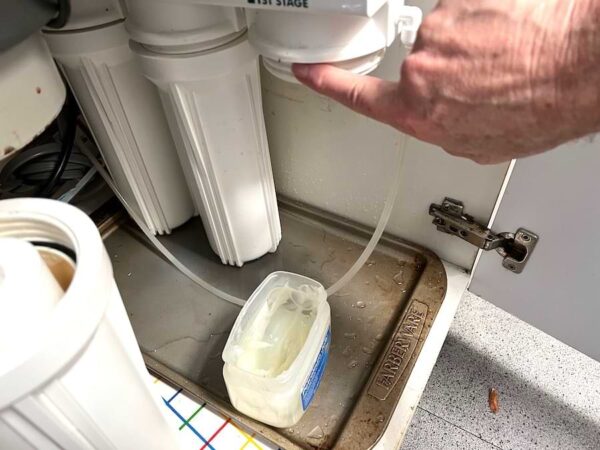
5: Restore water flow and relieve pressure
Make sure that the tank ball valve remains closed during this step. Turn on the cold water supply. Then open the shut-off valve connected to the RO system to allow water to flow into the system. Turn on the RO faucet lever to initiate the flow of purified water. Let the water run for about 10 minutes to relieve any built-up pressure inside the RO unit.
6: Adjust the tank and faucet settings
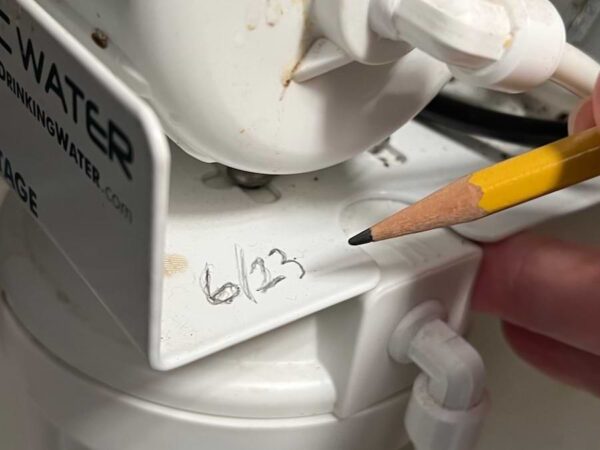
To complete the cartridge replacement process and ensure proper functioning of the RO system, close the RO faucet lever to stop the flow of purified water. Then turn on the tank ball valve to allow water to flow into the storage tank. Mark the replacement date on the filter and make a note on your calendar so you’ll know when it’s time to replace it again.
7: Inspect for leaks
After completing the cartridge replacement and adjusting the necessary settings, it is essential to check for any potential leaks. Carefully inspect all connections, including the filter housings, fittings, and tubing, to ensure there are no signs of leaks. Pay close attention to areas where the filter cartridges are installed and any newly replaced components.
By performing a thorough inspection for leaks and the other steps above, you can make sure your RO system will continue to deliver clean, great-tasting water. Remember, however, that you’ll need to change the reverse osmosis membrane every 2 to 4 years.