A comprehensive guide to repairing bathtub surfaces. Includes rust and dings in porcelain, repairing fiberglass scratches, and dealing with appliques.

Bathtubs can become scratched or stained over time. Depending upon the nature of the problem, there are a number of do-it-yourself remedies for cosmetic issues. If stains or scratches are too numerous—or if you want to give the tub an entirely new finish—consider hiring a bathtub refinishing professional.
Here’s how to handle some cosmetic problems:


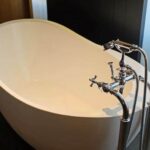
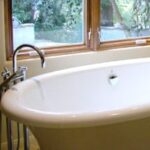
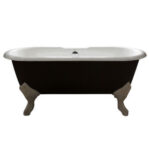
Bathtub Porcelain Rust & Dings
Rust on porcelain is usually the result of a dripping faucet and high iron content in the water. One household remedy is scrubbing the stain with a mixture of lemon juice and salt. If scrubbing doesn’t do it, soaking might. Saturate a rag with the mixture and lay it on the blemish for a few hours. Then scrub it again. If there’s still a stain, ask your local hardware dealer or home center about commercially available rust and iron removers.
Small dings and chips in porcelain can be repaired with an inexpensive porcelain touch-up solution that is commonly available online and at home-improvement centers. Choose a color that matches your tub.
Fiberglass Bathtub Scratches
Fiberglass tubs have “gelcoat” surfaces that can be restored with a lot of rubbing and buffing. For this job, you need to get a three-part kit made for removal of fiberglass oxidation. These are sold at marine products stores. Follow the label directions. This job normally involves buffing the scratches with a special compound, applying a seal coat, and then buffing again with rubbing wax.
Removing Bathtub Appliques
Bathtub appliques are great for providing traction on an otherwise slick and slippery bathtub floor. However, there comes a time when most have to be replaced or removed altogether. So how do you get the material and adhesive off without damaging the bathtub liner?
Whichever of these methods you choose, make sure to test the removal material on a small, inconspicuous part of the bathtub to make sure the cleaning chemicals will not damage that surface.
Keep in mind that most non-slip bathtub appliques are made in three layers: the (often decorative) top layer, a middle cushioning layer that is usually made of of Mylar film, and a sticky adhesive bottom layer.
1 Carefully peel up a corner edge of each applique. You can use a fingernail, a cuticle stick or any rigid, sharp edged scraper made of wood or plastic to get it started.
2 Lift up, while peeling back, each applique. Do this slowly and carefully, making sure the top two layers remain adhered together. If these layers begin to separate, the film will tear.
If this happens, begin the process again on other edges and corners of the applique, working each in toward the center until the entire piece comes free. If the Mylar film is left in place and only the top layer is removed, you will have a much harder time removing it, as cleaners and solvents will not disintegrate Mylar.
3 After you’ve removed each of the appliques, there will probably be remaining bits of adhesive stuck to areas of the tub floor. You can use certain adhesive removers, such as “Shout” or “Spray-N-Wash,” thoroughly soaking the adhesive spots for at least half an hour.
Once the adhesive has been reduced to a rubbery consistency, wipe it off with a dry cloth. You may have to repeat this procedure a couple times to get all the adhesive off.
Removing Difficult Appliques
If the appliques are too securely placed, and you are unable to lift them off in this way, try this:
1 Lift as many corners and edges as you can on each applique. Then pour a generous amount of “Shout” or “Spray-N-Wash” over the entire floor of the bathtub. Since these chemicals will not eat through the Mylar film, these solutions have to be able to get to the adhesive beneath the applique in order to work.
2 Let the appliques soak in the solution for at least two hours when using this method. The adhesive should soften enough for the appliques to be lifted easily. If it doesn’t completely loosen the adhesive, repeat the procedure. Wipe off the softened adhesive as directed above.
After completing either of these procedures, thoroughly scour the tub with a mild powder-based cleanser. Then rinse with clean water and allow the area to air-dry before installing new appliques.
If you have a fiberglass bathtub, a porcelain enamel tub, or are concerned about damaging the tub’s surface, use a liquid detergent, all-purpose cleaner, or baking soda mixed with water.