How to repair water supply pipes, including burst or leaking pipes, noisy or frozen pipes, including information on how to locate underground pipe leaks

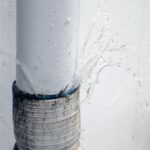
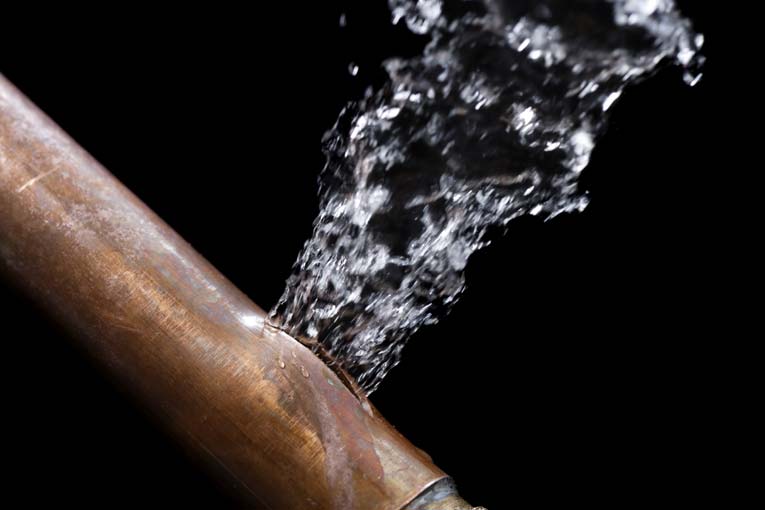
Water leaks and broken pipes can be a big problem for any homeowner. Because water in supply pipes is under pressure (normally about 50 pounds per square inch), if a pipe or fitting springs a leak, the water usually sprays out with considerable force.

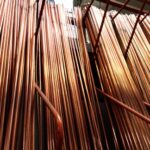
Most modern home water supply pipes are copper, soldered together with elbows, tees, and other fittings. Threaded galvanized iron pipes are also common, particularly in older homes, but are being phased out because they tend to get clogged by mineral deposits over time.
As you’ll see, it’s helpful to have at least one pipe repair clamp on hand just in case a pipe bursts—especially if you live in a climate where pipes are likely to freeze. You can buy these quick-repair screw-on devices at any home improvement store or online.
How to Fix a Pipe Leak Fast (3 Methods)
1. Locate the leaking pipe. Because of this pressure, it’s usually pretty obvious if a pipe is leaking—even if the pipe is inside a wall or above a ceiling. You can often hear water spraying inside the wall or ceiling. The drywall becomes wet, particularly at the joints between panels. And water often pools at the base.
If water is staining the ceiling or dripping, the leak may be directly above, although water can travel along a joist or other interior framing member and stain a wall or ceiling some distance from the leak itself. If there are no stains or drips overhead as evidence, grab a flashlight and check the pipes in the basement or crawlspace.
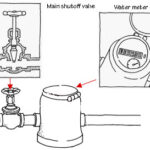
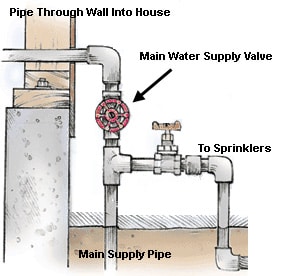
2. Shut off the valve that controls water flow to the damaged pipe (see How to Shut Off the Water Supply).
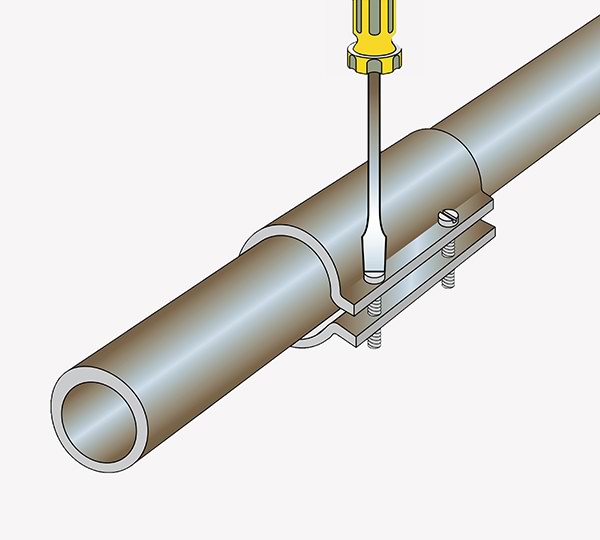
3. Apply a pipe repair clamp according to the package instructions—this usually involves centering a rubber sleeve over the leak in the pipe and then bolting the two-part clamp in place over the sleeve.
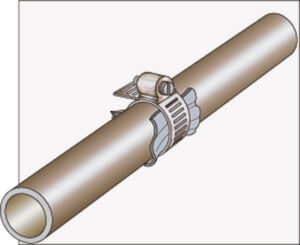
4. If you don’t have a sleeve clamp, you can make your own pipe repair clamp by wrapping the burst section of pipe with a strip of rubber (from an inner tube, for example) and then clamping the wrap with an adjustable hose clamp, a pipe-sleeve clamp, or a C-clamp.
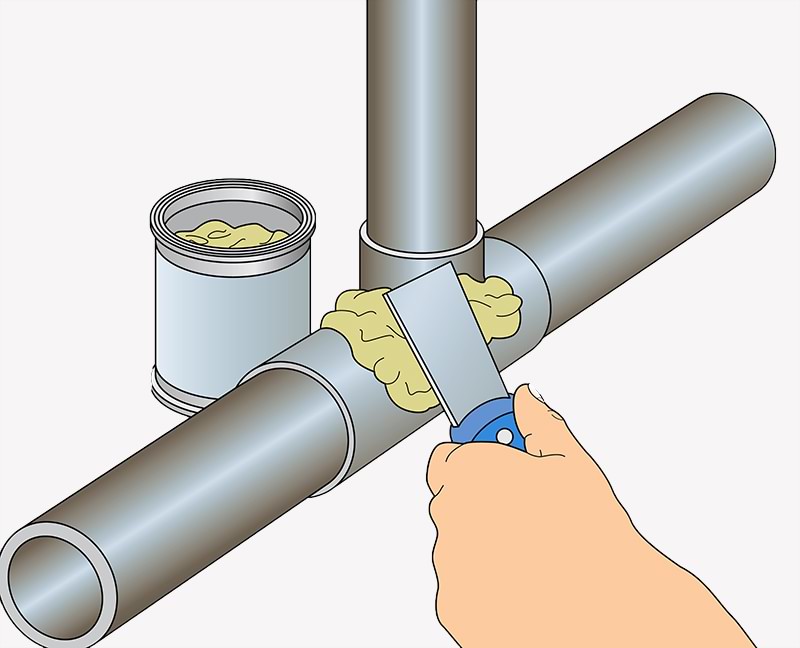
5. If the leak is near a joint, apply epoxy putty.
Note that this is a temporary repair. Call a plumber if you are unable to replace the damaged section of pipe yourself.
See below for how to do a more permanent repair.
How to Fix a Leaking Copper Pipe (Permanently)
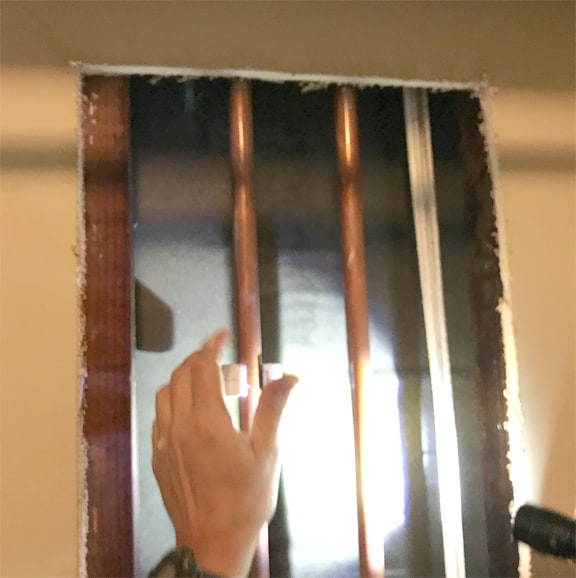
Here you can see how to fix a copper pipe that is leaking inside a wall. This pipe, though fairly new, had a pinhole leak that was spraying water into the wall cavity between wall studs. It was hidden behind the drywall, but the spraying was audible from the wall and the surface of the wall was wet. The wall’s wetness started about 5 feet from the floor, so it was clear that the leak was above that point.
This repair involves cutting out and replacing the damaged part of the pipe. To do this job, you’ll need a short section of matching copper pipe and two straight couplings and a tubing cutter.
One or both of the couplings should be the type that doesn’t have a “tube stop” so it can slide completely onto the pipes until the replacement piece is positioned, and then slide into place onto the replacement.
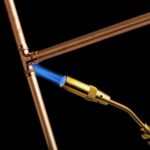
In addition, you’ll need soldering supplies and a torch. For complete details about soldering copper pipe, see How to Cut & Solder Copper Pipe.
1. Turn off the valve that controls the flow of water to these pipes. If necessary, turn off the main water valve to the house. Open a faucet or hose bib that’s lower than the leak in order to drain water from the pipes. For more, see see How to Shut Off the Water Supply.
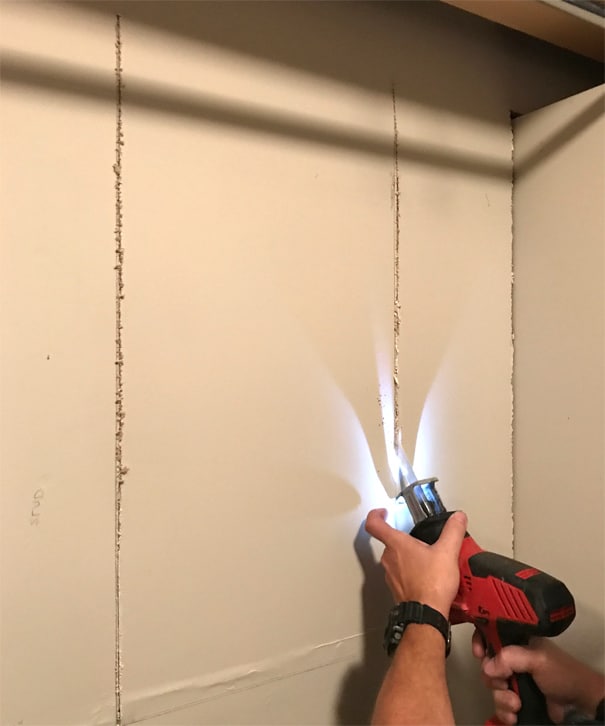
2. Cut open the wall if necessary to access the pipe. Be aware that this is going to make a mess, so prepare the area as required with drop cloths and the like. Plan to make vertical cuts just inside the wall stud locations (see How to Find Wall Studs and Framing).
Use a utility knife or a reciprocating saw to make the cuts along straight lines. Beware: Electrical wires or pipes may be inside the wall (as there were in this case), so be very careful to avoid them with the saw’s blade. In fact, you can avoid the wires entirely if you cut the opening using a utility knife to repeatedly score along lines.
Remove the cut-out section and save it so you can replace it later. If it’s soaked, put it on a flat surface outside so it can dry.
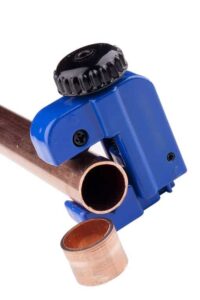
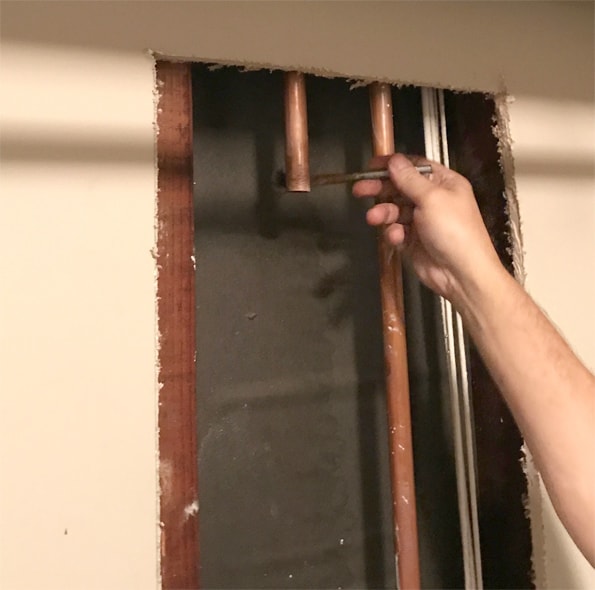
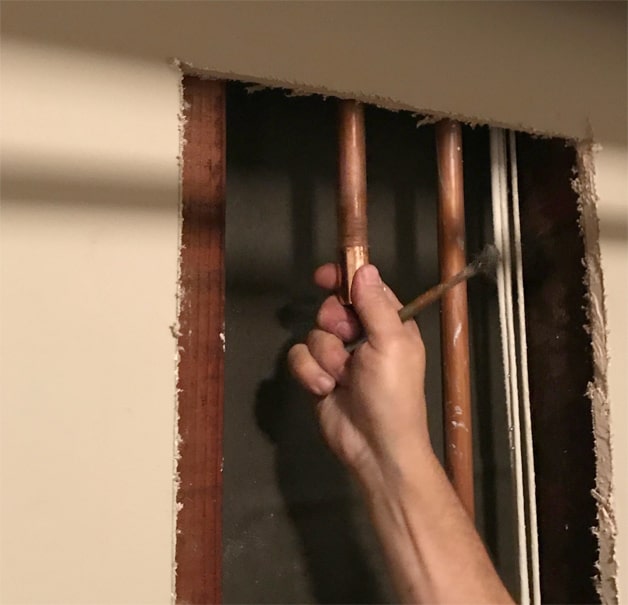
3. Cut out the damaged pipe section. Make two cuts—one on each side of the leak, about 10 or 12 inches apart.
Depending upon how the pipe is situated, use either a small tubing cutter like the one shown, or use a metal-cutting blade in a reciprocating saw. Measure the distance between the two remaining cut pipes and cut the replacement piece about 1/4 inch shorter.
4. Apply flux to all pipe ends after you use fine wet sandpaper to polish the cut ends and remove any burrs.
5. Test fit the coupling by sliding it onto the pipe. You’ll need one of these couplings at both ends of the replacement piece.
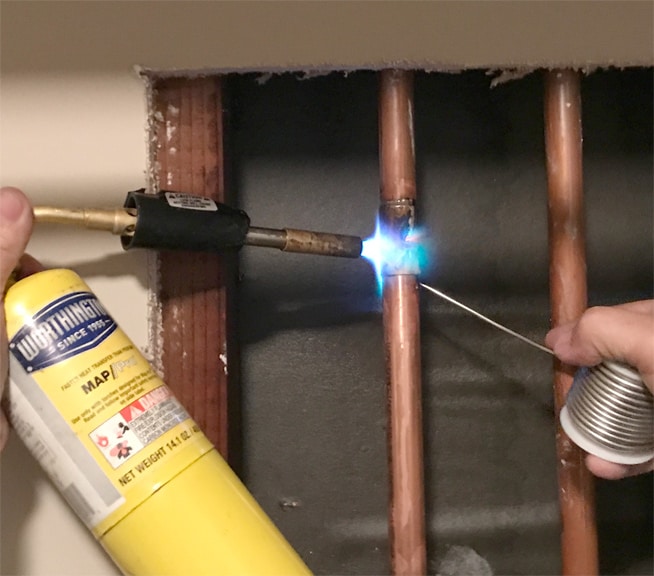
6. Solder the top coupling to the existing and replacement pipes, starting with the top fitting. Have a fire extinguisher nearby, and be very careful with the flame!
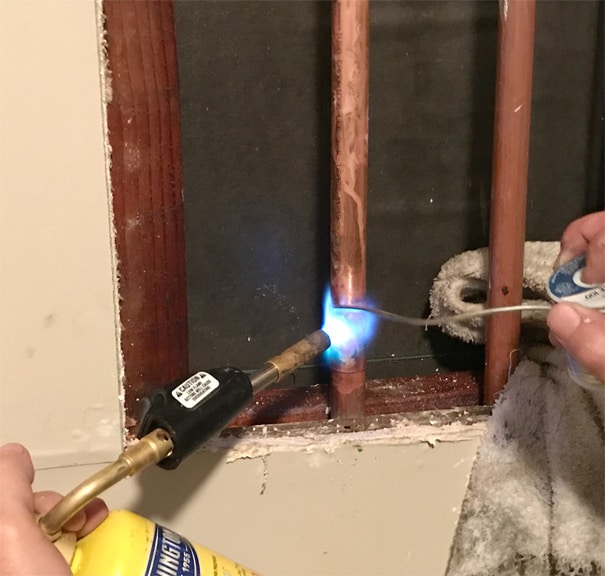
7. Solder the bottom coupling to the pipes, using the same techniques. Allow the pipes to cool, and then turn the water back on. Be sure to close any faucets that you opened when draining the pipes.
Be aware that, until the air is purged from your water supply pipes, faucets throughout the house are likely to sputter and spit air and water when you use them. After a couple of uses, this will stop.
8. Repair the wall. When you’re sure the leak is fixed and the wall has had an opportunity to dry out, you can replace the piece of wall that you removed. You’ll probably need to add a couple of wood blocks so you have something to nail or screw the wallboard to. For more about attachment methods, see How To Hang Drywall.