Expert advice on how to paint exterior house siding, including DIY tips on painting and staining wood, aluminum and stucco siding, exterior trim and moldings.

The first step in any exterior painting project is preparing the surrounding area.
Shrubs, garden beds, and the like should be carefully covered with dropcloths.
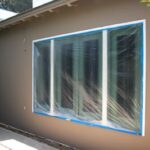
Surfaces that will not be painted but that could be subject to paint splatters, such as roofing, should be masked with painter’s tape.
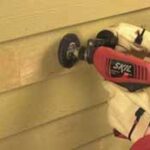
Finally, the surfaces to be painted should receive a final inspection for any areas that were missed during old-paint removal.


When painting the siding, first apply a coat of primer, ideally tinted to a shade similar to the paint color you have chosen.
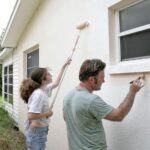
With this preparation complete, you’re ready to paint. Following are some useful tips and techniques:
• Consider the weather. Plan your project for a time of year that is likely to have dry, fair weather for the duration.
If temperatures drop below 50 degrees F. you risk the paint not adhering properly.
Begin after the morning dew is gone and stop well before the onset of evening dampness-at least two hours.
If possible, paint a surface when it is in shade and will remain in the shade for the rest of the day. If you are using a paint that has been thinned with a solvent and the sun strikes it before it is dry, blistering could occur.
• Paint in the proper sequence. For best results, start from the top down, painting overhangs first, then the walls, and then the trim.
If the trim is to be a different color than the walls, wait until the walls are completely dry before painting the trim.
Mask the siding and then remove the tape when you have finished painting the trim; do not wait until the paint is dry.
All other incidentals, such as railings, can be painted last. If you have shutters, removing them for painting with a paint sprayer rather than painting them in place with a brush is much easier.
If you have lap siding, paint the bottom edges before painting the surface.
• Allow paint to dry.When you have finished painting a surface, let it dry before touching it up. Oftentimes a finish looks quite different dry than wet.

• When painting windows, there is no need to mask the glass panes.
To the contrary, you want to allow a small bead of paint to lap onto the pane to ensure complete coverage; then simply wipe the paint when it is still wet with the end of a putty knife wrapped in a rag.
Should the paint dry before you can wipe it, it can be easily removed with a razor blade.
For operable windows, paint the sash when the window is open to ensure the window doesn’t get painted shut.
• For all wood surfaces, paint perpendicular to the grain first, to ensure thorough absorption, and then even out the finish by painting in the direction of the grain.