No home improvement project revives, protects and beautifies a house as quickly, effectively and affordably as exterior painting. A new coat of paint can completely transform a house and, though painting a house can be a big job, it’s a project that can be completed in a week or two.


If you hire a professional painter, expect to pay from $1000 to $4500 or more, depending upon the size and condition of your house. By doing the work yourself, you can save the labor portion of the cost—typically more than half—but it will take some serious effort.
Regardless of whether you hire a pro or do it yourself, painting your house is something you won’t want to repeat in a few years. With this in mind, here are nine critical rules that will ease the work and help ensure a beautiful, lasting result.
1: Don’t skimp on materials. Pay for top-quality paint, primer and caulking compound. Top-quality paint lasts longer, and flows and covers better than poor-quality paint. Buy paint that has a lifetime warranty against defects in the finish.
With most house paint, you get what you pay for: The best ingredients are expensive. High-quality exterior paint typically costs from $35 to $40 per gallon—in fact, you can pay up to $70. Choose 100% acrylic paint.
Top brands recommended by Consumer Reports include Behr Premium Plus Ultra Exterior, sold at Home Depot, and Clark + Kensington Exterior, sold at Ace. Both contain VOCs (volatile organic compounds) below federal limits. Both performed well in Consumer Reports’ tests that simulate 9 years of outdoor exposure, and both cost from $35 to $40 per gallon.
Other top-performing brands include Sherwin-Williams Duration Exterior and Benjamin Moore Aura Exterior—pricier at about $68 per gallon. For complete ratings, visit ConsumerReports.org.
Flat finishes, preferred for siding, do a good job of hiding defects and irregularities. Satin and semi-gloss enamels, used for trim, are more durable and easier to wash.
2: Do the necessary preparation. For paint to adhere well, it must be applied to a surface that is clean, dry and not flaking or peeling. Depending upon the condition of existing siding and trim, this often means considerable scraping and sanding may be required before you can paint.
Begin by washing the surfaces. You can use a hose and a scrub brush with water and detergent, or a pressure washer. If you use a pressure washer, you must be careful not to drive water deeply into the joints between siding or erode the surface of the wood with the high-pressure water spray.
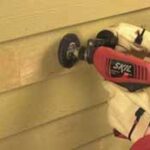
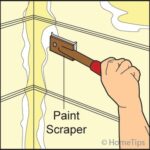
To remove loose, flaking paint, you’ll need a scraper. Then, for removing tougher paint and smoothing the surface, a 5-inch disc power sander or a random-orbit sander will work well.
Start with 60-grit sandpaper and follow-up with 100-grit sandpaper. The idea isn’t to remove all of the paint—just remove loose paint and smooth the surface.
Use a putty knife and wood filler to fill cracks and holes. Let the filler dry, and then sand these areas again.
Brush off all of the dust, caulk the joints, and allow the caulk to dry before applying primer.
3: Beware of old lead paint. Though today’s house paints do not contain lead, old paint applied before 1978 is likely to contain lead.
According to the EPA, “Common renovation, repair, and painting activities that disturb lead-based paint (like sanding, cutting, replacing windows, and more) can create hazardous lead dust and chips which can be harmful to adults and children. Home repairs that create even a small amount of lead dust are enough to poison your child and put your family at risk.”
For lead testing and removal, the EPA recommends that you contact local lead-safe certified renovation contractors, which can be found through the EPA’s website.
4: Don’t skimp on coats of paint. Begin with a high-quality oil-alkyd primer if you’re painting over bare wood or metal. Some painters like to tint the primer toward the final paint color to minimize the need for two finish coats of paint. Others prefer to tint the primer to a contrasting color, which will highlight any spots where the final coats haven’t completely covered.
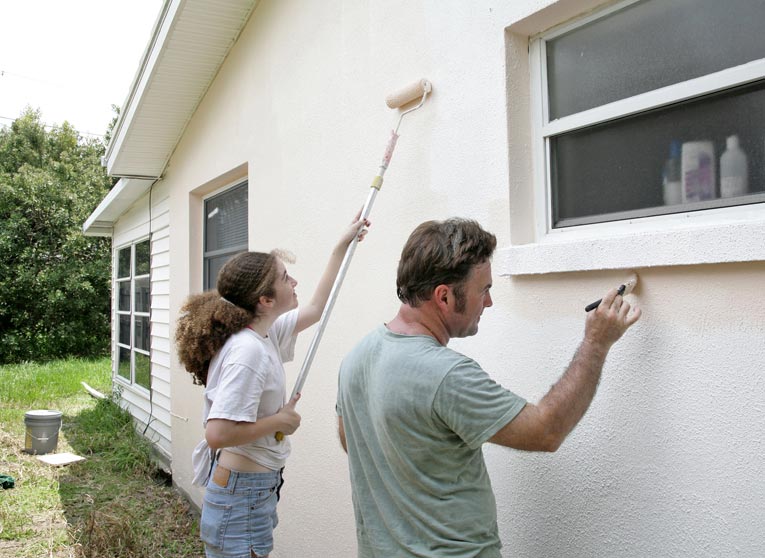
Apply the first finish coat and, after it becomes tacky, apply a second top coat.
5: Use the right tools, including a high-quality brush, roller and—for some houses—an airless sprayer, which can be rented at most home improvement centers or tool rental outlets. The easiest way to apply primer and paint to textured surfaces is to spray it on with an airless sprayer, and then back-roll it by hand with a roller to ensure adhesion.
If you have never used an airless sprayer, pay close attention to the equipment’s directions and gain a little experience by painting a less-conspicuous side of the house first. Work from a 5-gallon paint bucket and use a paint strainer so paint doesn’t clog the sprayer.
6: Be realistic. Don’t paint your house yourself unless you have the time, tools, skills, and stamina to do the work. Though saving half the cost of the job is a strong incentive, be prepared! Depending upon the size—and height—of your house and the condition of the existing siding, preparing and painting a house yourself can be a tedious, difficult job.
7: Wait for temperate weather. Don’t paint on hot days, in the rain, or during windy or dusty weather. Ideal for painting are temperatures between 50 and 90 degrees F. Hot weather causes the paint to dry too quickly, as does direct sun so, when possible, follow the shade. Temperatures below 50 degrees may prevent the paint from adhering to the surface properly. Dampness or dew can bubble surfaces.
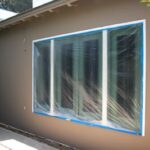
8: Cover and protect decks, shrubs, gardens, plantings, patios, and walkways from paint spills and splatters with drop cloths and/or plastic sheeting. This will save you from big cleanup problems later. If you use an airless paint sprayer, masking and covering will be absolutely imperative. Be very careful of overspray—it can coat your neighbors’ cars!
9: Paint using proven techniques. If you plan to do the work yourself but you’re a novice, do your homework. You can find lots of free information on the Web, including videos by pros and experts that show specific techniques.
Work from the top down, starting with overhangs so fresh paint won’t drip on newly painted surfaces. Paint the siding, and then, when it is dry, mask around windows and doors, and paint the trim.
As soon as you’re finished painting the trim, remove painter’s tape or masking tape so it won’t leave a residue. After all of the paint has dried, touch-up “holidays” where paint hasn’t covered fully.
10: If you hire a pro, get bids and references. Request detailed bids from at least three painting contractors, and ask them for the names and phone numbers of satisfied customers. Call two or three of those customers or, if possible, visit their homes to inspect the workmanship and confirm the customers’ satisfaction.
This article, written by Don Vandervort, first appeared at USNews.com.