Expert DIY advice on how to cut, join, and solder copper plumbing pipes

1. Cut copper pipe to length
2. Apply soldering flux
3. Ignite the soldering torch
4. Train heat on the copper fitting
5. Apply the solder
Copper is the standard for water supply piping and tubing in most locales. Though cutting and joining solid copper pipes and tubes may look like tasks beyond your DIY skills, you may be surprised at how doable these jobs are, especially with a little practice.

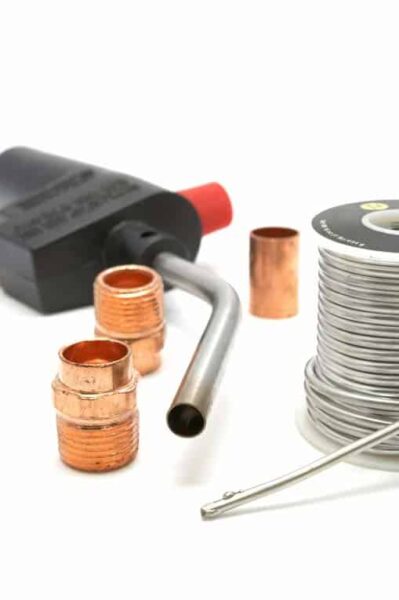
This article will show you how to cut and solder copper pipes.
1. Cut copper pipe to length
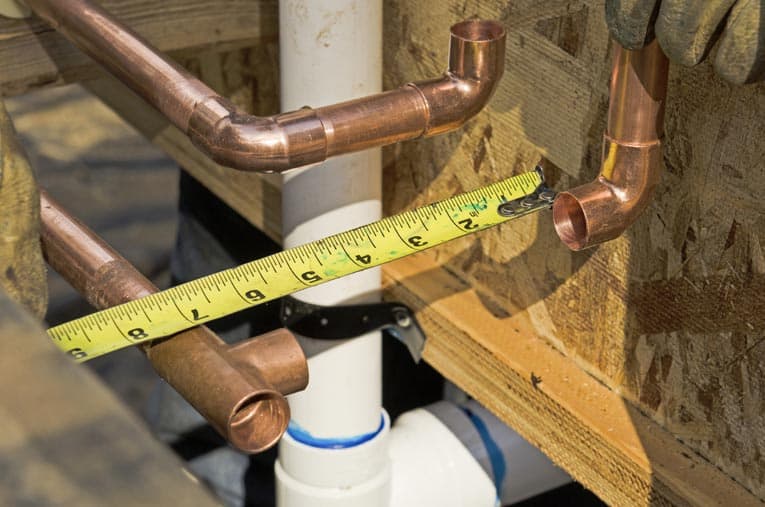
The first step in creating a plumbing assemblage of copper pipes and fittings is to measure the lengths of pipe required. When measuring, be sure to allow enough length to slide fully into the elbows, connectors, tees, and other fittings.
Plan to work in sections, measuring and cutting the necessary pieces of pipe, and dry-fitting them together to make sure they fit.
By far the easiest way to cut copper pipe is to use a tubing cutter designed for the job. Several types are made—but all involve clamping the cutter onto the pipe and gradually turning a knob so that the tool’s cutting wheel digs into the copper as you rotate the cutter around the pipe. Tighten the cutter after each revolution, until the pipe comes apart.
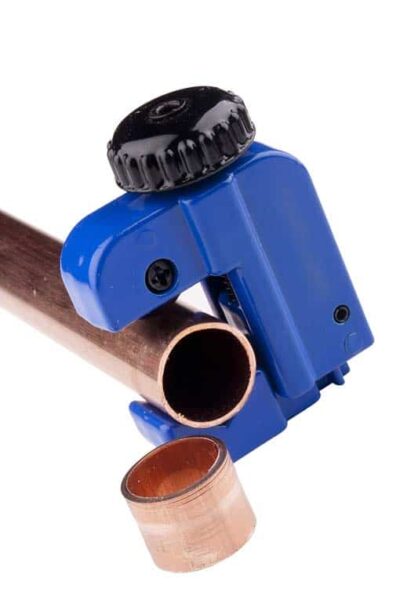
After you’ve cut the pipe, remove any burrs with a round file or a retractable reamer mounted on the tubing cutter. Use fine sandpaper, emery cloth, or steel wool to smooth and slightly roughen about an inch at the end of the pipe until it’s shiny.
Also slightly clean and scour the inside of the fitting from the end down to the shoulder, using the emery cloth or steel wool. A wire pipe brush makes this cleaning easier—we recommend one of these if you’ll be doing a lot of connections.
2. Apply soldering flux

Using a small, stiff brush, apply soldering flux around the inside of the fitting and around the outside of the pipe end where they will join. Wear gloves to avoid getting the flux on your hands—it can cause irritation.
Place the fitting onto the end of the pipe, and turn the two parts back and forth to spread the flux evenly. Then position the fitting correctly. Continue with other connections until you’ve completed a section and are ready to solder.
3. Ignite the soldering torch
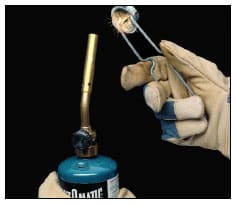
Turn on the gas torch’s control valve, and then light the nozzle end with a match or a striker tool. Be careful! If it doesn’t light immediately, turn it off and let the air clear before trying it again. Don’t point the flame at anything flammable! If necessary, shield surrounding flammable objects (such as wall studs) with a flame guard. Adjust the flame so it’s steady and strong.
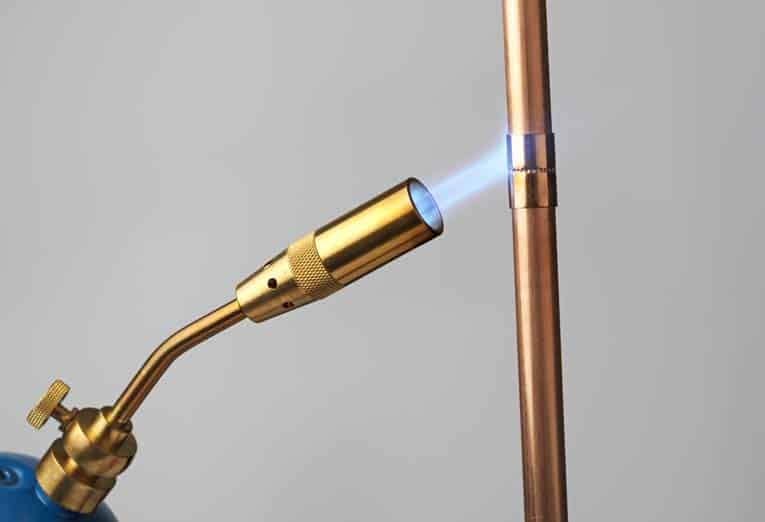
4. Train heat on the copper fitting
Apply heat first at the bottom of the fitting. Heat all of the way around the pipe. The joint is hot enough when solder will melt on contact with it. Test the temperature by touching the lead-free solder wire to the joint occasionally as you’re heating the fitting. The instant the wire melts, the joint is ready for soldering.
5. Apply the solder
When you touch the lead-free solder wire to the edge of the fitting, capillary action should pull molten solder in between the fitting and the pipe. If it doesn’t, heat the fitting a bit more. Keep applying heat until a line of molten solder shows all the way around the fitting. Then position the torch nozzle about 4 inches from the fitting, and move the flame back and forth across the fitting to distribute the heat evenly. It’s important to get the fitting hot but not too hot or the flux will burn off and simply vanish.
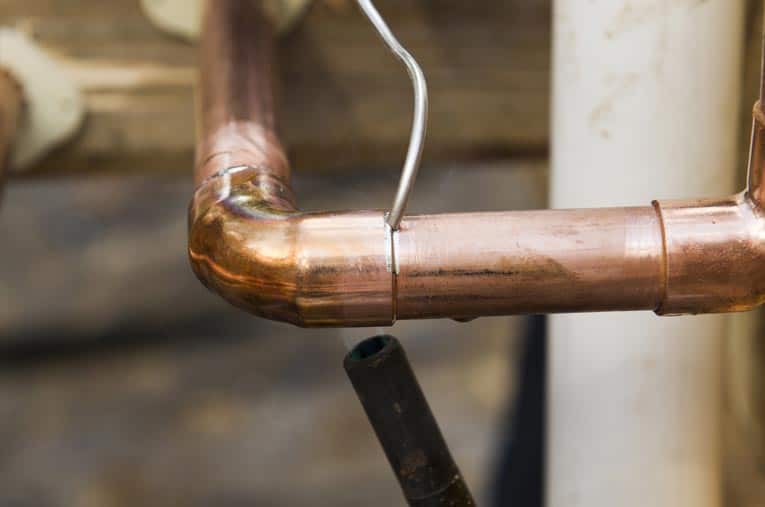
After a few seconds, when the solder cools, use a damp rag to wipe off surplus flux. Don’t touch the pipe with your hand—it will be very hot! Wait an hour or two to allow the solder to completely harden before disturbing the connections.
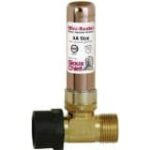
How to Install a Union
To install a copper pipe union, begin by sweat-soldering the male shoulder onto one pipe as described above. Then slip the nut onto the adjoining pipe and solder the female shoulder onto the pipe’s end. Let the pipes cool. Then push the male and female parts together, slide the nut over the female shoulder, and screw the connection together. Use two wrenches to tighten the connection—one holds the male shoulder while the other turns the nut.

Video: How to Solder Copper Pipe the Correct Way
Here is an excellent video produced by Julio Caluori of GOT2LEARN that shows in detail how to solder copper pipe, including the tools and materials you’ll need to do the job right: