This expert advice will show you how to install a pre-hung door—including the door jambs. It walks you step-by-step through each part of the process.

Installing a new interior door with new door jambs can be relatively easy if you use a factory-manufactured pre-hung door. With this type, hinges attach the door to the preassembled jambs, so the door fits perfectly in the frame from the get-go. A brace across the sill and jambs keeps the assembly square until it’s installed.
Walls have different thicknesses, depending upon how they’re constructed. A plaster wall, for example, is thicker than a wall finished with drywall. Because of this, it’s important to specify the wall’s thickness when you order the door—that way, the jambs will be properly sized.

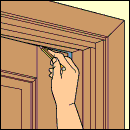
If you’re replacing an existing door, pry off the old trim, and pry out the side and head jambs. If you’re installing a door in a newly framed opening, be sure the framing is sized properly. Before nailing the jambs to the rough framing, it’s very important to make sure the door fits squarely in the opening and that the jambs are plumb, both from side to side and from front to back. This is a process that will involve shimming, checking for level, nailing, and then repeating. To avoid denting the jambs with the hammer head when nailing, stop nailing before the heads reach the surface and finish with a nailset.
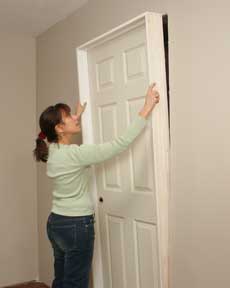
1Set the base of the pre-hung door into place, centered in the rough opening, with the hinges positioned on the proper side. Tilt the assembly up into the opening. When doing this, it’s a good idea to have a helper on the other side of the door to receive it and help shift it so the jambs are flush with the walls.
2Using a piece of drywall (or other finish material) as a spacer against the trimmer studs, slightly adjust the unit until it is flush with the spacer. If the finish floor hasn’t been installed yet, raise the side jambs to the correct level with blocks—you want to avoid cutting off the bottom of a new door, if possible.
3To shim, you use a hammer to tap pairs of tapered wooden shims snugly between the jambs and the trimmer studs on both sides to adjust the unit and hold it in place until you nail it (if the casing is attached to the jambs, insert shims from the open side).
Start by shimming the lower hinge side of the door. Nail through the jamb and shims 1 inch into the stud with a 10d finishing nail; position the nail where the stop molding will cover it.
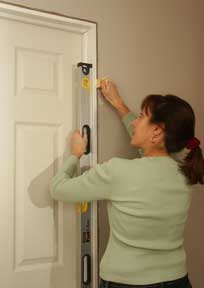
4Insert shims next to the upper hinge location, check the jamb for plumb, and nail partway. Again, shim, plumb, and nail halfway between the top and middle hinge positions. Repeat this process between the middle and bottom hinges. Check to make sure the jamb above the doorway is level.
5Shim the opposite jamb at similar locations, but do not nail where you will need to cut for the latch.
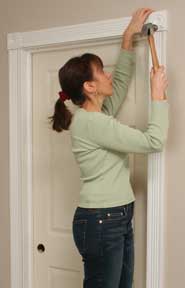
6To complete the installation, remove any bracing or blocking tacked to the unit. Close the door and check that there is the same amount of space (1/16 to 1/8 inch) between the edges of the door and the jambs. If the door sticks or is out of alignment, pull out nails in the area that seems to be the problem. Use a block to prevent the jambs from becoming damaged by your hammer.
Drive the nails almost flush, and then set the heads with a nailset. Using a handsaw, cut off the shims flush with the jambs (you can just break off short, thin pieces). Finish with the door casing or other trim.
7Nail the threshold between the jambs, shimming below if the threshold does not rest securely on the subfloor. Install the stop molding with 4d finishing nails, and then install new trim around the door, using 6d (2-inch) finishing nails.
![]()
![]()