Creating a new doorway in an existing wall can significantly improve the flow and accessibility of your home. This task, while ambitious, can be tackled with the right planning and tools. Before you start cutting into your walls, it’s crucial to understand what lies within them and how to handle any obstacles you might encounter. (See How to Open Up a Wall.)


This guide will walk you through the process, from understanding the basics of wall structure to framing your new doorway, ensuring you achieve a professional finish.
Step 1: Understand Wall Basics
- Investigate Obstructions: Walls may contain wiring, pipes, and ducts. Before determining where your new opening should go, locate any obstructions. If extensive wiring, pipes, or ducts are in the way, consider modifying your door’s location unless you’re comfortable rerouting utilities, which often requires a permit and adherence to local building codes.
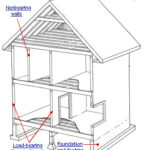
- Understand Wall Structure: Interior walls are typically framed with studs spaced 16 or 24 inches apart, with a bottom plate at the base and a top plate at the top. When creating an opening for a door, somethe wall studs are removed, and the opening is bridged by a header supported by extra studs (trimmer studs) at each end.


Step 2: Prepare for a New Doorway
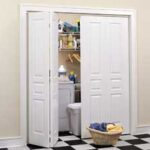
1. Choose Door Type: Doors can be bought individually or as pre-hung systems. Pre-hung doors come hinged in a jamb and frame, making them easier to install. Obtain the rough opening dimensions from the manufacturer. (For more about this, see Interior Doors Buying Guide.)
2. Measure Rough Opening: Remove wall covering for at least the rough opening plus 3 inches on each side and across the top. If the door is going into a bearing wall, the rough opening may need to be taller to accommodate a structural header. Remove wall covering from floor to ceiling between the bordering studs that will remain in place.
3. Mark Door Location: Measure the width of the door and its frame. Mark the center point of the door location on the ceiling, then measure half the door unit’s width in each direction and mark again. Add another 3 inches to each side for surface removal.
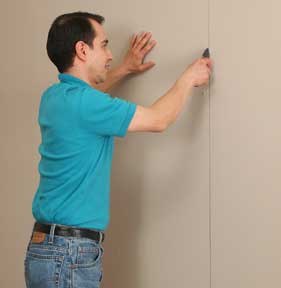
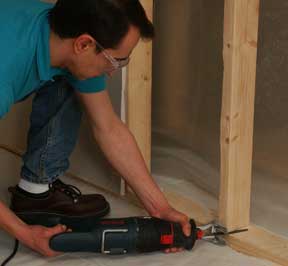
4. Remove Wall Materials: Use a utility knife to score the drywall along your vertical layout lines. Pry the cut panels off the studs. For plaster and lath, cut through the lath with a saw that’s equipped with a plaster-cutting blade. Wear safety gear, and firmly press the saw against the plaster while cutting.
5. Cut Studs: Use a reciprocating saw to cut off the studs within the new opening, then pry them away from the plates.
Step 3: Frame the New Doorway
- Install Framing Members: Measure, cut, and install the king studs, trimmer studs, header, and cripple studs as shown in the main illustration above.
- Cut Sole Plate: Carefully cut, pry-up, and remove the section of the sole plate that spans the door’s opening.
- Prepare for Door Installation: Once the framing is complete, prepare the floor where the wall once stood. Fill any gaps left by the sole plate removal with wood putty or a threshold saddle if the floor is too rough to refinish.
By following these steps, you can effectively open a wall to create a new doorway, ensuring a smooth transition and functional space. This step-by-step approach helps to organize the process, making it easier to follow and implement.