TOOLS AND MATERIALS NEEDED

Attaching Rafters to a Ledger
Splicing Rafters
Sloping Rafters
Attaching Rafters & Beams
| TOOLS | Safety glasses, drill, screwdriver, hammer, saw, chisel, saber saw, chalk line |
| MATERIALS | Metal framing connectors, joist hangers, special rafter hangers, seismic anchors, board lumber gusset plates, manufactured metal splice plates, galvanized nails (8d or 10d), wood finish, blocking material |
This article is a continuation of the article: Building a Roof Over a Deck or Patio.
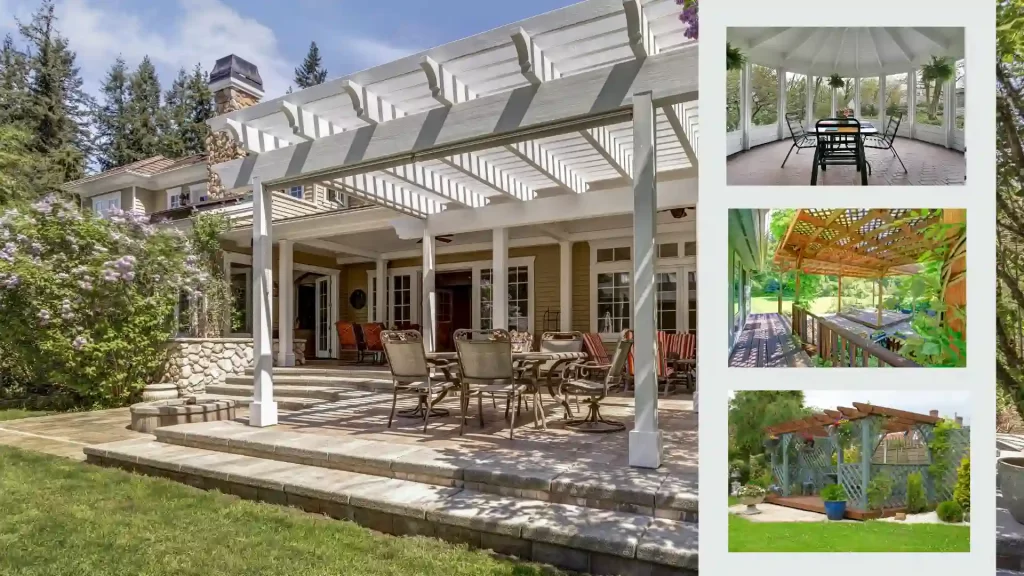
Rafters spread patio roofing loads across beams, making it possible to use roofing materials too insubstantial to span the distances between beams.
Rafters must support their own weight over open space without sagging or twisting and also support the weight of the roof covering.
For a roof that must shed water, the rafters are sloped.


Rafters may connect to ledgers and beams any of several ways. The right method to use depends on the roof’s design. For proper spans and spacings of patio roof beams and rafters, please see Patio Roof Maximum Beam & Rafter Spans.
Decoratively cutting rafter ends can give a patio roof or gazebo a distinctive style. If you wish to add decorative detailing to rafters, do so before you lift and fasten them into place. Use a saber saw for making curved cuts.
Attaching Rafters to a Ledger
With a house-attached overhead, rafters are fastened to the house at one end. Metal framing connectors make the best connections.
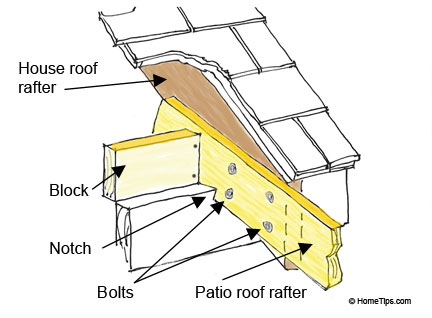
Joist hangers can hang rafters from a ledger, but, for sloping rafters, notch them or use special rafter hangers.
If rafters will sit on top of a ledger, attach them with seismic anchors as you would attach rafters to a beam.
Splicing Rafters
Where rafter connections will not be visible, rafters can be spliced together end-to-end with board lumber “gusset plates.“
To do this, butt the ends of the rafters together over a supporting beam. Then nail two pieces of 1-by or 2-by lumber of the same width as the rafters (as show at left) and about 18 inches long centered over both sides of the splice. Or, join the members using manufactured metal splice plates.

Be sure each rafter end sits a full inch on the supporting beam. If you must splice several rafters, stagger the splices over different beams to prevent a weak substructure.
Another splicing method—though it does not utilize uniform spacing—is to overlap the rafter ends that are supported by beams. If more than one splice is needed on a full rafter length, alternate overlapped sides.
For standard 2-inch lumber, nail both faces of each splice with six 8d or 10d common galvanized nails. This type of splicing, as shown above right, adds lateral stability to the rafters and may eliminate the need for bracing.
Sloping Rafters
Fitting sloped rafters in place can be tricky for a novice. It’s usually easiest to cut one rafter to fit and then use it as a template for the rest, but this only works if the supporting beam and ledger (or second beam) are perfectly parallel.
To cut sloping rafters for a house-attached patio roof, lay a rafter board so it rests on its edge on both the ledger and the beam parallel to the ledger. Then force the rafter’s tip snugly against the house wall. Using a block of wood as a ruler, mark the ends for cutting.
Cut the triangular piece off the rafter end that rests on the ledger and off the end that rests on the beam, as shown below. Cut bird’s-mouth notches where the rafter rests on the ledger and on the beam.
Place the rafter in several positions along the ledger and the beam to check for fit. Then mark and cut the remaining rafters, using this rafter as a template. Before fastening the rafters in place, treat them with a wood finish.
Attaching Rafters & Beams
When building a patio roof, it can be tricky to build the post-and-beam structures that support the rafters. Here are some tips for how to do this:
There are various ways of attaching rafters to a beam. The most common method of fastening them to the top of a beam is to drive in screws at an angle.
When doing this, it may be necessary to drill pilot holes first so the wood doesn’t split. If the rafters will slope, use seismic anchors (also known as rafter ties), as shown above.
Although one standard anchor is adequate in most cases, a second one may be required diagonally across from the first one in high-wind or seismic areas; consult your building department for local standards. With conventional anchors, you must notch the rafters to fit or use a double-sided anchor to avoid notching.
Where rafters span long distances or are spaced wide apart, they are prone to twist or buckle unless braced with blocking. The width of the rafters is also a consideration; those made from 2 by 8s or larger lumber require more blocking than those made from 2 by 6s.
Spacing between blocking is typically determined by local codes. If rafter spans are less than 8 feet, headers (perpendicular rafters) nailed across the rafter ends are adequate for rafters that sit on top of beams.
Snap a chalk line across the rafters where the blocking will go, and then work your way across the joists, measuring and notating the lengths of blocking you’ll need.
The easiest method of placing the blocks is to stagger them from one side of the chalk line to the other, as shown at left. By using this technique, you’ll be able to face-nail the blocks instead of toenailing them. Use 16d nails.
For a decorative accent and to hide metal post caps, you can cut and miter trim stock to fit around the post tops.
Find a Reliable Local Deck or Patio Builder
NEXT SEE:
Installing Patio Roof Rafters FAQs
- How do you attach rafters to a ledger?
For a house-attached overhead, rafters are secured to the house using metal framing connectors. You can use joist hangers to hang rafters from a ledger, but for sloping rafters, it is better to notch them or use special rafter hangers. If rafters sit on top of a ledger, attach them with seismic anchors.
- What is the process for splicing rafters?
Rafters can be spliced by butting their ends together over a supporting beam and nailing gusset plates on both sides of the splice. Alternatively, metal splice plates can be used. Ensure each rafter end sits at least an inch on the beam. If multiple splices are needed, stagger them over different beams to maintain structural integrity.
- How do you fit sloping rafters?
Fitting sloping rafters involves cutting one rafter to fit and using it as a template for the others. Place the rafter on its edge on both the ledger and beam, snug it against the house wall, and mark the ends for cutting. Cut triangular pieces off the ends and bird’s-mouth notches where the rafter rests on the ledger and beam. Check the fit before cutting the remaining rafters.
- What are the methods for attaching rafters to beams?
Rafters can be attached to beams by driving screws at an angle, possibly requiring pilot holes to prevent wood splitting. For sloping rafters, use seismic anchors, and in high-wind or seismic areas, a second anchor may be needed diagonally. Blocking is required to brace rafters that span long distances or are widely spaced to prevent twisting or buckling.