Expert advice on how to install a skylight including planning the skylight shaft and installation, the tools and supplies you will need, and step-by-step skylight installation directions.

A window on the roof lets in significantly more light than a vertical window, so even a small skylight can make a room feel larger and airier.
When planning a skylight installation, be sure to take into consideration the sun’s path. Skylights on the south- or west-facing portion of the roof will collect direct sun—skylights facing north or east may not get any direct sunlight.

Any skylight that receives direct sunlight is bound to become a heat trap on hot days. So, if you intend to install a skylight facing south or west, be sure you plan ways to control heat gain.
Some manufacturers sell remote-controlled shades or Venetian blinds for their skylights—opting for these would be one way to minimize the problem. Another is to choose a ventilating skylight that can be opened to allow hot air to escape. For more, see Skylights Buying Guide and Skylight Blinds & Shades.
Keep in mind one important fact: If you want to install a skylight in a room that has an attic above, you’ll need to build a light shaft.
The shape of a light shaft controls the spread of the natural light beam. A shaft that’s flared on all four sides spreads light over the widest area; a perpendicular shaft with vertical sides focuses the light straight below. A shaft flared on only one or two sides sends more light in the direction of the flared sides.
Planning Skylight Installation
Be sure any skylight you intend to install will meet local codes for load, wind resistance, and related factors. Building permits are required for installation in most regions.
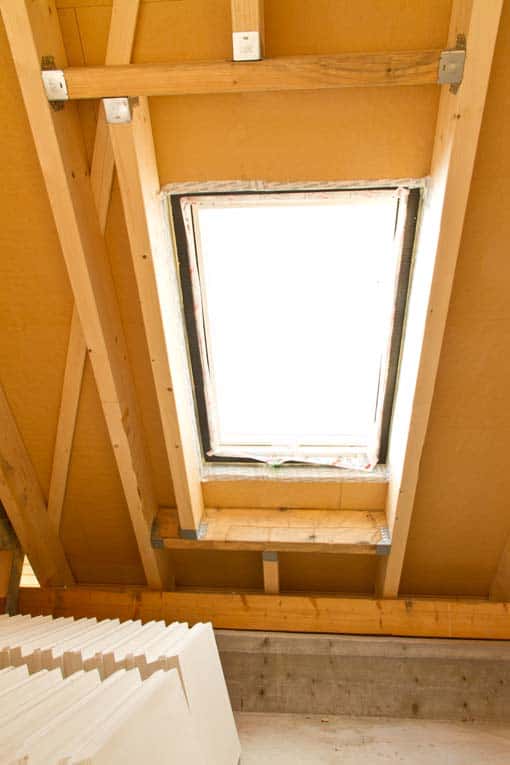
Sizing and placing a roof window in an attic room so that it captures a view calls for careful planning.
The roof’s slope will affect proper placement. A low-sloping roof will require a taller window than a steeper roof for the same amount of view.
Manufacturers of roof windows have charts that list recommendations based on the slope of the roof.
Installation Supplies
Here’s what you need to install a skylight:
In addition to the skylight, you will need 2-by-4s for the frame, drywall and finishing supplies for the ceiling, roofing paper, roofing nails and 16d galvanized nails, step flashing and continuous flashing.
Your toolkit should include a circular saw, hammer, flat pry bar, tin snips, and a utility knife.
Step-by-Step Skylight Installation
This is not an easy project as it involves cutting the roof and installing new structural framing members as well as installing drywall and finishing the ceiling beneath the skylight.
The roofing paper and metal flashing must be installed correctly or the roof will leak around the skylight.
If you have good carpentry skills, follow the manufacturer’s directions precisely; otherwise, hire a professional.
The instructions presented here will give you an idea of the work involved. Some skylights use different installation methods and different types of flashing.
1. Cut and frame the opening.
Follow the manufacturer’s specifications for cutting the hole in your roof. From the inside, drill a locator hole where you want the center of the skylight to be and then work on the roof to cut the opening with a circular saw.
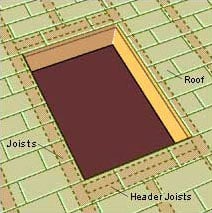
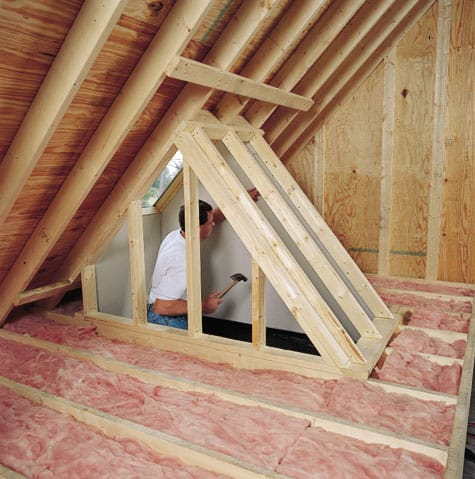
Frame the opening so it is structurally sound according to building codes. Be sure to support the ends of roof rafters before cutting and removing them! Install header joists perpendicular to the rest of the joists (Figure 1).
If the skylight is mounted above an attic, you’ll also need to cut and frame a hole in the ceiling of the room below it, and frame a light shaft through the attic. Note: If you’re not familiar with basic carpentry practices or you are installing a large skylight that will require the removal of more than one roof rafter, consult a professional builder.
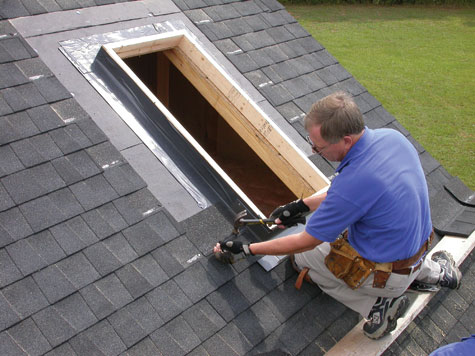
2. Cut back the roofing and attach the skylight.
Using a utility knife and a straightedge, cut the roof shingles about 3 inches back from the opening on all four sides. Set the skylight in place, centered on the opening, and attach it to the roof with nails or screws.
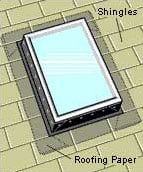
3. Slip in the underlayment.
Cut strips of roofing paper about 8 inches wide and slip them under the shingles (Figure 2). Install the bottom piece, then the sides, and then the top.
The idea here is to overlap the pieces down-roof with the pieces that are up-roof so water will shed properly. Sneaking the paper under the shingles will be tricky. Use a flat pry bar to lift all the roofing nails that would get in the way, taking care not to damage the shingles.
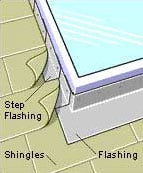
4. Install bottom & step flashing.
Install the bottom flashing, a single piece that wraps partway around the skylight and sits on top of the roof shingles (Figure 3). Drive roofing or flashing nails horizontally into the skylight, not vertically into the roof.
Next, slip individual pieces of step flashing under the shingles. On each side, start at the bottom and work up. The step flashing pieces must overlap each other by 4 inches or so. Attach the flashing pieces to the skylight, not to the roof.
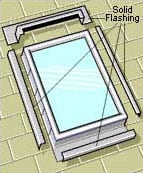
5. Install the solid flashing pieces.
These pieces are designed to fit tightly onto the skylight and ensure that water cannot enter between the step flashing and the skylight. Attach the bottom piece first and then the side pieces (Figure 4). Install the top piece (called the head flashing) by slipping it under the roofing and attaching it to the skylight.