Expert advice on how to clean, restore, refinish and maintain a wood deck, including protecting against wood rot, how to acid wash a deck, and apply a finish to decking.

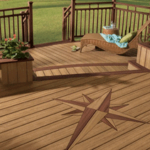
A new wood deck provides a warm, handsome connection with the outdoors, adding to a home’s beauty and setting the stage for a world of outdoor activities. But wood decks take a lot of abuse, both from use and through continued exposure to weather. After a few years, without proper care, they become weathered and uninviting.
Fortunately, most wood deck surface problems are cosmetic, not structural, because decking is built of durable woods, usually redwood, cedar, or pressure-treated pine. Redwood and cedar heartwoods have a natural resistance to termites and decay; pine is pressure-treated with a pesticide to give it insect- and decay-blocking power.
Even so, ultraviolet radiation (UV) from the sun breaks down surface fibers and lignin, causing graying and surface erosion. Moisture encourages surface mildew and causes stains, particularly in damp or humid climates where surfaces never completely dry. And natural extractives in redwood and cedar can discolor the surface.


The road to restoring a deck’s great looks is usually simple, regardless of the type of wood. First, you clean it, and then you diagnose and treat any discoloration. Last, you protect the result with a durable finish.
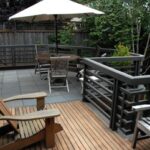
If you’re working on a deck that is above a usable area, such as a second-story deck above a patio, before beginning be sure to protect the area below it with plastic sheeting or drop cloths.
Give your tired-looking deck a facelift sooner rather than later. Wood that is left unprotected will soak up moisture, leading to serious damage. Because decks are exposed to regular abuse—harsh sun, foot traffic, rain, snow, and ice—you may need to treat your deck periodically, perhaps even once a year.
Inspect a Wood Deck for Rot
If your deck was built with pressure-treated lumber rated for ground contact, the wood will be very resistant to rot. If it was built of untreated redwood, cedar, or other wood, there is a greater risk of rot, particularly if the wood is light-colored sapwood rather than dark-brown heartwood.
Just about any wood, however, can rot if it stays wet long enough. (Look at tags at the ends of boards, or printed stamps on boards, to find out about your wood. A deck may be made from several types of lumber.)
Take the time to examine all the wood carefully to see if any boards are rotten. Unfortunately, most wood rot occurs in places that are hard to see—under the decking boards, at the ledger (the board that is attached to the house), on the underside of stair treads, and so on. If possible, crawl underneath the deck to make your inspection.
If the rot is less than 1/2 inch deep, the board can probably be left in place. More extensive rot calls for a replacement board. Use a flat pry bar to carefully remove rotten boards. Replace them with rot-resistant wood. If nails or boards are popping up or coming loose, do not pound the old nails down again; remove them and replace them with longer nails, special decking nails, or decking screws.
If any part of your deck stays wet for a day or more after a rainfall, take steps to see that it can dry out. You’ll probably need to use a leaf blower or a broom to sweep away leaves and dirt from between boards or where the deck meets the house. Perhaps a bush or tree limb needs to be trimmed back, or a gutter downspout moved to direct water away from the deck.
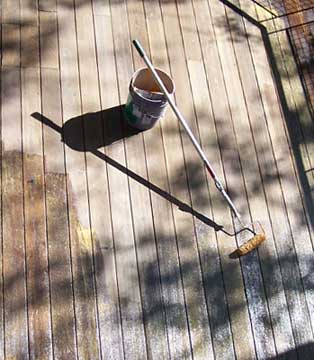
Debris between deck boards looks bad and soaks up water, promoting rot. Use a putty knife or, even better, a laminate scoring tool like the one shown here. Sweep away the dirt and debris, using a sturdy broom. to clear out the debris.

How to Wash a Deck
First use a leaf blower or broom to blow all of the debris off of the deck’s surface and then wash the deck.
To clean a deck, purchase a commercial deck cleaner that removes mildew, oxidation (graying), and dirt. The best ones contain sodium percarbonate. Mix it following the label directions. Be sure to wear rubber gloves and safety glasses.
Using a stiff fiber bristle brush on a broom-type handle, thoroughly scrub the surface in line with the wood grain. Work in small areas and rinse frequently with clear water. Allow to dry. This may be all it takes to return much of the wood’s natural tone.
For a large deck, you can rent a power washer and adjust it to 600 to 800 psi of pressure to blast and rinse the decking. It should have a nozzle that fans an arc of about 25 to 40 degrees.
Wearing safety goggles, hold the nozzle about 6 inches above the deck’s surface and spray slowly and steadily in line with the wood grain, overlapping your path. Be careful not to get too close or stay in one place too long—the powerful spray can erode soft wood grain. Allow the deck to dry for several days before applying any type of finish.
Strip An Old Finish
If the deck has an old oxidized, flaking or peeling finish, remove it with a deck finish stripper. Opt for the least caustic product that will do the job: Some strippers are mild and biodegradable, while others are caustic and toxic. It’s best to buy a small amount and test it in an inconspicuous place.
Wear rubber gloves, protective clothing, and eye protection.
Before applying the stripper, protect surrounding surfaces, siding, and plants with plastic sheeting. Follow the label directions. Strippers typically may be applied with a hand-pump garden sprayer, synthetic brush, or roller. Do not leave the stripper on the wood longer than recommended by the label. When its time to remove the stripper, rinse both the deck and surrounding plants thoroughly with water.
If you have a pressure washer, you can use it for rinsing.
Remove Stains & Discoloration
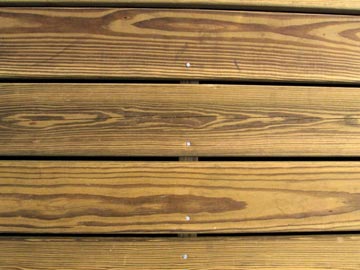
Over time, the beauty of a natural wood deck can lose its luster as the ultraviolet rays from the sun break down the wood’s structure. If the deck has taken on a dull gray color, the problem may easier to solve than it looks.
Non-chlorine oxygenated bleach (with trade names such as Stain Solver or OxyClean) will remove algae and mildew stains, and some oxidized deck sealers. These products are non-toxic to handle, biodegradable, and environmentally friendly. They also clean and brighten the wood, but are not recommended for redwood or cedar because they may darken it.
If your deck is redwood or cedar and has algae, mildew or mold, opt for chlorine bleach (sodium hypochlorite) based cleaners. These remove mold and mildew and lighten (actually bleach) the wood. Chlorine can damage the wood’s fibers and destroy the wood’s natural color if used improperly, and it is toxic to plants and people, so it requires careful handling. Always follow the label directions.
Bleach-based products eliminate mildew. Acid-based products handle graying and stains.
Test for mildew by applying a drop of undiluted liquid household bleach to a small, black spot. If the spot disappears after a minute or two, clean the deck with a mild cleanser (no ammonia) and rinse with a solution of 1 part household liquid bleach to 4 parts water, and then rinse. For stubborn mildew, mix 1 cup trisodium phosphate (TSP) and 1 cup household liquid bleach in a gallon of water and scrub with a stiff brush. Rinse after about 15 minutes.
Non-mildew stains are often caused by natural wood extractives or corroding hardware and nails. Familiar, general graying of the decking is usually the result of surface wood cells that have been broken down by UV radiation and wear.
Always wear rubber gloves, goggles, and old clothes when working with these chemicals, and follow the directions explicitly.
Caution: Never mix detergent containing ammonia with household bleach; the resulting fumes can be highly toxic.
Restore the Wood
Use a commercial deck restoration product to remove aged, gray wood from the surface and revive the wood’s original color and beauty. Oxalic-acid based products, often found in “deck brighteners,” remove grayed surface fibers from wood and the dark tannin stains that can occur on redwood and cedar decks.
For these problems, an acid-based deck restoration product is best. You can buy a pre-mixed oxalic acid deck cleaner or purchase oxalic acid crystals from a hardware store or home improvement center and mix a solution of 4 ounces crystals to 1 quart water in a non-metallic container. Wearing rubber gloves, eye protection, and old clothes, apply with a rag one board at a time and scrub with a soft brush. Allow to dry, and then rinse with water and allow to dry again completely before applying a finish.
How to Finish a Wood Deck
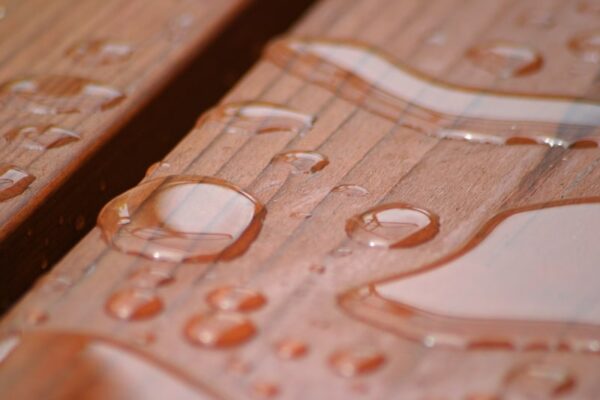
After cleaning a deck, allow it to dry thoroughly before sealing it, but don’t wait too long or it will get dirty again. Determine if it needs to be sealed by sprinkling a few drops of water on the wood. If the water doesn’t bead up and instead soaks right in, the deck needs to be sealed.
Consult with a paint supplier or other expert to choose the finish best suited to the lumber used to build your deck. It should contain either oil or paraffin to keep moisture from soaking in. In addition, it should have UV blockers or pigment (color) to keep rays of the sun from turning the deck gray, unless that’s the look you want.
If your home is subject to wood-eating bugs, see that the finish contains insecticide as well.
You can choose a semi-transparent stain, opaque stain, clear sealer, or paint. In most cases, the best finishes soak into the wood. Films that coat the surface, including paint, tend to show wear patterns and peel more readily. As a result, they require more frequent re-coating.
An oil/alkyd-based finish protects best, but water-based finishes are easier to apply and clean up. Follow the label directions to apply the finish in line with the wood grain—typically using a pad or brush. Your result will be a deck that provides you with years of lasting beauty and enjoyment.