Expert advice on how to repair hardwood floor water damage, repairing a hardwood floor finish, fixing wood flooring scratches, hardwood floor gouge repair, and more

Even the best wood floors are subject to damage. Hardwood flooring, by its name, sounds like it should be really hard. But, compared to other materials like tile, stone, and laminate, it is relatively soft and prone to damage such as scratches, gouges, and discoloration.
Unfortunately, surface scratches and gouges are the inevitable result of daily wear and tear.
Below we show you how to repair minor scratches and gouges. If your floor has many scratches or gouges, it’s probably time for floor refinishing.
The cost of refinishing a hardwood floor will depend upon the condition of your floor, the type of wood flooring, and the number of square feet to be refinished.
Refinishing a wood floor is a big job that involves moving furniture, bringing in a drum sander or other floor sanders, protecting the rest of your house from dust, dealing with odors from polyurethane or other finishing products, and more.

Because it’s easy to ruin an expensive wood floor, refinishing a hardwood floor is often best left in the hands of flooring contractors.
You can’t easily prevent problems caused by expansion and contraction. Wood, as a naturally fibrous and porous material, expands and contracts with changes in temperature and humidity. As it does so, boards can separate or warp and nails can loosen.
With expansion and contraction—and movement in general—hardwood floors can develop squeaks. For methods of fixing squeaks, see How to Fix Floor Squeaks.
The natural settling of a house can also cause separations between the joists and the subfloor. If your floor is sagging or uneven, there could be a serious structural problem causing it. If this is this case with your home, consult a contractor. If the problem is minor, there are some things you can do to fix a bouncing or sagging floor.
To maintain wood floors, vacuum or dry-mop them about once a week.
Repair Hardwood Floor Water Damage
In general, water is an enemy to wood floors. It can damage the finish, leave rings or discoloration or—at its worst—cause flooring boards to cup, warp, buckle, or grow mold.
Water damage to hardwood floors can be from minor to major. It can be caused by a potted plant that leaks onto the floor, from a burst appliance supply hose, or from major flooding.
Methods for dealing with hardwood floor water damage depend upon the severity of the damage.
Severe water damage. If several hardwood flooring boards have warped because of excessive water damage, they’ll probably need to be removed and replaced. In many cases, you can replace only the damaged areas. In order to do this, you’ll need to be able to identify and buy identical replacements. Of course, this isn’t always possible.
This video shows how a professional flooring contractor removed and replaced severely water damaged hardwood flooring:
Removing a water stain. If someone has left a water-mark ring from a hot coffee cup or cold glass on the floor, you might be able to extract the stain.
Fold a white cloth or rag in half and lay it over the stain. Then set an iron to medium heat and use it to iron back and forth over the stain area. Do this gradually, checking frequently to see whether the stain is disappearing and to make sure you don’t cause further damage.
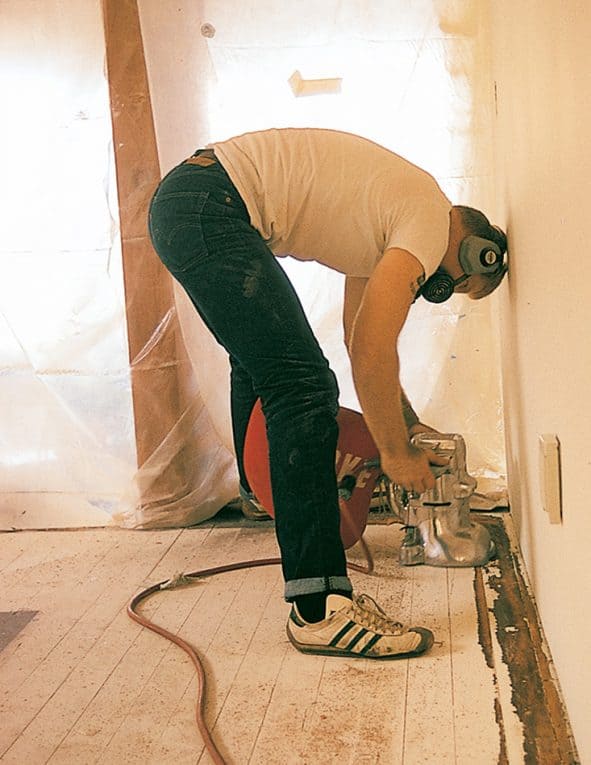
Larger stains on wood floors are typically water marks, caused by spills or over-watering house plants. The area must be sanded, sometimes bleached, and then refinished to match the rest of the floor, which is the trickiest part.
It’s a good idea to hire a flooring contractor for dealing with a large stain, particularly if the stain is in a highly visible area.
If you do decide to take on this project yourself, this is how the process goes:
1 Sand the area with a vibrating sander, first with 100-grit sandpaper and then with 150-grit.

2 Vacuum the area with a shop vacuum.
3 Wipe the area with mineral spirits for an oil-based stain and water for a latex stain.
4 For a dark stain, apply bleach or oxalic acid according to label directions to lighten the stain, and then lightly sand in line with wood grain, using 150-grit sandpaper.
5 Mix up a stain to match the existing floor color. This process usually requires testing possibilities on a piece of wood that’s the same species as your floor.
If you can’t find replacement pieces, cut them from a closet or another inconspicuous part of your existing floor and then replace that cutout with newer flooring.
Repair Hardwood Floor Scratches
Minor scratches in wood floors often can be buffed away using steel wool or hand-sanding with progressively finer sandpaper grits.
When sanding minor scratches, restrict your sanding to the scratched area, feathering only slightly into the surrounding surface. Always sand or buff only in line with the wood grain.

Polyurethane finishes are difficult to sand. Try using a scouring pad dipped in mineral spirits or use a sanding screen.

Don’t ever wax a wood floor that has been coated with a polyurethane finish—this will make it impossible to re-coat in the future without having to sand the floor first.
If paste wax will adhere to the finish, you can use it to hide scratches, and the wax is available in clear, honey tone, or brown to match most any wood floor. Wood-repair wax sticks may help to fill deeper scratches and dents.
Fix Hardwood Gouges and Dents
You can sometimes raise small dents by placing a few drops of water on them and allowing the wood to swell back to its original shape. Applying mild heat with an iron on a thick cloth or a heat gun helps this process along.
For deep gouges or dents, you can use a wood floor filler and wood stain to repair the damaged area. Before applying the filler, tape off the damaged area so you don’t accidentally apply filler where it doesn’t belong.
Mix equal parts of the epoxy-based filler and apply to the gouge with a putty knife. Allow to dry. Then sand and finish.
The following video by Russ Richards shows exactly how to do this. Note how he mixed two different finishes to achieve the right color. You can buy the wood floor filler he uses, Elmer’s Damaged Wood, on Amazon.
Replace Damaged Wood Flooring
Badly damaged or rotted sections of flooring must be removed and replaced with new pieces. This involves cutting out or prying up a section of the finish flooring, gluing or nailing replacements to the subflooring, filling cracks to match, sanding the surface, and refinishing.
If you’re not experienced with this type of work, you’ll find the most difficult part is getting the new pieces to match the old. This job is usually best left to a wood-flooring professional. Staining and finishing to get the repair to match your existing floor may require more work and time than the repair itself. In fact, you may ultimately have to sand and refinish the entire floor to hide the repair.
if possible, buy replacement flooring that matches the size and color of your existing flooring. If you can’t find an exact match and you only need one or two small replacement pieces, consider removing those pieces from an inconspicuous place on your existing floor (such as a closet). Then you can repair that area with new material that doesn’t match as well.
In some cases, it’s easiest to remove and replace a full-length board. Then again, if a damaged board is long, it’s generally best to replace only a portion of it. If more than one board must be replaced, stagger the end joints.
Cutting Out the Damaged Board
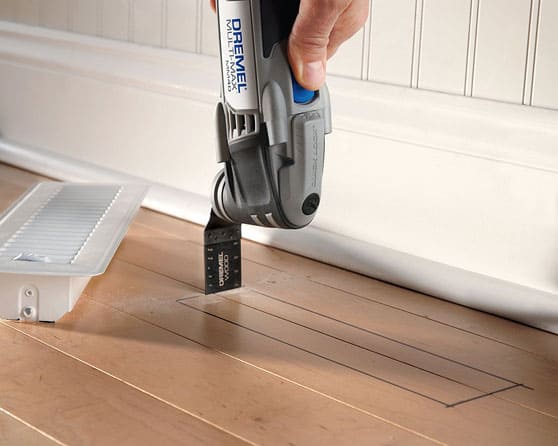
The first step is to cut out the damaged portion. To prevent splintering when you cut the board, mark the cut line with a square and a utility knife.
The best tool for cutting out a section of wood flooring is an oscillating multi-tool, as shown in this photograph. For more about this tool, see the HomeTips Oscillating Multi-Tool Buying Guide.
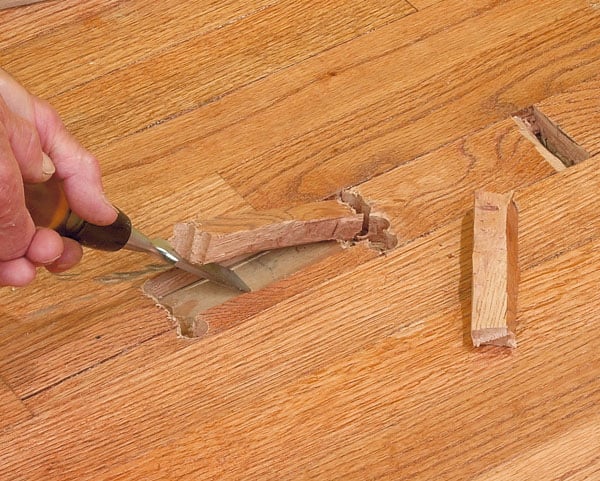
If you don’t have this type of tool, make the cut with a hammer and a sharp chisel. Hold the chisel with the bevel facing the area to be removed.
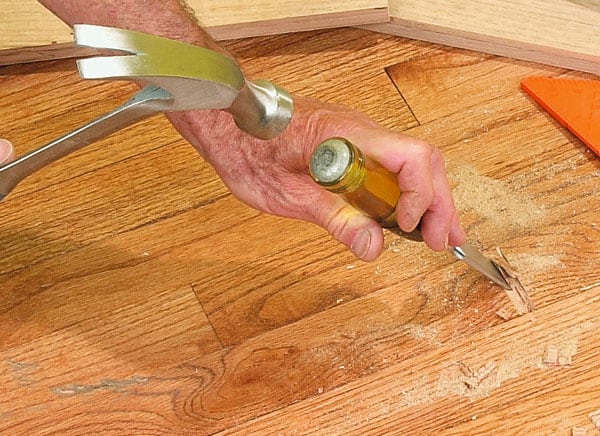
To remove the wood between two cuts, bore two rows of 3⁄8-inch holes, spaced 4 to 6 inches apart, and across the center of the damaged plank. Don’t damage adjacent flooring. Then, using a hammer and chisel, split out the wood between the holes and pry out the pieces.
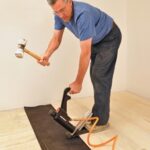
Installing the Replacement
Cut each replacement board to exact length. If necessary, cut off the lower shoulder of the groove so you can fit the board into place. You can chisel this shoulder off or, if you have a table saw, rip it with the saw.
When you tap the replacement into place with a hammer, protect it with a scrap of wood or flooring.
Drill pilot holes, and then finishing nails to fasten the replacement board and the ends of the existing flooring to the subfloor.
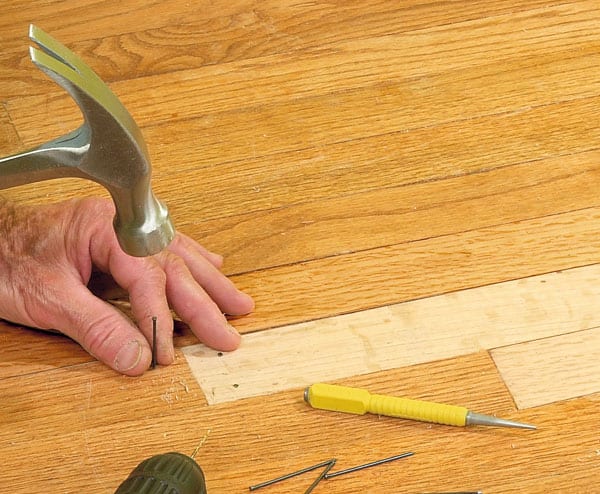
Set the fastener heads below the surface, using a nailset. Then fill with matching wood putty.
Depending upon the extent of refinishing that you’ll be doing, you may want to use a power sander or a hand sander to bring the patch even with the level of the surrounding floor, but be careful not to sand too much!
![]()
![]()
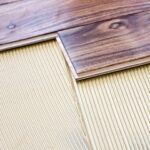
Laminate Floor Replacement
If your floor is a laminate wood floor, as opposed to solid hardwood flooring, you may be able to replace damaged pieces. This video shows how one homeowner replaced a couple of warped laminate wood flooring boards in his kitchen:
Tools for Sanding Floors
You can rent these 3 critical tools for sanding a wood floor: drum sander, random-orbital sander, and edge sander.

Sanding a wood floor is not something to take lightly. Though an experienced do-it-yourselfer can often handle this job, think twice if you’re a newbie at home repairs.
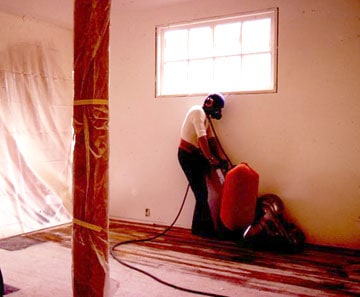
Sanding a wood floor is a difficult job that has potential for disaster. A poor job can result in permanently wavy bumps or visible scratches on what otherwise could be a beautiful wood floor. Our general advice is to hire a professional floor refinisher unless you’re accomplished at this work.
Unless you’re doing a couple of small repairs or working in a tiny area, you’re going to need professional tools for sanding a wood floor. Three main types of floor sanders are available, as discussed below. To do a complete job, you’ll need all three. To buy these, you would pay thousands of dollars; fortunately, you can rent them from a tool rental supply or major home improvement center.
You will also need a heavy-duty vacuum for keeping the dust down—most of these sanders are designed to be connected to dust-control vacuums. Talk with the rental desk about a vacuum that can be connected to the sanders.
Also buy enough sandpaper for your job. The amount and grits you will need depend upon the size of the floors and the nature of the finishes you’ll be removing. (Ask the dealer for recommendations.) When using any floor sander, you will be working from rough sandpaper that removes a lot of material (20-grit) to progressively less abrasive sandpaper: 60-, 80-, and 120-grit to eliminate scratches and produce a fine finish.
Other supplies you’ll need include masking tape and plastic sheeting for protecting areas from sanding dust. You can buy or rent the necessary safety equipment: a respirator, hearing protection, goggles, and work gloves.

Drum Floor Sanders
A drum sander is used for the first stage of a floor-sanding job. You stand to operate this very heavy upright machine. It rolls an 8- or 12-inch-wide sandpaper belt across a series of drum rollers so that the sandpaper moves in a straight line. On unsanded new wood flooring, a drum sander may be operated on a diagonal to the wood grain at first to flatten the irregular surface. But for refinishing and finer sanding, it should be operated only in line with the direction of the wood grain to avoid leaving scratches, skips, or chatter marks. To rent a drum sander, expect to pay from $50 to $75 a day.

Random-Orbital Sanders
A random-orbital sander is used to remove scratch patterns created by drum or rotary sanders, in preparation for the final finish. In addition, it is used in small areas and tight spaces where a drum sander would be difficult to maneuver and on herringbone, parquet, and ornamental floors. This sander is also used with fine-grit sandpaper for “screen and recoat” jobs, where minimal sanding is required.
At the orbital sander’s base, sandpaper is fitted to a flat pad that moves in minute back-and-forth and oval vibrating motions. Because of these tiny movements, this type of sander is much less prone to scratch the wood than sanders that move the sandpaper in one direction.
You can get types with a rounded base or a rectangular base. Floor models can be rented for about $30 to $50 per day. For very small work, you can buy palm-sized models for from $50 to $100.

Edge Sanders
An edge sander, or “edger,” is a smaller sander that you typically operate from a kneeling position. The edger is designed to work right up to base moldings and walls and go into tight spots where a drum sander can’t go. It includes a dust bag and has an orbital motion, like the random-orbital sander above right. You can buy an orbital sander for around $200 or rent one for about $30 per day.