Though popcorn or acoustic ceilings were once popular in homes and apartments, the bumpy look of popcorn ceilings quickly dates a home today. A very common home improvement is to remove a popcorn ceiling.

Before you jump into this project, however, it’s important to consider whether the ceiling texture might contain asbestos. Popcorn ceilings applied before the 1980s may contain asbestos, a fiber that is harmful when airborne.
If you’re unsure whether your ceiling may contain asbestos, you can buy a mail-in asbestos test kit for about $35. Be sure the kit is EPA approved. With this, you carefully scrape a small piece into a plastic bag that seals and send it to a mail-order certified testing lab.
If your ceiling contains asbestos, you have a couple of options:
- Instead of removing the ceiling texture, cover over it with a new layer of drywall. According to the Consumer Product Safety Commission, leaving asbestos in place is not hazardous—it’s removing it that allows the dangerous fibers of asbestos to become airborne.
- Have the texture removed. You should leave removal of asbestos to a professional asbestos abatement contractor.
How to Remove a Popcorn Ceiling, Step by Step
If your popcorn ceiling does not contain asbestos, the following information will guide you through removal.
Begin by preparing the room for the mess, then move on to the removal process.
1. Because you need to spray water onto the ceiling to remove the texture, begin by turning off the power to the receptacles and light fixtures at the circuit breaker panel.

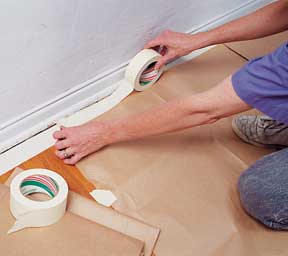
2. Protect the floor, baseboards, and lower parts of the wall by spreading heavy-duty plastic sheeting or water-resistant drop cloths across the floor and extending it about 18 inches up the wall. Tape the edges of the sheeting to the wall with blue painters’ tape.
3. Run 1 1/2-inch painters’ tape along the top of the wall, about 1/4-inch down from the ceiling. Drape the walls with plastic sheeting, taping the top edge to the painters’ tape along the top of the walls. Then unroll rosin paper on the floor to keep the floor from getting too slippery and make cleanup easier.
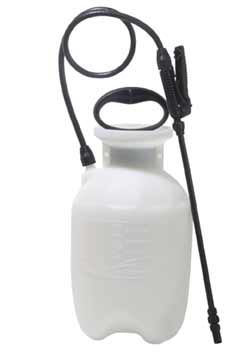
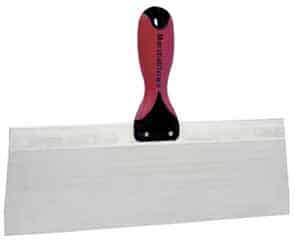
4. Working in 2-by-2-foot sections, use a garden sprayer to apply water to the ceiling, and then scrape the texture off with an 8-inch-wide drywall taping knife. Wear safety glasses and a dust mask.
5. Once you’ve finished scraping the entire ceiling, remove the plastic from the walls.
Leave the plastic sheeting on the floor until you gather and dispose of all of the rosin paper and wall sheeting.
Here is a helpful video from Home Depot that shows how to remove a popcorn ceiling, step by step: