Greatly increase your chances of successfully remodeling your bathroom by following the 10 expert tips outlined in this article. Advice for budgeting, scheduling, choosing materials, avoiding delays and surprises, and more.

Bath-remodeling projects continue to be one of the most popular of all home renovations, and it’s easy to see why: Nothing is warmer or more welcoming than an updated, smartly appointed, freshly remodeled bathroom.

Plus, bath remodeling is a smart investment if you’re planning to sell your home within the next few years.
There’s no secret formula to creating the perfect bath, but you can greatly increase your chances of success by following the 10 steps outlined below.
1. Create a Realistic Budget
The very first step of any home improvement project is to create a realistic budget that addresses every expenditure. For a bath remodel, that means accounting for all labor and material costs, including new fittings, fixtures and surfaces.
Renovating a bathroom can be a complicated, expensive project that requires meticulous planning, a lengthy timetable and the careful coordination of several different trades, such as plumbers, carpenters, electricians and tile contractors.
The easiest way to establish a budget is to hire a professional designer or remodeling service who will design the new bathroom to fit within your budget, and then guide you through each step of the remodeling. Of course, the budget will have to include the cost of the designer, which varies widely depending on the size and scope of the project. To find an experienced, qualified bath designer, visit a local home improvement store or contact the National Kitchen and Bath Association.
If you decide to forego a professional designer and establish the budget yourself, use a computer spreadsheet or dedicated notebook to keep track of all expenditures, including separate listings for labor and materials. Get price quotes in writing from contractors and suppliers, and note that most quotes are only valid for a specific amount of time, usually about four weeks. Once you’ve totaled up all the costs, add on an extra 10 to 20 percent to cover any changes, upgrades or unforeseen repairs.
Now, you’re probably wondering how much it costs to create a dream bathroom. That’s hard to say because so much depends on the condition of the current bath and the fixtures and fittings selected, but on average it costs between $6,000 and $10,000 to totally remodel a small- to medium-size bathroom.
Also, be aware that most towns will require you to apply for—and receive—a building permit before work can commence. Ordinarily, the designer or general contractor will pull the permit, but if not, then you’ll be responsible for getting the building permit.
2. Dealing with the Demolition
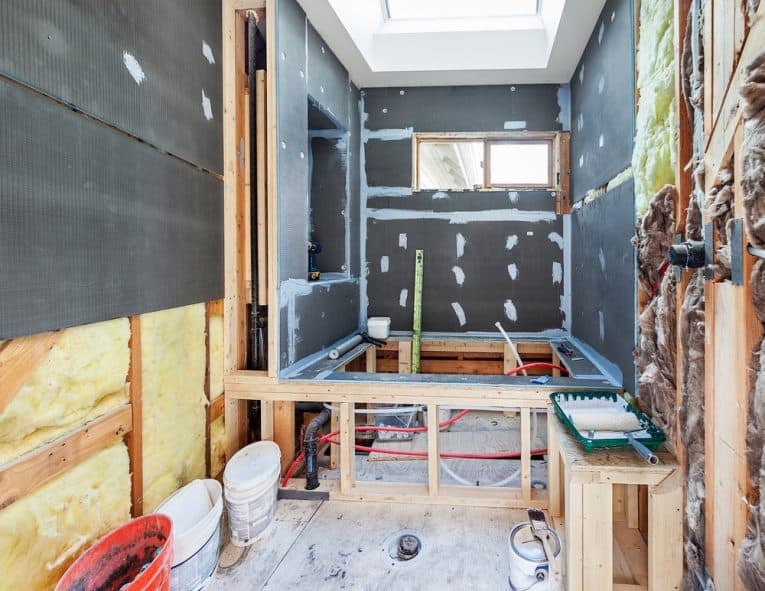
The first step of a bath renovation is to demolish the old bathroom, which goes surprisingly fast. Two people can clear out an average-size bathroom in a day or two. However, this is an extremely dirty, dusty, noisy job. If you decide to tackle the demo work yourself, be sure to wear the proper safety equipment, including work gloves, eye goggles, hearing protection and a dust mask or dual-cartridge respirator. Rent a small dumpster for the demolition debris—it’ll be worth the added expense.
Start by removing the old vanity and sink, disconnecting the toilet, taking up the floor and stripping off the wall tiles. Just be careful not to cut into any plumbing pipes, electrical cables or metal ducts. If you’re going to keep the existing tub or shower, protect it with plywood or a quilted moving pad.
3. Order Products Early
It’s a lot of fun shopping for new bath products, such as the vanity cabinet, sink, faucet, toilet, light fixtures, shower head and floor tile. But it’s important that you order these products as soon as possible. Nothing brings a remodeling project to a screeching halt quite like products that are missing or back-ordered. Once a plumber or electrician walks off the job because there’s nothing for them to install, there’s no guarantee they’ll be available when the products do finally arrive on site.
Worse still, an interruption or lag in the construction schedule has a domino effect, throwing off the work sequence of all other contractors. Before long, a four-week timetable can easily be stretched to eight or more weeks.
4. Choose Bath-Appropriate Surfaces
When choosing surfacing materials for your new bath, be mindful that these materials must be suitable for installation in a bathroom. Bathroom floors, walls, showers and vanity tops are continuously exposed to hot, soapy water and intense steam. These conditions are tough on surfaces, but also create slippery, potentially dangerous conditions for people.
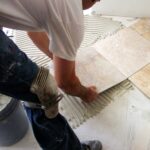
Porcelain tile is arguably the best material for any bath floor. It’s much harder than ceramic tile and comes in a wide array of sizes, shapes, colors and patterns, including porcelain planks that resemble wood flooring. However, when selecting tile for a bath floor, the most important characteristic is slip resistance. The same goes for tiles used in the shower area or toilet alcove. Don’t even consider any floor tile that doesn’t have a slip-resistant surface.
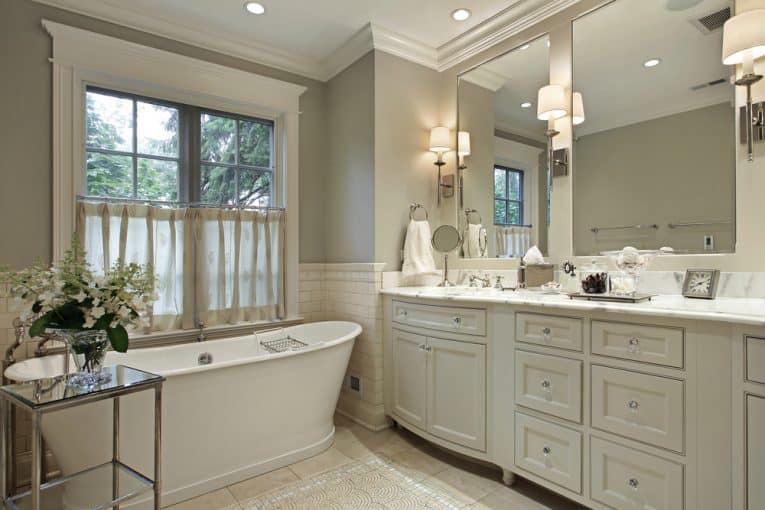
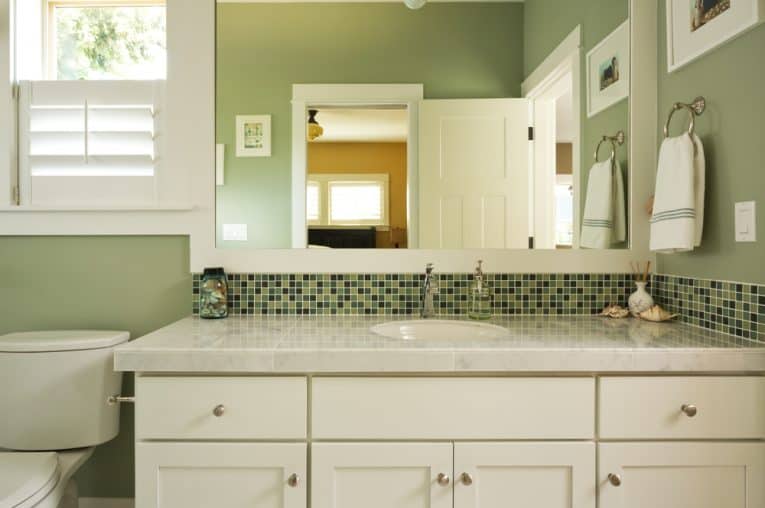
The most popular—and most appropriate—surfaces for vanity countertops include granite, marble, quartz composite and solid-surfacing materials, such as Corian or Staron. All are extremely durable and hold up well in the wettest, steamiest baths. Just be sure to ask the fabricator to round off any sharp corners and edges, especially if you’ve got young children.
5. Plan for Unexpected Surprises
As mentioned earlier, bath remodels are complex projects, so it’s not unusual for an unexpected problem to pop up. Until you open up the walls, remove the vanity cabinet and tear up the old flooring, you cannot predict what you’re going to find.
However, you can reduce your risk: When contractors arrive to bid on the job, ask them to check for any hidden signs of trouble. Or, for a more thorough assessment, hire a home inspector or building engineer to check for damage or code violations. If the bathroom floor is accessible from below, remove the insulation to give the pros a clear, unobstructed view of the underside of the subfloor and plumbing pipes. Identifying any problems early on allows you to budget for them, thus avoiding cost overruns.
6. Avoid Change Orders
Nothing will bust your budget faster than change orders. This involves any change that’s made once the budget is set and after work has begun. During the remodel, you might experience a “while we’re at it” moment and ask for a change that veers away from the original design. Try to avoid this as much as possible.
One of the best ways to keep costs down and shorten the construction schedule is to avoid relocating plumbing pipes. Moving water supply lines, vent stacks and drainpipes is a time-consuming, costly job.
Now, there are times when changes are inevitable, such as when you discover that the subfloor is rotted or the wiring isn’t code-compliant and must be replaced. However, resist the temptation to make gratuitous changes, and you’ll save a significant amount of time and money.
7. Build a Safer Bath
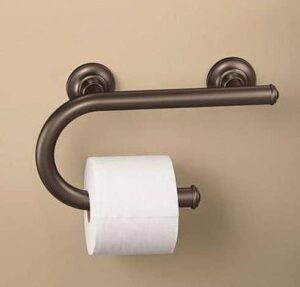
Provide a greater level of safety by installing grab bars. Now, I know you’re probably thinking, “Grab bars are ugly. I don’t want them in my beautiful new bathroom.” There was a time not too long ago when that was true. Grab bars were purely practical and very industrial looking. Most were reminiscent of the type used in hospitals and nursing homes.
Today, however, there’s a whole new generation of designer grab bars that are stylish and very attractive. And they come in a wide variety of finishes to match any bath decor. Some grab bars even serve double duty as a towel rack or toilet paper holder, permitting them to unobtrusively blend into the bathroom design.
Consider putting two or three grab bars inside the shower stall and bathtub, and install one just outside the tub and shower. Mount one grab bar beside the toilet. If you’re installing the grab bars yourself, be certain to follow the installation instructions, and only use the recommended mounting hardware.
8. Address Storage Needs
Remodeling is the perfect time to add storage space to your new bath. Storage is especially important if the bathroom is being shared by two or more people.
If you’re removing walls to enlarge the overall size of the original bathroom, make room for a linen closet. It doesn’t need to be very big, even a 24-inch-deep x 32-inch-wide closet will provide plenty of space for towels, bath mats, toilet paper and cleaning supplies. Just be sure the swing of the closet door doesn’t interfere with the bathroom’s entry or shower door.
If space permits, consider replacing a one-sink vanity with a double-sink vanity. You’ll not only gain a second sink, but a much larger storage cabinet. Switch out a wall mirror with a mirrored bath cabinet and you’ll have a convenient place to store small items, such as makeup and medications.
For a quick, inexpensive way to increase bathroom storage, install wall-mounted shelves or purchase a freestanding bath cabinet or shelving unit. Securely fasten any freestanding cabinet or shelving unit to the wall to prevent it from toppling over.
9. Improve the Lighting
Installing the proper lighting will make your new bathroom much more attractive, warm and welcoming. However, the most important reason to improve the lighting is to create a safer bathroom. Dimly lit, shadowy baths increase the chance of someone tripping and falling, especially the elderly, young children and those with limited mobility.
Every bath should have two types of lighting: ambient and task. Ambient lighting provides general overall illumination for the entire room. This is usually provided by ceiling lights, such as flush-mounted fixtures and/or recessed lights.
Task lighting, as its name implies, delivers precise illumination for specific tasks, such as applying makeup, shaving and personal grooming. Task lighting is often created by wall-mounted sconce lights, recessed fixtures or lights installed over or beside a mirrored bath cabinet.
For advice on bath lighting, visit a lighting showroom, hire a lighting designer, or visit the lighting department at your local home improvement store.
10. Upgrade the Ventilation System
No room in the house needs an effective ventilation system more than a bathroom. A ceiling-mounted vent fan or a combination vent fan/light fixture is the best way to exhaust steam, hot air and unpleasant odors. (Wall-mount vent fans are also available, but not nearly as popular.)
Proper ventilation can also prevent condensation from forming on floors, making them less slippery. It also helps towels to dry faster so they don’t get musty-smelling. And it deters the growth of mold and mildew. Fortunately, upgrading the ventilation system is a relatively easy to do during the remodeling process. Just be sure to consult with the electrician early on in the design process.
When shopping for a vent fan, check its airflow rating, which is measured in cubic feet of air exhausted per minute (CFM). A bath fan should have a rating equal to one CFM for each square foot of floor space. In other words, if your bathroom is 50 square feet or smaller in size, you need a 50-CFM fan. Keep in mind that very spacious baths will likely require more than one vent fan. Again, consult with the electrician for specific requirements.
If you’d like to put a vent fan in a shower stall or directly above a bathtub, be certain that it’s rated for such wet, steamy conditions. And, of course, bath vent fans must exhaust to the outdoors, never into an attic, basement or other enclosed area.
These 10 strategies can be applied to any bath project, regardless of its size or style, and they’ll ensure that the bath remodel goes smoothly, stays on budget and becomes a warm, welcoming oasis.
Also see: How to Makeover a Small Bathroom (with Pictures)
Joseph Truini is a home improvement expert and the author of the bestselling book Building a Shed who writes online for The Home Depot. He provides great “how to” advice on upgrade the different spaces in your house. For more bath remodel ideas and information, click here.