There aren’t many remodeling projects that work comfortably in both traditional and contemporary interiors. It’s hard to think of any bath fixtures that could do this.

The same is true of most furniture, wallpaper, light fixtures, cabinets and even appliances. So, when you find something like a farmhouse sink (this style is also called a “farmhouse apron front sink”) that can look good in just about any kitchen, it’s worth taking a closer look.

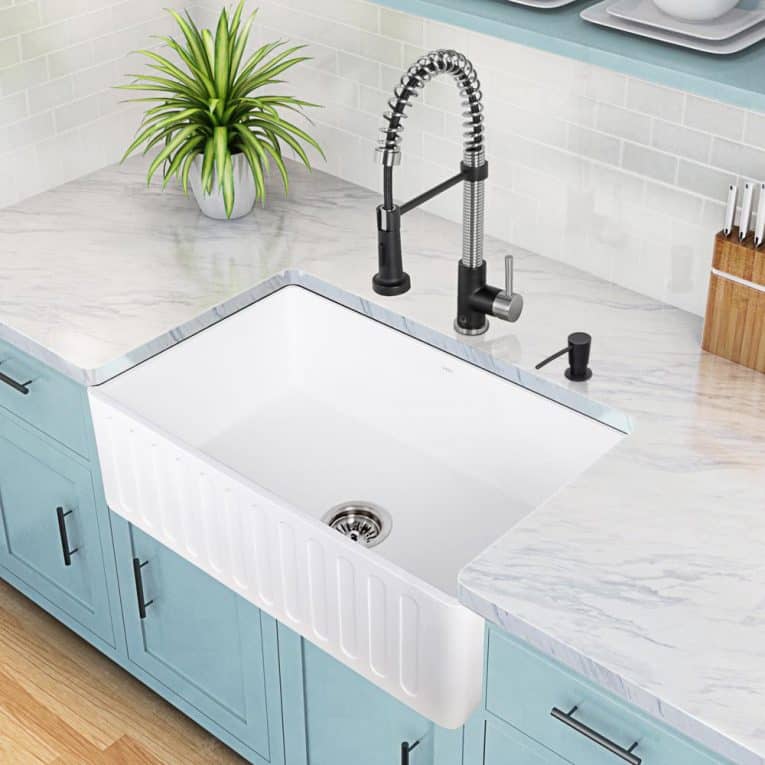
These fixtures are firmly rooted in the past because they echo designs from decades ago. But they also have contemporary grace notes due to their simple, unadorned designs, and are very popular with today’s kitchen designers.

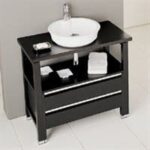
Though most farmhouse kitchen sinks have a single bowl, double bowls are also widely available. Some buyers don’t want to make the change to single bowl models because they are used to how these sinks work. Others just prefer the look of a double bowl sink. Although both types function differently, the installation of both is basically the same.
Although you can find farmhouse sinks that drop in over your countertop, the under-mount approach is more common.
This means that if you have laminate counters, you should pick one of the drop-in models that can cover the cut edges of your sink cutout hole. These sinks look like under-mount models because they have the same front aprons.
They do not, however, have one of the great features of a typical farmhouse sink—the ability to wipe counter debris directly into the sink without hitting a sink lip. If you plan to install new counters, then the under-mount approach is preferred.
Farmhouse Sink Cabinet Retrofits
Fortunately, farmhouse sinks are designed to work in existing kitchen sink cabinets. They do require modifications, but none are very difficult.
The first step is to remove the existing sink, then make a sink access-notch in the face frame just above the doors. Although this panel can sometimes look like a drawer, it is a false front. A drawer couldn’t work because the sink occupies the space that a drawer would require.
Occasionally these panels operate, when they are hinged to tip down, so sponges can be stored in a small tray behind the panel. However, this feature is eliminated when the new sink is installed.

Most sink cabinets are 36 inches wide, but some are 30 inches wide. Farmhouse sinks are available in both sizes, so pick out a model that will fit your cabinet. Next, take out the template that comes with the sink and read the directions about how to use it. The template will explain how to support the sink and how to cut the counter next to it, if required.
For under-mount installations, the sink should be supported from below. (When full of water, these sinks can become very heavy.) This means using a drill to screw 2×4 support cleats to both cabinets walls and the back of the cabinet, too, if it leaves enough room for the plumbing connections.
The template will explain exactly where these cleats should be located to support the sink you have. Make sure to use screws that go only through the cleat and the side of the cabinet. Don’t use screws that are so long that they would interfere with the operation of a drawer in a nearby cabinet.
The template also explains the location and the size of cuts required in the face frame.
To make these cuts, you’ll need a variable jig saw. In most cases, there should be enough room to make the cuts without interfering with the doors underneath. But if this happens to you, you’ll have to install new, shorter doors and add a filler block between the new doors and the bottom of the new sink.
Use blue painter’s tape to cover up the cabinet face where the notch cuts fall. This will reduce the splintering from the cut and protect the surface from scratches caused by a rough saw foot. When working with a jig saw, be sure to wear protective eye gear and work gloves.
Placing the Farmhouse Sink
Before sliding the sink into place, run a bead of silicone caulk around the face frame cutout and along the top of the support cleats. Get some help to lift the sink and lower it into place from above. Locate the sink so the apron sticks out about a half-inch from the front of the cabinet.
Next, push the sink against the cabinet and wipe away any caulk squeeze-out from around the sink. Lastly, add some silicone caulk to the top edges of the sink, then install the countertops over the sink. Again, be sure to wipe away any squeeze-out.
Sink Plumbing Connections
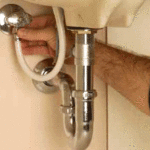
Because these sinks have big, deep bowls, they frequently have single drain openings. However, the sinks they replace are almost always double-bowl units with two drain openings. This means that the waste plumbing components need altering. If you’re not comfortable working with plumbing, or run into any questions as you’re working, call a licensed plumber.
The first step is to install a drain assembly in the drain hole, according to the directions that come with this hardware.
This assembly must be connected to the sink trap that’s already in place. How this is done is dependent on the existing conditions, but most often, you first install a disposer unit to the bottom of the drain assembly.
Next, remove the trap from the existing system, then install it on the pipe coming out of the disposer’s side.
Finish up by positioning the trap so the drain side is facing toward the waste pipe in the wall. To make this work, the extension pipe from the trap to the drain pipe in the wall needs to be cut to size.
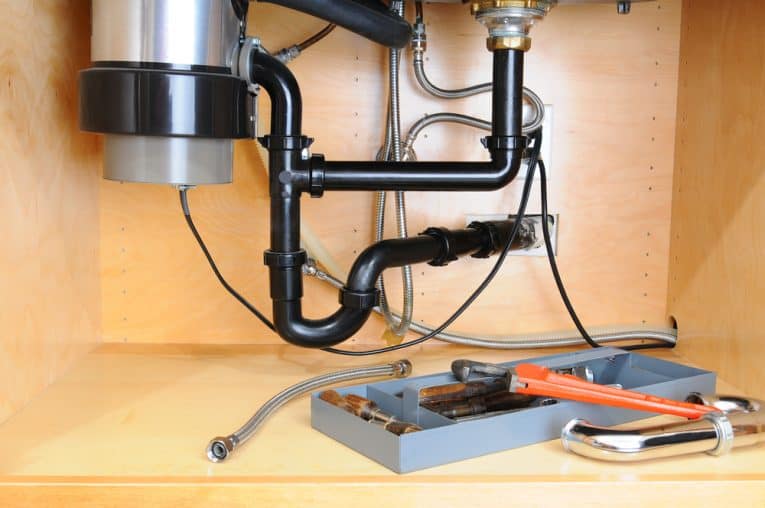
The water supply lines usually need alterations too, because typically when a sink is replaced, the faucet is replaced, too. To do this, first install the faucet (and typically a spray hose on a kitchen sink), then measure the distance from the bottom of the faucet to the water supply valves and install new supply tubes from these valves to the hot and cold sides of the faucet.
Finally, test for leaks, and adjust the plumbing where needed. If no leaks appear, you’re done!
Steve Willson began his career as a carpentry contractor in Rochester, New York, where he owned and operated his own business. He then joined Popular Mechanics magazine as their Home Improvement Editor, a position he held for 22 years. He is the author of three books and has edited or rewritten 11 books on various home improvement and tool-use topics. He also writes for the Home Depot, which carries a wide selection of tools that make installing a new sink much easier.