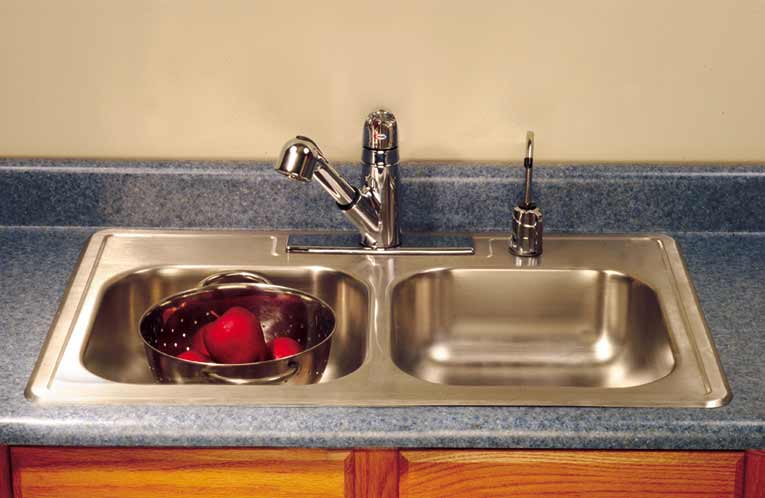
The kitchen sink is an essential element of any household. Food is prepared, dishes are washed, flower vases are filled, and food is disposed of in the kitchen sink. The kitchen sink can be installed above the counter, below the counter, or even as a seamless part of the counter itself.

Want to install a kitchen sink? This expert guide will take you through the process step-by-step.
To many homeowners, installing a kitchen sink seems like a daunting task, but the fact is, if you can trace around a template and cut out a hole, you can install a kitchen sink.

You do want to make sure your new sink fits your countertop and the cabinet below it, so measure the width and depth of your lower cabinets before making a purchase.
Generally, a sink up to 22 inches deep (from front to back) will fit in a standard 24-inch-deep cabinet if you have no backsplash; if you do have a backsplash, your countertop will only take a sink up to 20 1/2 inches deep. Of course, your options will increase if you are also changing your cabinetry and countertop.
Install a Drop-In Kitchen Sink: Step-by-Step
To install a counter-top kitchen sink, follow the directions below:
1 The first step when installing a new sink is to properly site the opening. Most sink manufacturers provide a template.
Position the template so it is centered on the sink cabinet and is at least 1 1/2 inches back from the countertop’s front edge. If your countertop is deeper than 24 inches, place it farther back, but not more than 4 inches. Tape the template in place, then outline it with a marker.
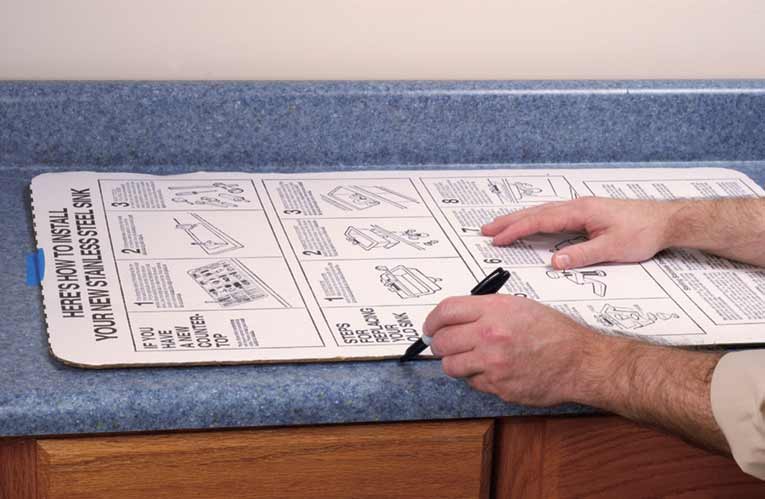
2 After marking the opening, remove the template and drill a 3/8-inch-diameter hole in each corner.
Insert a saber-saw blade in one of the holes and start cutting along the inside of the line. To prevent the cutout from snapping off and falling through as you complete the cuts, first screw a scrap of wood from front to back on the top of the cutout long enough so it spans the opening, plus a couple of inches.
When you’ve finished, simply lift the cutout from the template.

3 Install the faucet (see How to Install a Kitchen Faucet for instructions) and the sink strainers. (Doing this when you’ve got full access to the sink will be much easier than fitting the pieces in from below after the sink is installed.)
Next, to create a watertight seal between the sink and the countertop, apply a bead of silicone caulk or plumber’s putty around the entire perimeter of the underside of the sink’s lip.

4 Carefully flip the sink over and insert into the opening, taking care not to disturb the caulk or putty.
Now install the kitchen sink. If your sink is heavy, get help lifting and installing it; also consider placing a couple of scraps of wood near the edge of the opening to support the sink and protect your fingers as you drop it into position.

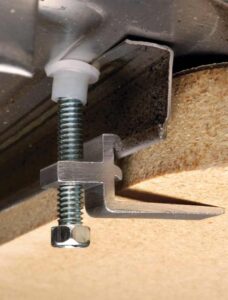
5 Most sinks are pulled down tight against the countertop with special mounting clips that hook onto the lip on the underside of the sink and are tightened with a screwdriver or nut-driver. Follow the manufacturer’s directions for spacing these clips.
Tightening the mounting clips may cause the caulk or putty to squeeze out from under the sink lip, so remove this excess with a clean, soft rag.
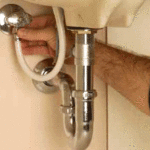
6 To complete the project, first connect the P-trap. Join the faucet lines to the hot and cold supply lines with flexible supply tubes and connect the strainers to the waste line.
Turn the water on at the shut-off valves, remove the aerator from the faucet, then turn on the water from the faucet to flush the system. Reinstall the aerator after you’ve run the water for a minute or so.

Install a Drop-In Kitchen Sink Video
This video walks you through the steps of installing a drop-in kitchen sink.
Install an Under-Mount Kitchen Sink Video
Installing an under-mount kitchen sink is quite as easy as installing a drop-in sink. Nevertheless, this video shows you how: