Expert step-by-step instructions for installing a bathroom or kitchen fan yourself, including methods of venting through a wall or roof.

Kitchens and bathrooms are particularly prone to moisture problems caused by high humidity. Heat and moisture combine to produce moisture-laden air that fills the room and, upon contacting cooler walls, and ceilings, condenses, turning back into water.
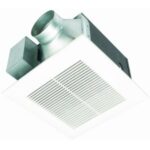
This feeds mold, mildew, and even structural rot. To expel humid air before it has a chance to condense, every bathroom needs ventilation. And kitchens need ventilation for expelling steam and cooking odors. In most cases, the best ventilation for kitchens and bathrooms is an exhaust fan or range hood. Methods for installing range hoods and bath fans are quite similar; here we focus on the techniques for installing a bathroom fan.
Though the bathrooms in most new homes are equipped with adequate bath fans, an older home is often either entirely without a fan or has one that is underpowered. When buying a new ventilation fan, be sure to check its rating for air movement, which is measured by cubic feet per minute (CFM). For an average-size bathroom, the minimal requirement is 80 CFM.
Replacing an existing fan with a new one is a relatively easy do-it-yourself project as long as the new unit will fit in the existing opening and can be connected to the existing exhaust duct.
Installing a new fan where there wasn’t a fan before is more involved but often easiest if you place it where there is an existing ceiling light fixture. Before you install the fan housing, the job will require cutting a hole in the ceiling at the light fixture’s location, snaking a vent pipe (or duct) from there to an exterior wall, penetrating the exterior wall for the vent, and adding a vent cap. For this job, purchase a fan that has a built-in light to replace the light you remove. If the ventwork is beyond your skill level, call in a contractor.
Step-by-Step Bath Fan Installation
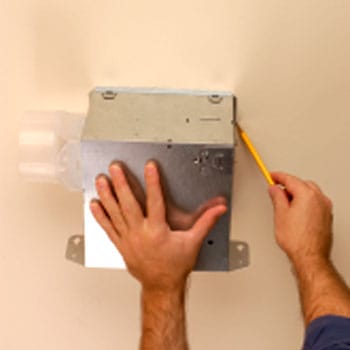
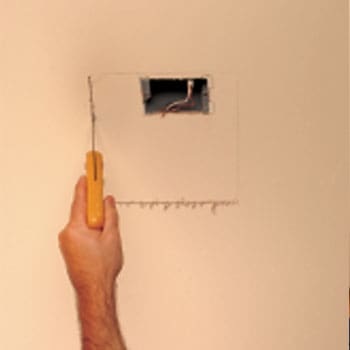
1 Turn off the power to the existing fixture at the service panel. Remove the old fixture. Position the template or housing on the ceiling so it aligns with the ceiling joist. Trace around the template or housing to locate the opening. Alternatively, if you have access from above, position the housing or template next to the joist and trace around it.

2 Cut out the opening according to the manufacturer’s directions using a drywall saw, saber saw, reciprocating saw, or utility knife.
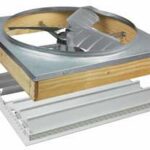
3 Attach the ductwork and insert the housing up into the opening. Secure the housing to the joist with the fasteners provided. Make sure to fill all the mounting holes with fasteners to reduce vibration and ensure noise-free operation.

4 Connect the fan unit to the existing wiring following the manufacturer’s wiring diagram. Be sure the electrical circuit is turned off when doing all work.
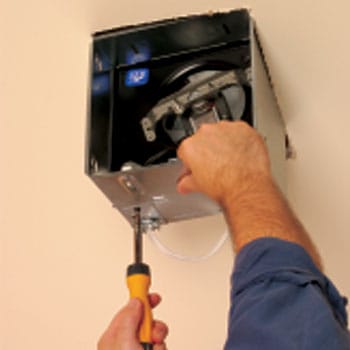
5 Attach the fixture to the housing and attach the grille to the fixture with the fastener provided.

6 Screw in a lightbulb and attach the diffuser; this will generally just snap in place.

Finally, run the ductwork, making as few turns as possible.
Mark the location for the vent cap and cut out the hole. Apply a bead of silicone caulk around the perimeter of the cap and slide it in the opening. Fasten the cap to the wall with galvanized screws. Connect the ductwork to the vent cap and test the system.
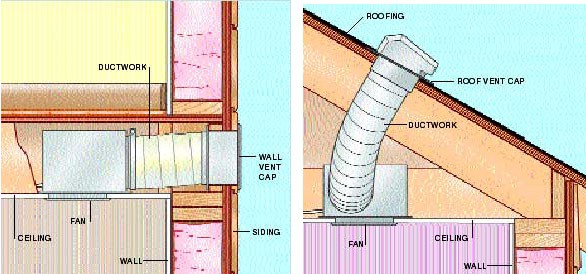
Bathroom Fan Venting Options
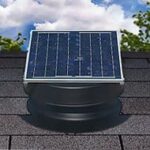
There are two common ways to route ductwork to vent bathroom air outside: through the ceiling and out through an exterior wall, or through the ceiling and out through the roof. (You can also buy a fan that vents directly through an exterior wall, but this typically requires running a new electrical line to the wall.) Of the two ceiling options, a vent through a wall is less likely to leak.