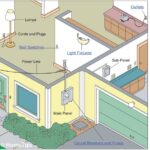
The National Electrical Code, although sometimes a little fussy, is the reference book for all sorts of electrical specifications in a typical house. Among its many data points are circuit-wiring capacities— the number and type of outlets allowed on a circuit protected by a specific-amperage circuit breaker. With a never-ending supply of new electrical appliances and devices, most houses have fully loaded service panels with no room for any new circuits.


Fortunately, there’s more room in the main electrical panel than meets the eye if you utilize tandem circuit breakers. Following is a description of what tandem circuit breakers are and how to add a new circuit using them. If your electrical panel is so undersized that tandem circuit breakers won’t solve the problem, you’ll probably need to have an electrician install a new electrical service panel.
For more, see Electrical Service Panels & Circuit Breakers: How They Do Their Job
Tandem Circuit Breakers
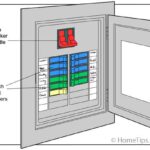
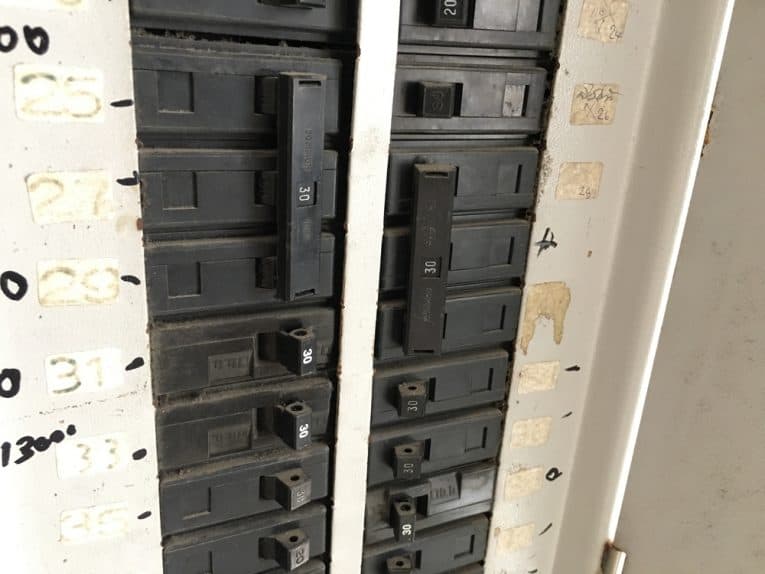
When you look inside your main electrical panel, you’ll see that most—but not all—of the circuit breakers are the same thickness. An extra large breaker is typically at the top of the panel; this is the main service breaker (it shuts off all of the power). In addition, you will probably see a couple of other extra-thick or double breakers that serve big appliances like the water heater and electric range.
The remaining average-sized breakers typically serve lighting, receptacle, and small appliance circuits in the house, and usually are either 15- or 20-amp breakers. As household electrical needs increase, families often run out of these and/or the electrical panel can run out of places to put new ones.
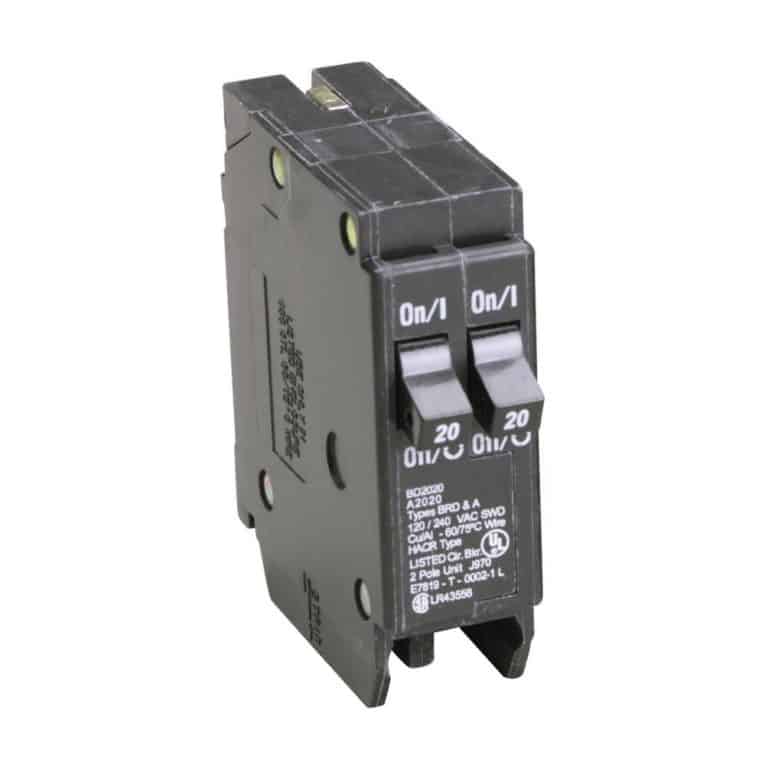
If you need more 15- or 20-amp breakers, a simple solution is to install a tandem breaker. The overall size of a tandem circuit breaker is the same as that of a standard breaker, but instead of a single breaker, it has two narrow side-by-side breakers. You can buy tandem circuit breakers where both sides are 20-amp breakers, both are 15-amp breakers, or one side is 15 amps and the other side is 20 amps.
Even though each “half breaker” is thinner than the standard circuit breaker, they offer the same circuit protection. By removing a standard 20-amp breaker and replacing it with a tandem unit that has two 20-amp breakers, you immediately gain an extra circuit in the electrical panel. The wires from the original breaker are attached to one of the new breakers in the tandem, and the wires feeding your new circuit are attached to the second breaker.
Installing a tandem breaker is a simple job that takes about 10 minutes. Installing a new circuit with boxes, cables, receptacles, switches, and light fixtures, however, takes a lot more time.
Adding a New Circuit
Following is a step-by-step overview that shows what it takes to add a new circuit and connect it to the new breaker. If you don’t have the tools or skills to safely undertake this work yourself, hire an electrician for the job.
Step 1: First, figure out what lights, switches, and receptacles you want, then determine their approximate locations. If you are adding a circuit to the interior of your house in a completely finished room, you’ll want to choose a location based on how difficult it will be to install the cables and box. If you are just adding a new lighting circuit to an unfinished space such as a basement, choosing a location will be much easier.
Step 2: Make a shopping list of what you will need. Go to a home center, and run it by the clerks in the electrical department. These people are usually well informed and can easily explain options you might not have considered.
Step 3: Mount the electrical boxes in the desired location and install the proper gauge electrical cable between these boxes. Keep in mind that if your new circuit is going to be on the first floor and the house is built on a basement, you’ll need to run the cables through the floor joists in the basement instead of fishing them through finished walls, floors, and ceilings on the first floor.
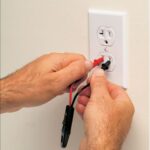
Step 4: Install the new receptacles, light fixtures, switches, and cover plates.
Step 5: Turn off the main breaker at the top of the box, and then remove the panel cover by unscrewing a few large screws. Use a voltage tester to be sure the power to the panel is off—touching electrically charged wires or bus bars inside the panel can be deadly. Then, as long as all your work occurs below the main breaker, you will not be exposed to any charged power in the panel box. By turning off the main power, you cannot be shocked by any fixture in the house (but you may need a flashlight since your electricity will be totally off).
Step 6: Select a standard breaker for replacement, preferably one at the bottom of the box, where removing the existing breaker and installing the new one will be easier.
Step 7: Remove the black wire from the existing breaker and pull the breaker out of the box by gripping it on the side where the wire was attached. The breaker is held in the box by a lip on the bus bar. (The bus bar runs down the middle of the back of the box and holds both columns of breakers.) The breaker will pivot out of its spot until it clears the lip on the bus and then it can be removed.
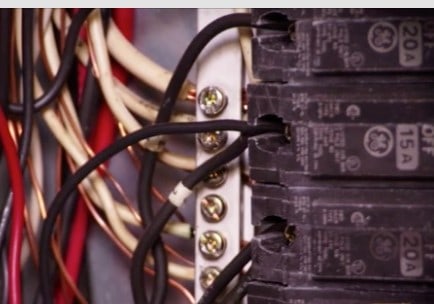
Step 8: Attach the black wire from the old breaker to the top breaker in the new tandem unit. Then, do the same with the black wire from the new circuit cable.
Step 9: Hook the end opposite the black wires onto the bus bar and push the breaker into the opening until it is flush with the surrounding units.
Step 10: Attach the white and ground wires from the new circuit into the same strip at the back of the box that holds the white and ground wires of the old breaker.
Step 11: Reattach the panel cover and door, turn on the main service breaker, and check that the new circuit components are working properly.
Find an Electrical Pro Near You
ABOUT THE AUTHOR: Steve Willson writes for The Home Depot. He was the home improvement editor for Popular Mechanics magazine for 22 years and owned a carpentry contracting business in Rochester, New York. He has also written three books about home improvement. You can see a selection of circuit breakers by visiting The Home Depot’s website.
This article is editorial content that has been contributed to our site at our request and is published for the benefit of our readers. We have not been compensated for its placement.