Expert DIY advice on how to remove an old water heater tank, prepare for a new tankless water heater, and install the tankless water heater.

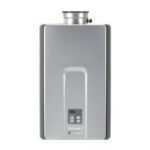
A tankless water heater, also called an on-demand water heater, saves money because it doesn’t store a large volume of heated water. What it does is provide hot water on demand so you don’t have to worry about the shower suddenly running cold.

But there is one caveat: Because a tankless water heater heats the water real-time as the water moves through the unit, it can only heat a given amount of water at one time. As a result, it may not work in a household where two or three showers may be running at the same time. The number of hot-water fixtures it can serve at one time will depend upon the heating capacity of the unit.

This project calls for good plumbing skills, and local codes may require that a licensed plumber do the work. If you can and choose to do the job yourself, you should know how to shut off the water to your house (see How to Shut Off the Water to Fixtures) and how to cut into and connect new fittings and pipes to your supply pipes (if you have copper pipes, see Cutting & Joining Copper Pipe).
There are a couple of basic options:
• An indoor, gas-powered tankless water heater must be vented to the outside. It also requires a gas line and a connection to a 120-volt circuit. It can be plugged into an outlet or wired directly to a service panel.
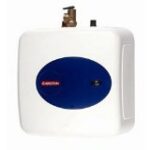
• An indoor, electric tankless water heater does not need to be vented to the outside. It does require 240-volt power. It may be plugged into a 240-volt outlet or directly wired to a service panel.
Tankless Water Heater Preparation
Before you disconnect and remove your existing water heater, be sure to do all of the necessary preparation—you don’t want to be stuck without hot water for a week or two while you’re waiting for needed plumbing, electrical, or vent work.
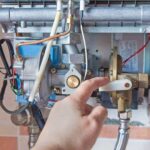
If you are installing a new gas unit, check to see if you need your gas meter upgraded. Because the unit uses lots of BTUs, your meter may not have a large enough capacity to supply it along with the other gas-using appliances in your home. The gas company can check this out for you and usually will upgrade the meter at little or no cost. Also have the gas company check to see that it supplies the correct amount of manifold pressure for your new unit.
A tankless water heater usually requires a 1-inch gas pipe from the meter to the water heater. If you need to install a new gas line, it is best to hire a professional plumber to do this. You may want to have another gas shutoff valve installed just prior to the unit being installed.
An indoor gas unit will also require venting. Because a tankless water heater produces a good deal of condensation and pushes air out with a fan, you will need to use category II stainless-steel exhaust pipe with tightly sealed silicon joints, as shown in the second video below. If you’re installing a high-efficiency tankless water heater, you may be able to use plastic pipe, as shown in the This Old House video below.
If you live in a cold climate, it’s a good idea to include a damper to prevent cold air from coming back in. Depending upon the heater’s make and model, you may also install a condensate drain, which drains water from condensation through plastic tubing. This should be routed to a floor drain or a utility sink. Consult the manufacturer’s literature for all plumbing and venting requirements.
A gas unit also needs 120-volt electrical power. Plan to plug it into a nearby outlet, or wire it directly to a junction box.
Here is a really good video from This Old House that will give you an excellent overview of the various steps involved in installing a tankless water heater.
This thorough video, by Ron Hazelton, explains how a failing conventional water heater can cause debris in your water that clogs faucet aerators, shower heads, and other water-using devices. He decides to remove and replace his failing water heater with a tankless water heater, and walks us through the process.
If you are installing an electric water heater, which requires 240-volt electrical power, have an electrician route the wiring to it unless you are certain of your skills.
Codes require a subpanel (which may be supplied along with the unit) to be installed next to the unit. This subpanel has its own circuit breakers so you can quickly disconnect power to the unit if needed.
Run wiring into the subpanel and then from the subpanel to the unit. Be certain that the power to the water heater’s circuit is off at all times while the work is being done.
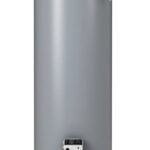
Removing the Old Water Heater
In most cases, a new tankless unit will replace a storage water heater. In Ron Hazelton’s video above, he references our site for the instructions: How to Flush or Drain a Water Heater.
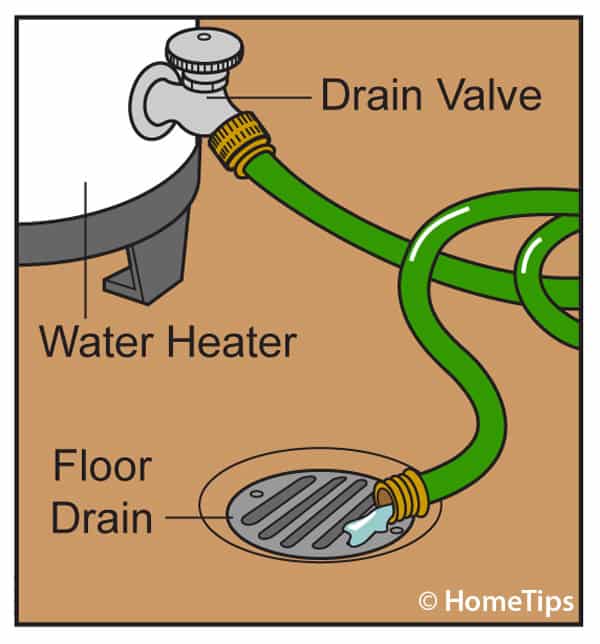
To remove the old water heater, shut off the valves on the two water lines (one inlet and one outlet) leading into the existing water heater.
Use channel-type pliers or a pipe wrench to loosen and disconnect the lines from the water heater.

Open the drain valve at the bottom and drain the tank.
On a gas unit, shut off the gas line valve, and disconnect the gas line.
Disconnect and remove a section or two of vent pipe.
If the unit is electric, you may choose to hire an electrician to disconnect the wiring as 240-volt power can present an electrocution hazard. If you choose to do it yourself, shut off the circuit at the service panel and test to make sure the power is off. Disconnect the wires from the unit and remove the old water heater. If you need help with this project, call a local water heater pro.
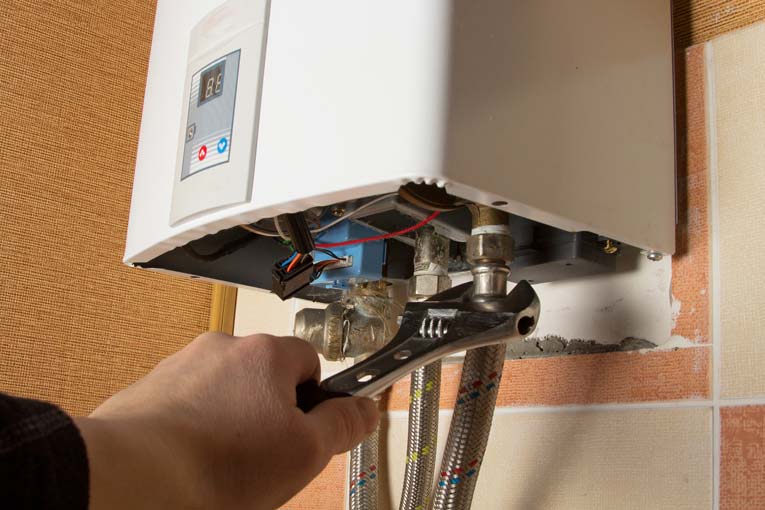
Installing a Tankless Water Heater
A new tankless unit can be installed flush—against the drywall or plaster—or set into the wall, between studs. If you want to set the unit into the wall, use a stud finder to locate studs and cut a hole between them. Attach the unit to the wall following the manufacturer’s instructions.
Route water supply pipes to the water heater. Be sure the pipe from the water utility leads to the inlet and the pipe leading to the house is connected to the outlet. Install shutoff valves on both lines near the unit. You also may need to add a pressure-relief valve. Use union fittings to make the final connections to the inlet and the outlet.
Open the water valves but not the electricity or gas. Open faucets in the house to run water through the unit for a minute or so. Shut off the water valves. Remove the inline filter, usually located near the inlet, and clean out any debris. Replace the filter, open the water valves, restore electrical power, and turn on the gas. Finally, test the unit to make sure it is operating properly.