Flush your water heater tank once a year to remove mineral sediment and scale so your water heater heats more efficiently and lasts longer. This expert advice uses videos, illustrations, and easy-to-follow text to show you how to flush or drain a water heater.

Why is flushing or partially draining a water heater important? Because it prevents the build-up of mineral deposits inside the water heater.
Over time, mineral deposits collect as sediment and scale in a water heater tank. These deposits can form a very thick, crusty coating at the base of a gas water heater or cover the elements of an electric water heater. This coating diminishes the transfer of heat from the burner or heating elements to the water in the tank, wasting energy and money. Eventually, it also causes corrosion.
Eventually, scale and mineral deposits can break free, slowing the flow of hot water through pipes and faucets. They can also clog the valve that is used to flush or drain a water heater tank.
EXPERT ADVICE: If your water heater hasn’t been flushed for years, some plumbers advise you not to flush it because this could activate leaks. The theory is this: Tiny fissures in the base may have filled with sediment that helps prevent leaks, particularly in a gas water heater where the flame has been baking the steel bottom. When you flush out the sediment, you could remove some of the protection against leaking. If your water heater has not been flushed for years, it would pay to ask a couple of plumbers in your area for their opinions about this.
The best policy is to flush or partially drain a water heater at least once a year after it is first installed.
How much does it cost to have a water heater drained or flushed? If you choose not to do this work yourself, expect to pay a plumber from $80 to $100.
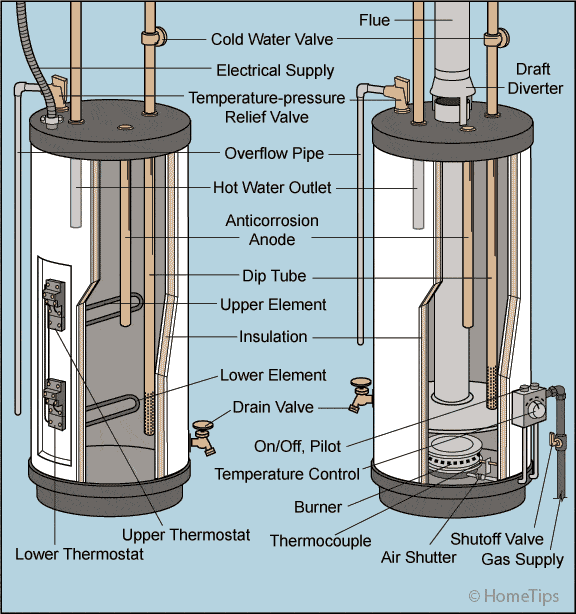
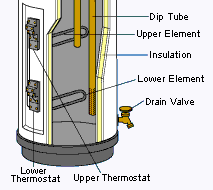
Here is a diagram that shows how electric and gas water heaters are designed.

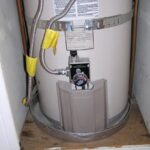
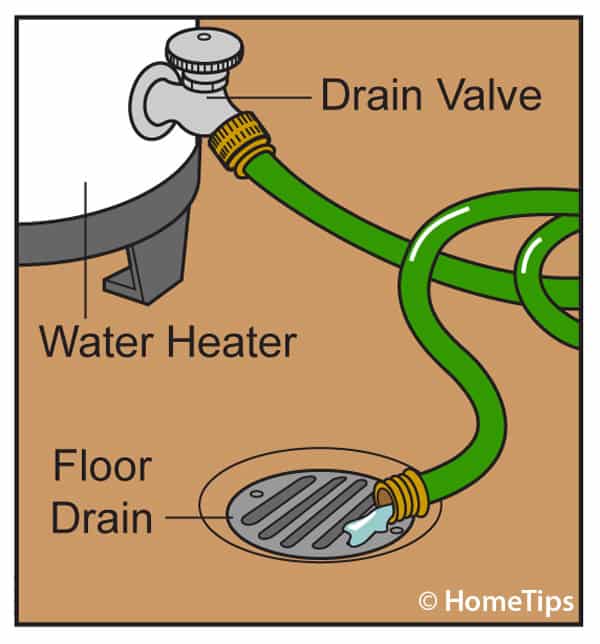
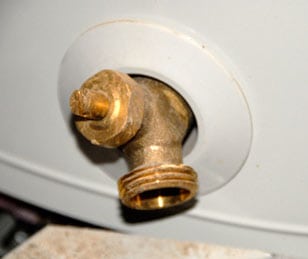
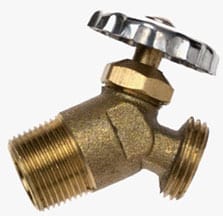
The drain valve at the bottom of a water heater, which looks like a small outdoor faucet, is used for draining a water heater tank for replacement or repairs, or for flushing mineral deposits from the tank. When using this valve, remember that, unless the water has time to cool, the water pouring out of it will be hot!
In brief, to flush or drain a water heater yourself:
- Turn off the gas or electricity to the water heater.
- Shut off the cold water inlet valve.
- Attach a hose to the water heater’s drain valve and run it to where you’ll drain the water.
- Open a hot water faucet somewhere in the house.
- Open the water heater drain valve (beware of hot water!).
- Flush 3 to 4 gallons, then close the valve (if draining, continue until empty).
For more detail about these steps, please continue.
How to Flush or Drain a Water Heater Tank
Following are the steps to take when flushing or draining a water heater.
1 Turn off the water heater’s gas supply or electrical power, depending on whether the water heater is gas or electric. On a gas water heater, you can simply turn the gas control to “Pilot.”
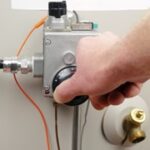
2 Turn off the cold water inlet valve that controls the supply of water to the tank. Be sure this is the incoming cold water valve, not a valve for the outbound hot water (the pipe should be cold). If this valve has a lever like the one shown below, turn it perpendicular to the pipe.
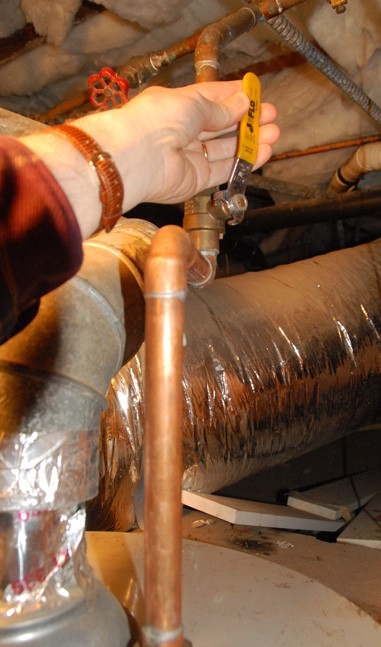
3 Attach a hose to the tank drain valve at the bottom of the water heater, and run the hose to a drain, to the outdoors, or to a large bucket. Make sure the end of the hose is below the level of the drain valve.
4 Open a hot water faucet somewhere in the house and the water heater’s pressure-release (PT) valve to let in air so the water heater can drain. This prevents a vacuum from forming as the water drains.
Caution: Remember that the water exiting the water heater will be very hot! Be very careful to prevent scalding. If you want to be extra safe, allow the water heater to cool for several hours before doing the next step.
5 Open the water heater’s drain valve. If you’re just flushing sediment, allow 3 or 4 gallons to exit until the water from the drain valve runs clear. Then close the drain valve and the PT valve. Open and close the cold water supply valve a few times to flush clean water into the tank. (If you’re draining the water heater completely, leave the drain valve open until the tank is empty.)
6 Close the drain valve and disconnect the garden hose.
7 Refill the water heater. Turn off the hot water faucet in the house that you opened before draining the tank. Turn the water supply valve back on to fill the tank. Wait about 15 minutes for the tank to fill. Then reopen the hot water faucet to purge air from the tank and pipes. At first the hot water pouring from the faucet will have air bubbles—wait until this cloudy mixture clears, then turn off the faucet.
8 Restart the water heater. Relight the pilot light for a gas water heater or turn on the electric circuit for an electric one.
Water Heater Won’t Drain
If your water heater is draining slowly or won’t drain at all when you open the drain valve, try opening the pressure-relief valve (see the illustration at the top of this page). This may break the vacuum that prevents the water from escaping.
If the water heater won’t drain or is draining slowly, the problem is likely to be that too much sediment has built up in the water heater. Sediment can clog the water heater’s drain valve.
The steps below show you how to break the sediment buildup so you can drain a clogged water heater through the drain valve.
First Steps in Breaking a Drain Valve Clog
1 Turn off the water heater. Depending upon whether the water heater is gas or electric, turn off the gas valve or circuit breaker that powers it.
2 Connect a hose to the drain valve and run it outside, placing the end of the hose below the level of the water heater. Turn on a hot water faucet somewhere in the house or open the water heater’s pressure-relief valve to break the vacuum inside the tank.
3 Open the drain valve. If the water runs freely, the valve works. If it doesn’t, it’s probably clogged.
4 If you suspect that the drain valve is clogged, you can try repeatedly stepping on the hose a couple of feet away from the tank to squirt water and air bubbles back into the tank. Hopefully this will break loose the clog. If it doesn’t, keep reading.
How to Back-Flush a Water Heater
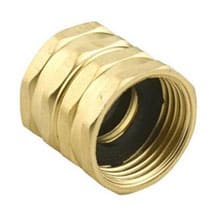
To back-flush a water heater, you connect a hose between the drain valve and an outdoor faucet, and squirt water back into the water heater through the drain valve. You’ll need a garden hose and a double-female garden hose coupler (available online for about $8) so you can connect two male threads together. Another option is to use a washing machine supply hose, which has female connectors at both ends.
How to Flush a Water Heater Video
Check out this video, which shows the process of flushing your water heater.
Back-Flushing a Water Heater Step-by-Step
1 First follow the preparation discussed above.
2 Turn off the water heater’s drain valve by turning it clockwise.
3 Using the female hose coupler, attach the male end of the garden hose to an outdoor hose faucet or washtub faucet (or use a washing machine supply hose with female connectors at both ends to connect the garden hose).
4 Turn on the faucet to charge the hose with water pressure.
5 Open the water heater’s drain valve. Water should rush into the water heater, pushing deposits away from the valve.
6 Turn the water heater’s drain valve off again, and then turn off the water faucet.
7 Unscrew the hose from the water faucet, and try flushing the tank again. If it still doesn’t drain well, the next step is either to replace the water heater’s drain valve or to replace the water heater.
How to Replace a Water Heater Drain Valve
Flushing a water heater is an important part of basic DIY water heater maintenance, as discussed above. Unfortunately, sometimes a water heater’s drain valve becomes so clogged with mineral deposits that it must be replaced.
Here we show you how to replace it, step-by-step.
You’ll need a replacement water heater drain valve, which you can buy at a hardware store or online for about $8. The most conventional size is 3/4-inch.
Unless you can empty the water heater first, replacing its drain valve raises the possibility of flooding your basement unless there is a floor drain nearby. In most cases, it will involve having a helper use buckets to collect and dump water that is pouring from the water heater while you’re extracting and replacing the valve.
Once you’re ready to begin the valve replacement, have a helper on hand to catch water in a bucket while you remove and replace the valve. And be prepared to get wet. But before this stage, you’ll need to let the water cool and, if possible, partly drain the tank through hot water faucets in the house.
EXPERT ADVICE: A plumber’s trick is to “air lock” the water heater before removing this valve. To do this, turn off the cold-water supply to the water heater and make sure no one touches any of the hot water fixtures or appliances inside the house during the valve change.
Before you start, check out this video, which shows the entire process of replacing a water heater drain valve:
1 Shut off the valve on cold water supply pipe that fills the water heater so that it won’t refill as you drain-off its contents. Then turn off the circuit breaker of an electric water heater or the gas valve of a gas water heater so the water won’t reheat.
Use hot water at faucets and tubs in the house as long as it’s available. Allow the water in the water heater to cool down to a safe temperature. This may take a full day.
You’ll want to have two buckets, a pipe wrench, screwdriver, and the replacement valve on hand before you begin the work.
2 Wrap the threads of the replacement valve with pipe-wrap (Teflon®) tape so it’s ready to install. Wear leather-palm gloves and have your helper and plenty of rags ready to go.
3 Using a pipe wrench, unscrew the valve from the tank, turning it counterclockwise. As it loosens, it will begin to leak, then spray, and eventually pour warm (or hot) water! This is when your helper can catch water in buckets as you work. Remove the valve entirely.
4 If mineral deposits are plentiful in the tank, they may jamb the drain hole as the water pours out. Stick a screwdriver into the hole and move it around to break-up deposits. If deposits are severe, you’ll need to drain the entire tank this way.
5 Insert the new drain valve in the hole and screw it in until it is snug, pointing down, and not leaking.
6 Open and close the new drain valve to test it. Attach a hose and drain the tank until the water begins to run clear of deposits.
7 Shut off the drain valve. If you’ve opened the water heater’s pressure-release valve or any hot water faucets, close those, too.
8 Then open the water supply valve to refill the tank.
9 Turn the circuit breaker back on for an electric water heater or open the gas valve and relight the pilot (or use the electronic ignition) to restart a gas water heater, per the water heater’s instructions.
How to Flush or Drain a Water Heater FAQs
- What is the proper way to drain a water heater?
To completely drain a water heater, turn off the circuit breaker (for an electric water heater) or gas valve (for a gas water heater), connect a hose to the drain valve, close the cold water valve that fills the water heater, open a hot water faucet in the house, open the water heater drain valve, and let the water heater drain until the tank is empty.
- Does a water heater really need to be drained or flushed?
Yes, to remove sediment buildup, improve heating efficiency, and extend the water heater’s lifespan, it should be flushed annually. It does not, however, need to be completely drained—only flush 3 to 4 gallons.
- What happens if you don’t flush your water heater?
Sediment can accumulate, reducing heating efficiency, causing overheating, and shortening the water heater’s life. This leads to increased energy costs and, eventually, potential failure of the unit.