Expert advice on household mold removal, featuring 5 different methods for removing mold.

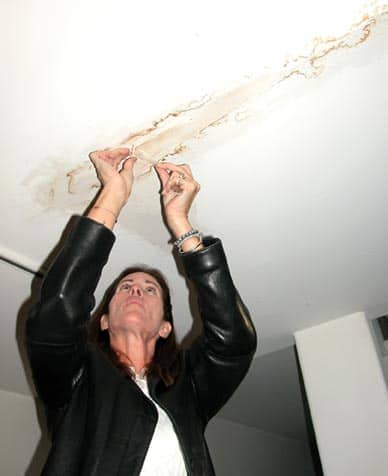
Mold can be a homeowner’s nightmare. Those fuzzy patches can look unsanitary, smell musty, lower property values, and present potential health risks. If your home has mold, you can—and should—wage war on it. This comprehensive guide will walk you through everything you need to know to identify, safely remove, and prevent mold from growing in your home.

Mold isn’t just dirt or grime; it’s a living organism. These microscopic fungi thrive in damp environments, feeding on organic matter and releasing spores that spread and colonize new areas. It can trigger allergies, respiratory problems, and other health issues. In fact, some types—notably the infamous black mold—pose serious health risks and require professional removal.
In this guide, we’ll teach you how to spot mold, distinguish between the harmless and the hazardous, and determine when it’s time to roll up your sleeves for DIY removal or call in the experts.
How to Tell Safe from Unsafe Mold
While all mold that’s growing inside your home warrants attention, not all types pose the same level of risk—some can be removed more safely by homeowners. Here’s how to tell the difference:
Safe(r) Molds
- Appearance: Often white, green, or blue-green.
- Texture: May appear powdery or fuzzy.
- Location: Typically found on surfaces like shower tiles, windowsills, or damp fabrics.
- Health Effects: Can cause allergies or irritation in sensitive individuals, but generally not toxic.
- DIY Removal: Often manageable with proper cleaning and ventilation.
Unsafe Molds
- Appearance: Most notorious is black mold (Stachybotrys chartarum), which can appear greenish-black.
- Texture: May be slimy or have a sooty texture.
- Location: Often found in hidden, damp areas like behind walls, under carpets, or in crawl spaces.
- Health Effects: Can produce mycotoxins, harmful substances that can cause severe respiratory problems, neurological issues, and other health complications.
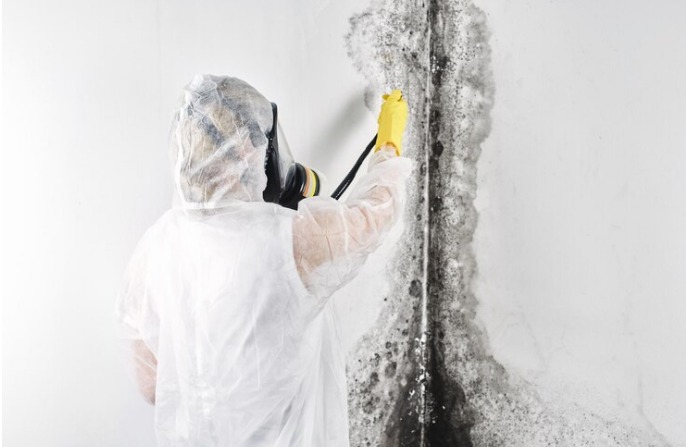
- Professional Removal: Always recommended due to health risks and the need for specialized equipment and expertise.
Warning Signs of Unsafe Mold
- Strong, Musty Odor: A persistent, unpleasant smell may indicate hidden mold growth.
- Water Damage: Mold thrives in moist environments, so water leaks or flooding can create ideal conditions.
- Health Symptoms: If you experience unexplained respiratory problems, headaches, or other health issues, mold could be a culprit.
NOTE: When in doubt, it’s always best to consult a professional for mold testing and identification. Currently, there are no regulations for mold set by the Environmental Protection Agency (EPA). https://www.epa.gov/mold/are-there-federal-regulations-or-standards-regarding-mold
Where Does Mold Grow?
Molds are natural organisms that grow on organic materials and are fed by moisture. Outdoors, they are as much a part of nature as the trees. Mold spores too tiny to be seen drift in the air, landing on fallen leaves, soggy ground, and dead trees, where they set up little colonies. Molds thrive in a damp environment, growing and reproducing. Fortunately, most outdoor molds don’t present health problems to humans because they are not encountered in concentrated amounts.
But indoors, molds can grow and become more concentrated in the ambient air. Even in houses that haven’t experienced hurricanes, flooding, and the like, molds flourish in moist, warm, insufficiently ventilated places such as crawlspaces, showers, leaky attics, and areas behind refrigerators. Plumbing leaks, sprinkler water, and flooded sewers are other sources of dampness that encourage mold growth.
What Mold Can You Remove DIY?
Mold that can usually be removed DIY is typically found on non-porous surfaces in areas with limited moisture exposure. These include:
- Bathrooms: Shower tiles, grout, bathtub caulking, and windowsills.
- Kitchens: Sink areas, countertops, and the exterior of appliances.
- Other Areas: Painted walls, hard flooring, and window frames.
Remember, DIY removal is generally recommended for small, localized mold growth that hasn’t penetrated deeply into materials. If you’re dealing with large areas of mold (more than 10 square feet), especially on porous surfaces like drywall or wood, or if you suspect black mold, it’s crucial to consult a professional.
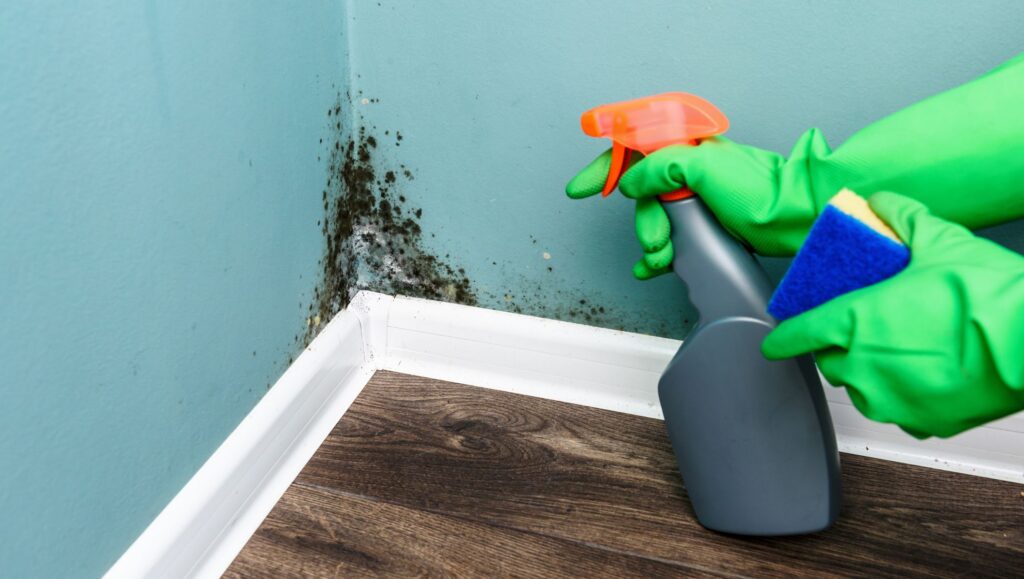
DIY Mold Removal Precautions
Ventilation: Open windows and doors for fresh air, but prevent dry materials from becoming airborne and being disseminated by fans. Be cautious of releasing spores in any way—lift and move things carefully and don’t scrub mold harshly.
Personal protection: Wear rubber gloves, an N95 respirator, and eye protection. When working with water and a mild detergent, ordinary household rubber gloves are sufficient. If you are using a disinfectant, a biocide such as chlorine bleach, or a strong cleaning solution, select long gloves that extend to the middle of the forearm and are made from natural rubber, neoprene, nitrile, polyurethane, or PVC. Avoid touching mold or moldy items with your bare hands.
Wear goggles that do not have ventilation holes to prevent mold or mold spores from getting in your eyes.
Containment: Isolate the area to prevent mold spores from spreading and unprotected people from entering the area during cleanup.
5 Methods for Removing Mold
The following 5 methods are listed from the most gentle to aggressive. When removing mold, start with these gentler methods, and escalate to stronger solutions if needed. It’s still a good idea to test the solution on a small, inconspicuous area before applying it to the entire moldy area. This will help ensure it doesn’t damage or discolor the surface.
Method 1: White Vinegar
Best for: Nonporous surfaces like tiles, glass, and countertops. Effective against mildew and some common molds. Safe for most painted walls, but test on a small area first.
For this method, you’ll need a spray bottle, scrub brush, and cloth.
Step 1: Fill a spray bottle with undiluted white vinegar.
Step 2: Saturate the moldy area and let sit for 1 hour.
Step 3: Scrub the area with a brush.
Step 4: Wipe clean with a damp cloth.
Step 5: Dry thoroughly.
Method 2: Baking Soda Paste
Best for: Non-porous surfaces and fabrics. Baking soda is mildly abrasive and helps lift mold stains.
This method calls for a bowl, sponge, and cloth.
Step 1: Mix baking soda with water to form a paste.
Step 2: Apply the paste to the moldy area.
Step 3: Let sit for 1 hour.
Step 4: Scrub with a sponge and rinse with water.
Step 5: Dry thoroughly.
Method 3: Baking Soda and Hydrogen Peroxide
Best for: Tile and grout: Baking soda can be mixed with hydrogen peroxide to create a powerful cleaning paste. This combination is particularly effective at cleaning and brightening tile and grout because baking soda is abrasive enough to scrub away grime and stains and hydrogen peroxide has bleaching and disinfecting properties that help to kill mold and bacteria.

This method calls for a bowl, sponge, and cloth.
Step 1: Mix 2 parts baking soda with 1 part hydrogen peroxide (3% concentration) to form a thick paste.
Step 2: Spread the paste onto the tile and grout lines, focusing on areas with stains or mold.
Step 3: Allow the paste to sit for 15-30 minutes.
Step 4: Use a brush or sponge to scrub the tile and grout lines. Pay extra attention to areas with stubborn stains.
Step 5: Rinse thoroughly with water.
Step 6: Dry thoroughly.
Important Considerations:
Always test the paste on a small, inconspicuous area first to ensure it doesn’t damage or discolor the surface. Hydrogen peroxide can release oxygen, so ensure adequate ventilation when using this mixture. Wear gloves to protect your hands from the cleaning solution.
Method 4: Borax Solution
Best for: Porous surfaces like drywall, wood, and fabrics. Borax has antifungal properties and helps prevent future mold growth.
For this method, you’ll need a spray bottle, scrub brush, and cloth
Step 1: Mix 1 cup of borax with 1 gallon of water.
Step 2: Spray the solution onto the moldy area.
Step 3: Let sit for 1 hour.
Step 4: Scrub with a brush and rinse with water.
Step 5: Dry thoroughly.
Method 5: Bleach Solution (Last Resort)
Best for: Non-porous, colorfast surfaces. Bleach is effective against most types of mold but can be damaging. Not recommended for porous surfaces.
Caution: Bleach is harsh and can damage surfaces. Use only if other methods fail and in a well-ventilated area.
In addition to household bleach, you’ll need a spray bottle, scrub brush, cloth, gloves, an N95 respirator, and eye protection.
Step 1: Mix 1 cup of bleach with 1 gallon of water.
Step 2: Spray the solution onto the moldy area.
Step 3: Let sit for 15 minutes.
Step 4: Scrub with a brush and rinse thoroughly with water.
Step 5: Dry completely.
Important Considerations:
If mold has penetrated porous materials like drywall or wood, it may be necessary to remove and replace the affected material.
For large infestations or suspected black mold, consult a professional for safe and effective removal.