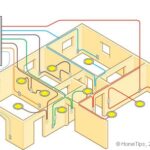
Routing cable in new construction is easy, but you should first sketch out your plan on paper.

Installing rough wiring in new construction is done before the wall, ceiling, and floor coverings are in place. Nonmetallic sheathed cable—known as type NM—is common for new construction.
While there are situations when you will have to route cable through structural members such as studs, joists, and rafters, the job is much easier if you can run the cable along the surfaces of these frames.
Running Cable Through Studs
When you have a situation where you need to run cable through wall studs, follow these steps:
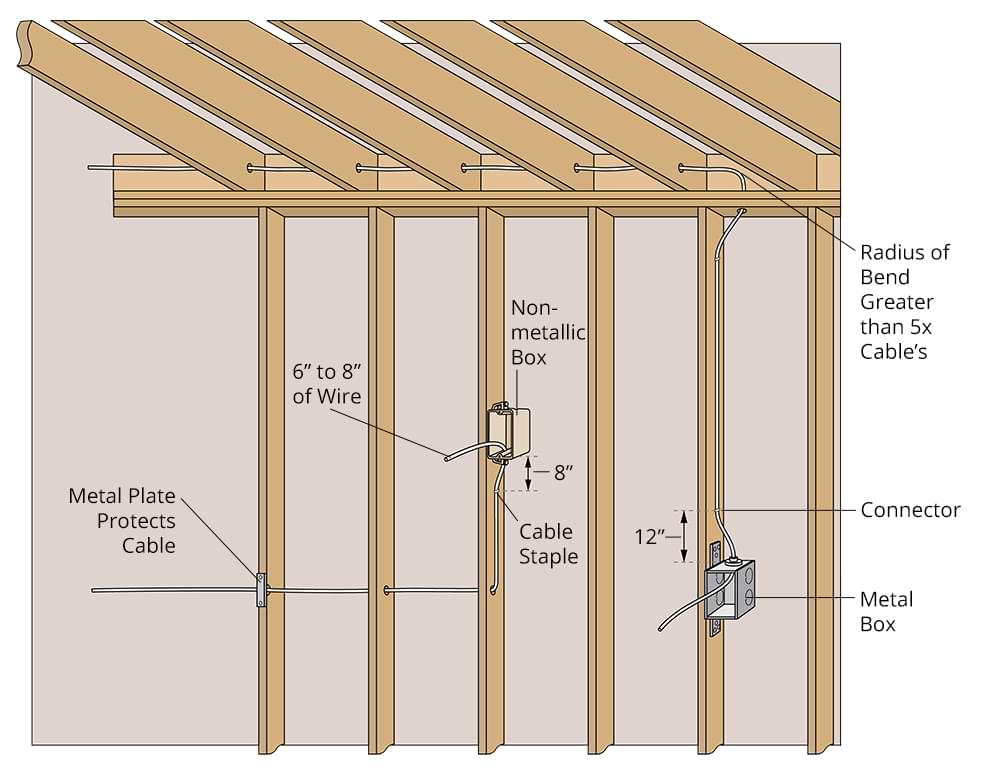
1 Drill a series of 3/4-inch holes through a run of new wall studs at an equal distance from the top or bottom of each stud. Drill in the center of each stud.
2 Measure for the amount of cable you will need. Include the height of boxes from the floor and the distance between boxes. Add at least an extra 4 feet to allow for unforeseeable obstacles.
3 Run the cable through the holes you drilled in the studs or joists toward the new receptacle box, taking care not to kink or twist the cable.

Securing Cable
In new construction, cable must be stapled or supported with straps every 4 1/2 feet; it also must run within 12 inches of each metal box or within 8 inches of each nonmetallic box. You can use cable staples, but be careful not to staple through the cable. You can also use metal plates to protect cable that is installed near the edge of a stud or joist.
Cable staples or supports aren’t necessary when the cable is concealed. But the cable must be clamped to boxes using built-in cable clamps, metal cable connectors, or plastic cable connectors. NM cable does not need to be clamped to a nonmetallic box if it is stapled within 8 inches of the box.
Routing Around Doors & Windows
Windows are a little simpler to bypass than doors since most have stud framing below the sill through which you can run the cable. With doors, however, it is best to route the cable through the ceiling above or the floor below, if possible. If neither of these is an option, you will need to run the cable through the cripple studs above the header or through the shim space just below the header.
Routing Tricky Corners
An intersection where stud walls meet may present a challenge for routing cable. It may be easier to route the cable above or below the area in question. If the corner is hollow, you can drill holes in the studs from both sides and run the cable through them.
Unfinished Basement
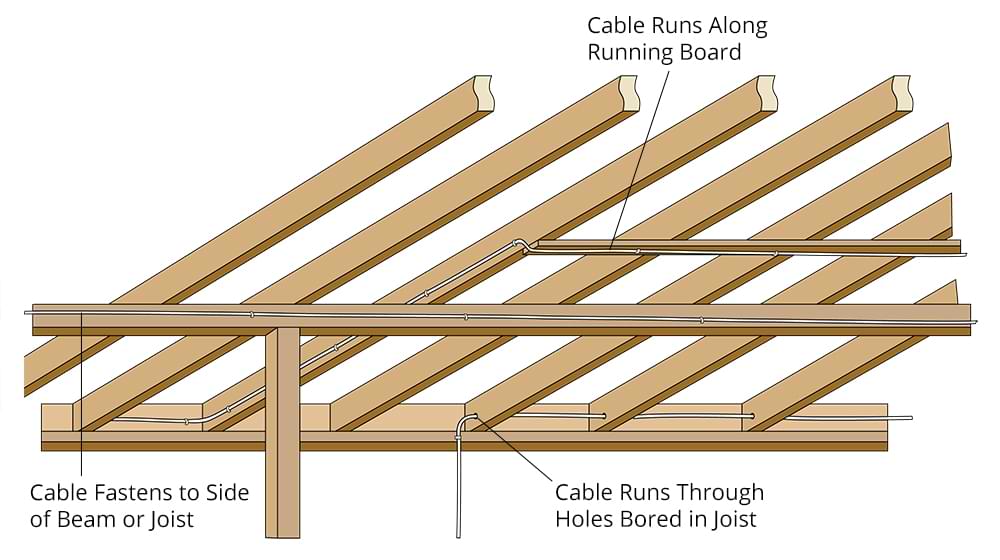
If you are routing the cable under the floor at an angle to the floor joists, NM cable with two conductors smaller than #6 or three conductors smaller than #8 should be run through holes drilled in the joists and then stapled to the running boards. Or, you can support the cable on the surface of structural members; just fasten larger cable directly to the bottom edges of joists.

Routing Cable in an Attic
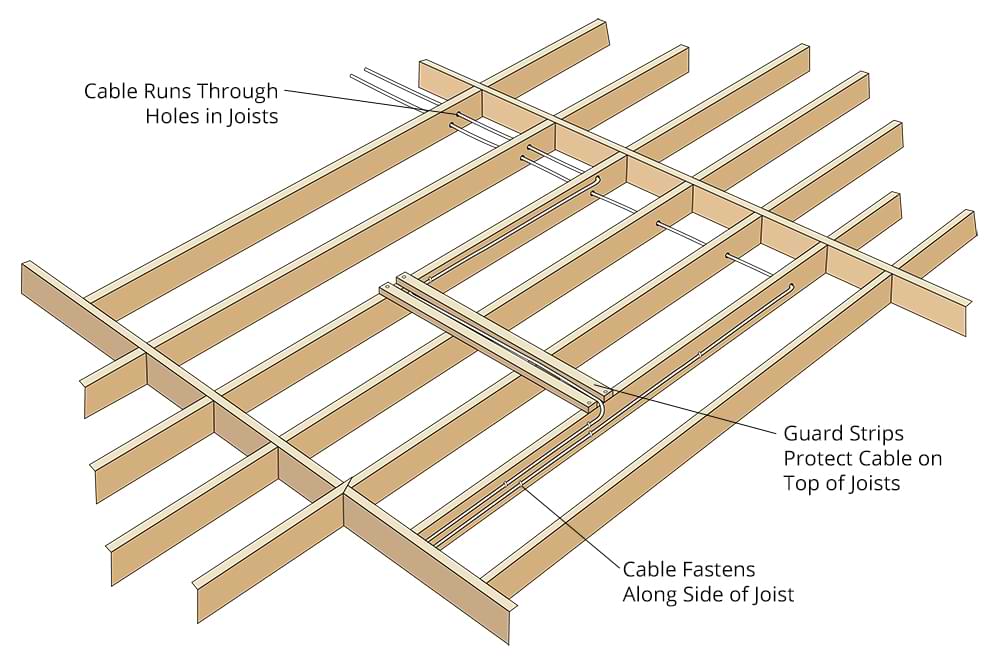
When running cable in an attic, you can run it either on top of the joists or through holes drilled in them, depending on their accessibility. In the case of an attic with a permanent staircase or ladder, run the cable at an angle to the structural members and protect it with guard strips. If the attic is accessed through a crawl hole with no permanent stairs or ladder, protect the cable within 6 feet of the hole with guard strips; beyond that distance, simply lay the cable on top of the ceiling joists. If the cable runs parallel to the joists, you can staple it to the sides of the joists.
Safety Tip: When running electrical cable in and around prefabricated roof trusses, never drill holes or cut notches in them. This could void the manufacturer’s warranty, weaken them, and ultimately create a safety hazard. Instead, use running boards and secure the cable to them using staples.
Get a Pre-Screened Local Electrical Wiring Contractor