An in-depth guide about the best ways to use hand saws. Includes cutting with hand saws and coping saws, as well as a miter box and backsaw.

If you intend to tackle some or all of your home improvements and repairs, you’ll need a fairly complete assortment of tools-and the know-how to use them properly. Having the right tool makes a big difference in the relative difficulty of a task, and often affects the quality of the final result. As you investigate this section of HomeTips, you’ll find helpful information on how to use conventional-and a few somewhat specialized-tools.
Cutting Wood with a Hand Saw
In any carpentry-related repair or improvement, you’ll need to start with accurate, consistent sawing, which is essential to strong, square joints and assembly. Along with precise measuring, careful cutting is the key to success.

Power saws aren’t necessary; you could build an entire house with a crosscut saw, perhaps supplemented by a compass saw. And there are times when only the handsaw will do—spots without electricity or where a power saw might be dangerous.
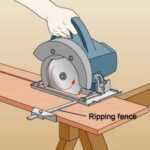
As a rule, though, power saws perform much faster and more accurately, once you’ve had some practice using one. For information on using a power saw, please see How to Cut with a Power Saw.
Saws differ in shape, blade size, and the position and number of teeth along the blade. Both tooth size and number of teeth per inch (tpi) are indicated by the term “point.” An 8-point saw has only 7 teeth per inch, since the points at both ends of that inch are included.
In general, you’ll get a rougher but faster cut with fewer teeth; many teeth means a smooth but slower cut.
The degree to which the teeth are set, or bent outward, determines the thickness of the cut. Saw teeth are set to produce a cut wider than the blade; otherwise, the saw would bind in the kerf, or saw cut. The wider the set, the faster and rougher the cut will be; a smaller tooth set gives a fine kerf.
Cutting with a Crosscut Saw
A good multi-purpose handsaw is the crosscut saw with a 26-inch blade. When you choose a crosscut saw, be sure the handle feels comfortable in your hand. Sight down the back of the saw blade to make sure it’s straight.
Flex the tip; it should bounce back to the center position. Look for a “taper ground” saw; the blade’s thickness tapers toward the back and the tip, preventing the saw from binding in the kerf and allowing a narrower set to the teeth.
Premium saws are also “skew-backed,” meaning the back is slightly cut away to improve balance and minimize weight, although this makes the saw impractical for heavy-duty work. High-quality steel, though more costly, will flex better and stay sharp much longer than lower grades.
When saw teeth go dull, they must be leveled and filed and (after long, hard use) reset. You can do this yourself or take the saw to a professional sharpener.
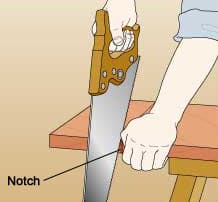
1. Start the cut
Hold the saw upright and slowly draw the blade up several times to cut a notch on the board’s edge. At first, guide the blade with your thumb knuckle. Be sure to allow for the width of the saw blade.
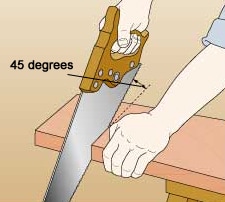
2. Cut smoothly
Once the cut is started, lower the saw’s angle to about 45 degrees-or 30 degrees if you’re cutting plywood-and make smooth, full strokes.
Sight down the back of the saw from overhead to align it; your forearm and shoulder must remain lined up with the blade. Whenever the blade veers from the line, twist the handle slightly to the opposite side to bring it back.
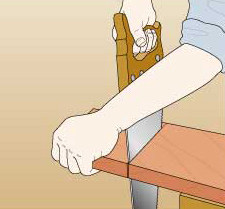
Toward the end of the cut, reach around the saw and support the waste piece with your free hand. Bring the saw to a vertical position once more and make the last strokes slowly to avoid breaking off-and splintering-the board.
How to Use a Coping Saw
A coping saw, with its thin, wiry blade strung taut within a small, rectangular frame, is very handy for cutting curves or making cutouts near an edge.
Clamp the material to a sawhorse or vise for better control. For a cutout, first drill a pilot hole the size of the blade width, slip the blade through this hole and then reattach it to the frame.
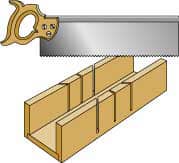
Using a Miter Box & Backsaw
A backsaw has a sturdy spine along the back of the blade that keeps it stiff and straight and it has fine-cutting teeth because it is designed for making precise, straight cuts such as those needed when cutting moldings and trim.
You can install the blade with the teeth pointed away from the handle to cut on the push stroke, or toward the handle to cut on the pull stroke.
A backsaw is typically used with a miter box, which guides it for cutting 90-degree and 45-degree angles.
Miter boxes can be the inexpensive wooden type shown here or more adjustable, precise metal models.