Installing a pellet stove, if allowed by local code, requires only modest do-it-yourself skills. This article covers the requirements and gives step-by-step DIY instruction.

Because a pellet stove, like a fireplace, is an attractive addition to a room, it is best located where the family can enjoy it and where it will provide the best benefit as a heating source.

But several other considerations come into play when you decide where to put a new pellet stove.
In most cases, a central location is best for a freestanding pellet stove because this allows its radiant heat to serve the entire surrounding area.
[
Pellet Stove Installation Requirements
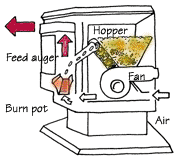
For a pellet stove to heat the entire house, the house will need to have an open plan, with few barriers to heat movement. Rooms away from the stove’s location will need a means of warm air distribution such as a ducted forced-air heating system. And the stove must have a blower.
With this type of setup, the stove can be placed near a primary cold-air return for the forced-air heating system so that its warm air is drawn into the system and circulated to the various rooms in the house. At the very least, this provides a good supplement for the existing heating system and cuts down on the use of gas or oil.
(Keep in mind that the warmed air will only be distributed when the heating system’s blower is running.)

Another option, if you want to heat the entire house with pellet fuel, is a pellet-fired furnace or boiler. This can replace or supplement your gas- or oil-fired furnace or boiler.

Because most pellet stoves do not require the same type of chimney as a conventional wood stove or fireplace, you usually have more options where it can be placed. Proper venting is absolutely essential for safety. For most stoves, you will need to plan for a 3-inch flue to exit out the back or top of the stove, go through the wall, and then extend upward past the house eaves.
The outer surfaces of a pellet stove don’t get as hot as the surfaces of wood stoves or fireplaces, so most can be placed closer to combustibles—typically 3 inches from walls at the sides and 1 inch from a back wall.
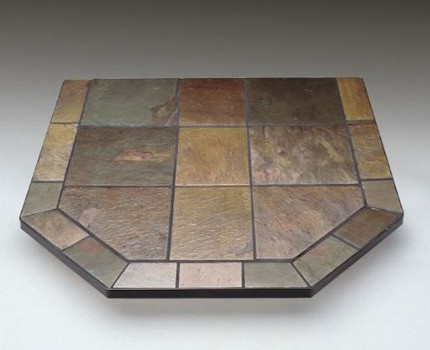
Most need to stand on a non-combustible surface such as stone or tile that is at least 3/8 inch thick. Be sure to adhere to all of the manufacturer’s requirements regarding clearances.
Step-by-Step Pellet Stove Installation
The instructions given here are for installing a freestanding pellet stove. If you are installing a pellet stove insert, which fits into a fireplace, it is best to hire a fireplace professional to clean the chimney, run the venting up through the chimney, and provide a waterproof storm collar and chimney cap at the top.
Stove dealers often offer installation for a reasonable cost, and local codes may require you to use a professional. But, if you are allowed to, installing a freestanding pellet stove is a job within the reach of a handy do-it-yourselfer.
Pellet stoves are very heavy. If you buy a large unit, you may have trouble moving it even with a helper or two and a heavy-duty handcart. Consult with your dealer. It may be best to install the hearth pad and cut the hole for the vent first and then have the dealer deliver the stove to the site.
If you do hire a professional installer, be sure that the stove is vented according to the manufacturer’s recommendations and local code requirements. The installer may want to simply poke the vent out a wall, but this may not be safe, and the stove will work better if the vent makes a turn upward and extends above the eaves.
Running the vent is the most difficult part of the installation, so plan the vent path before you begin. The most common method is to run the vent out through an exterior wall. If that is not possible, you can run the vent up through the roof. In this case, you may want to hire a roofer to install a code-approved roof jack through which the pipe will run. The jack must be installed and flashed so there are no leaks.
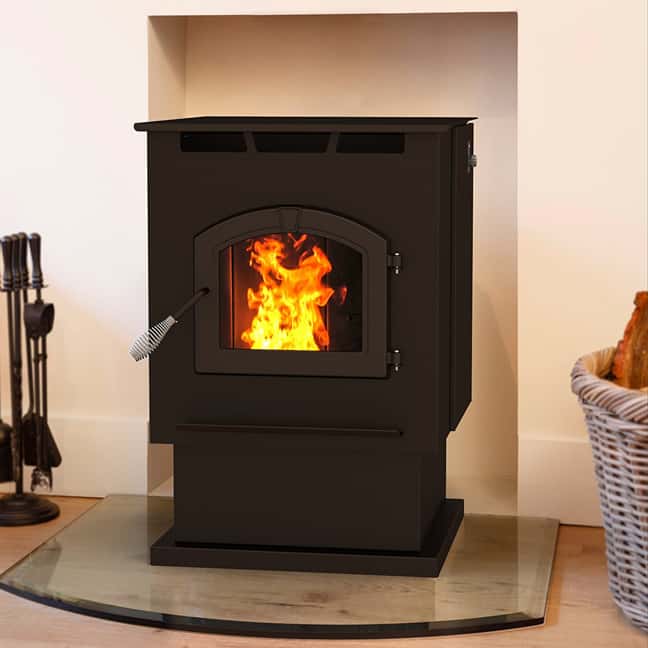
A pellet stove is typically installed just 1 to 2 inches away from a rear wall, but you can install it farther out if you like. The vent can travel out the back of the stove through the wall, making it inconspicuous if not nearly invisible.
Install a code-approved non-combustible hearth pad for the stove to rest on. The pad should extend at least 6 inches in front of the stove and several inches out on each side. You can make a pad yourself by laying down concrete backerboard topped with tile or by setting down a large stone slab. Or you can purchase a premade hearth pad online or from your stove supplier. The pad can be set right on top of the flooring.
Consult your product literature to determine the correct height of the hole for the vent. Use a stud finder to make sure the hole will run between studs. In most cases, you will need to cut a hole that is 10 inches in diameter.
Use a utility knife and/or a jab saw to cut through the inside drywall first, and then use a reciprocating saw or jigsaw to cut through the outside siding.
Install a vent thimble—a sleeve through which the vent will travel—into the hole.
Connect 3-inch double-walled vent pipe (or pipe recommended by the manufacturer) to the stove and run it through the thimble to the outside.
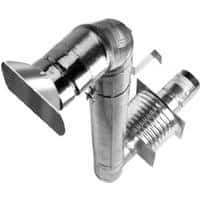
Outside, install a vent pipe cleanout for removal of the ashes and install an elbow so the vent can turn and run vertically above the eaves. Use a strap to secure the vent against the eave and add a rain cap.
Just plug the unit into a standard 120-volt receptacle and it’s ready for use.