Expert advice on how to remove paint from woodwork, including how to choose and use paint strippers.

Selecting a Chemical Paint Stripper
Stripping Paint from Woodwork
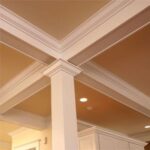
After multiple paint jobs in a home, interior trim can become caked with many layers of paint. When this happens, it can begin to lose the interesting contours, shapes, and details. If this is the case with the trim in your home—or if you want to remove the paint entirely so you can apply a natural wood finish—you may be faced with stripping the earlier finishes from the surface.

But be warned—stripping paint can be a very tedious job and often yields marginal results. It can be a real challenge to get paint out of all the nooks and crannies, and, when the finish has been entirely stripped, the wood may not look the way you had hoped it would.
Unless the trim is particularly unique, you may be better off removing it and replacing it with new, matching trim.
 Paint applied before 1978 may contain lead. Before stripping it, it’s very important to test for the presence of lead. Sanding or scraping paint that contains lead can be very hazardous to the health of your family. You can buy in inexpensive lead-test kit at home improvement centers or have it professionally tested. (For more information about how to do this, see the video below and also see our article Testing for Lead).
If you plan to repaint (as opposed to staining or sealing), you can fill nicks and gouges with vinyl spackling compound or wood filler before painting—in this situation, you won’t need to worry about matching the original wood.
Selecting a Chemical Paint Stripper
Chemical strippers are normally the least damaging to the surface and generally work best at removing paint from fine woodwork or irregular surfaces. Before applying a stripper to your trim, be sure the trim is made of wood, not plaster. Strippers can damage plaster trim.
What is the right paint stripper for removing paint from surfaces in your home? Some paint strippers are very effective at removing paint but do this job quickly and easily because they are highly caustic, making them poor choices to use indoors because of the health hazards.
Following is a look at some of the chemicals used for removing paint to help you make a wise choice:
Zero VOC paint strippers are by far the best for the DIY enthusiast. These have no volatile organic compounds (VOCs), making them much safer and more comfortable to use. Their fumes and smells are far less objectionable than classic paint strippers.
The only downside is that they are about twice as expensive as mores common paint strippers that have VOCs. Nevertheless—Unless you’re working on woodwork that is outdoors, this is not a good place to pinch pennies. Zero VOC strippers are worth the money.
Choose a stripper that has plenty of body so that it doesn’t drip and run.
If you decide to go old-school with paint strippers with VOCs, you have these choices:
Methylene chloride paint strippers can lift multiple layers of paint quickly; however, they are considered hazardous and require good ventilation. They also require reapplication because they evaporate quickly. When applying these paint strippers, wear an organic vapor respirator with new cartridges.
NMP and DBE strippers (N-methyl pyrrolidone and di-basic esters) are considered safer to use than methylene chloride, but they are slower acting. They, too, require good ventilation and may require you to wear an organic vapor respirator with new cartridges. They are generally a better option than methylene chloride for do-it-yourselfers.
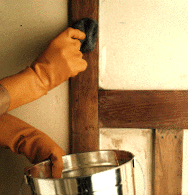
Stripping Paint from Woodwork
Be sure to protect the floor with plastic sheeting that has been taped with masking tape around the perimeter. Put newspapers on top to absorb the sludge. Also use painters tape and plastic sheeting to protect the walls from the stripper.
Wear rubber or neoprene gloves to protect your hands, protective goggles, and a respirator. If you are applying a paint stripper that contains VOCs, use vapor an organic vapor respirator with new cartridges. Good ventilation is imperative.
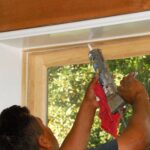
Apply the stripper with a disposable paintbrush in one or more thick coats, and let it work according to label directions. Cover the stripper with laminated paper to speed-up the curing time and make removing the old finish easier. This video by This Old House does a great job of showing how this process works.
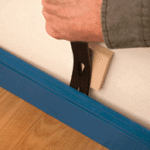
Gently lift the laminated paper and surface paint, peeling with a plastic scraper so you don’t damage the wood.
Be sure to allot the proper time for the stripper to cure before you begin removing it. After it has worked its way down into the paint, layers of paint should be easy to lift with the plastic scraper.
About Heat Guns…
Stripping wood with a combination of heat gun and stripper can be fast and effective but, unfortunately, a heat gun creates fumes that may be toxic, it can scorch the wood, and it presents a fire hazard. For this reason, we don’t recommend using a heat gun.