Learn how to repair brick siding with this expert how-to with step-by-step, including instructions for repairing mortar, removing paint, water stains, and efflorescence.

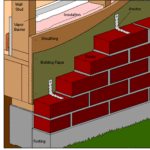
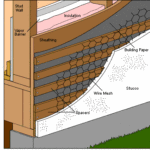
Most problems with brick sidings occur along the mortar joints or have to do with stains on the bricks themselves. If mortar is poorly applied or contains substandard ingredients, it will eventually crumble. Even the best mortar wears away eventually: The mortar shrinks and cracks open. Freeze-thaw cycles in cold-winter climates, heavy rain, settling, and earthquakes also result in mortar problems.
Repairing Brick Mortar
Heavy rain and dampness can cause brick to lose its effectiveness as insulation and may eventually affect the finish of interior surfaces. The fix for this is to “re-point” the brick, which means to remove some of the mortar and apply new mortar to the joints. Here’s how to do this:
1 Buy dry, weather-resistant type N ready-mix mortar at your home improvement center and mix it according to the label directions.
2 Using a cold chisel and hammer, chip out the crumbling mortar to a depth of 1/2 inch and then brush the joint well with a wire brush.
3 Dampen the cleared joints to accept the new mortar, and, using a small trowel, pack the new mortar into the joints as shown at right. Tamp the mortar with the flat of the trowel to make sure the mortar completely fills the joint.


4 Allow the mortar to set up until it’s somewhat firm and then finish the joints to match the existing joints by drawing a jointer (or similar tool) along them, as shown below left. Most often, the object is to give the joint a slightly concave profile.

5 Remove excess mortar using a clean trowel.
6 Allow the mortar to set up and then sweep it with a stiff brush.
7 Use a damp rag or sponge to keep the mortar joints moist for about four days. This ensures that the mortar will cure properly so that it doesn’t crack.
Removing Paint from Bricks
To remove paint from brick, start by spraying the brick with a hose. Mix a solution of 2 pounds of trisodium phosphate (TSP) or a strong detergent according to label directions, apply the solution to the surface, and allow it to soak in. Then scrub with a stiff nylon-bristle brush (don’t use a wire brush). For resistant spots, repeat several times.
If scrubbing with this solution doesn’t work, try using a water-based paint stripper (first test it where it won’t show).
Removing Water Stains from Bricks
If sprinklers or garden watering have left hard-water spots on your home’s brick exterior, buy an acid-based brick cleaner from a masonry dealer and follow the label directions. Generally, these instruct you to cover plantings with plastic sheeting and, wearing rubber gloves and eye protection, to wet down the brick, apply a mixture of the cleaner and water with a stiff-bristled nylon brush on an extension handle, and then rinse.
To protect the brick, seal it using a silane- or siloxane-based sealer (also purchased from a masonry dealer).
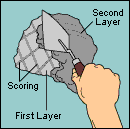
Removing Efflorescence from Brick
Stucco, brick, and other masonry surfaces may develop a white powdery substance on them known as efflorescence. You can brush away this powder with a wire brush, but, unless you eliminate the cause, it will return-and its existence may indicate that more serious moisture damage may occur.
Efflorescence can be caused by heavy moisture in your climate or by moisture from poor drainage, roof leaks, sprinklers, and the like that can penetrate masonry surfaces.
First try to clean efflorescence by washing it and scrubbing it with a brush. If the surface is grimy, use a little trisodium phosphate (TSP) in warm water. Be sure to rinse away all of the TSP or it may leave a residue or stain.
HomeTips Pro Tip: A much more radical-and hazardous-method of removing efflorescence is to use a mixture of muriatic acid. This chemical will burn your clothes and skin, and breathing its fumes is dangerous, so, if you go this route be sure to wear rubber gloves, eye protection, and long sleeves, and follow label directions precisely.